Optimize the Rich Text Editor in Sitecore
When it comes to building a Sitecore site your first thought probably isn't that you are going to need to make any setting updates or customization's to the rich text editor. After all when you learn about building a site its mostly focused around creating components to add and remove from pages, but there are a couple of things that will greatly enhance your content editors experience.
Configure the toolbars
Out the box Sitecore ships with 4 toolbar configurations. These are defined in the core db here:
- /sitecore/system/Settings/Html Editor Profiles/Rich Text Default
- /sitecore/system/Settings/Html Editor Profiles/Rich Text Full
- /sitecore/system/Settings/Html Editor Profiles/Rich Text IDE
- /sitecore/system/Settings/Html Editor Profiles/Rich Text Medium
The "Rich Text Default" toolbar

The "Rich Text Full" toolbar

The "Rich Text IDE" toolbar

The "Rich Text Medium" toolbar

As the name suggests, by default your content editors will see the default toolbar that contains a very limited number of options. This may in-fact be to limited and you need to offer the content editors one of the toolbar's with more options. Equally, the full toolbar may give to many options such as font's and you would want to offer a more restricted set of options.
Setting a toolbar on a field
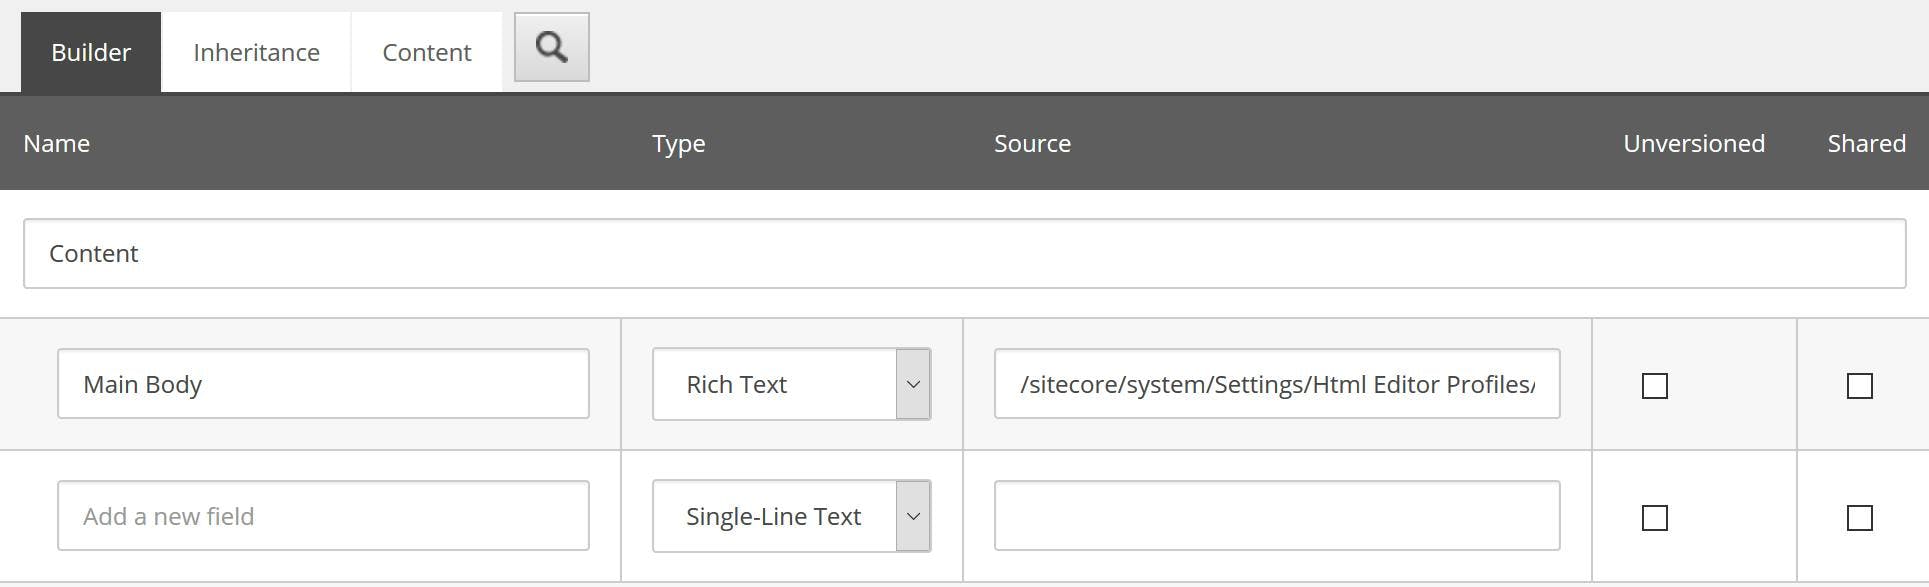
You can set a toolbar on each individual field by specifying the path in the template fields source field. This is particularly useful when a field needs specific options, such as a text area that should allow a user to configure bold, italics and links but shouldn't ever contain an image.
Updating the default toolbar for a rich text field
When you want to change the toolbar for all rich text fields, a better option is to update which toolbar is used by default. You can do this with a patch config file.
1<?xml version="1.0" encoding="utf-8" ?>2<configuration xmlns:patch="http://www.sitecore.net/xmlconfig/">3 <sitecore>4 <settings>5 <setting name="HtmlEditor.DefaultProfile" value="/sitecore/system/Settings/Html Editor Profiles/Rich Text Full" />6 </settings>7 </sitecore>8</configuration>
Updating the rich text editor CSS
A second way of customizing the rich text editor that you should consider is to make changes to the CSS file that the editor uses. By default this will use a CSS file called default.css that you will find in the root of the site. You can see this being referenced form a config setting if you look at the showconfig.aspx page.
1<!-- WEB SITE STYLESHEET2 CSS file for HTML content of Sitecore database.3 The file pointed to by WebStylesheet setting is automatically included in Html and Rich Text fields.4 By using it, you can make the content of HTML fields look the same as the actual Web Site5-->6<setting name="WebStylesheet" value="/default.css" />
You can change this to use a different CSS file using a patch config file as follows:
1<configuration xmlns:patch="http://www.sitecore.net/xmlconfig/">2 <sitecore>3 <settings>4 <setting name="WebStylesheet">5 <patch:attribute name="value">/rich-text-editor.css</patch:attribute>6 </setting>7 </settings>8 </sitecore>9</configuration>
Now you may be wondering why you would want to do this, after all Sitecore offers an experience editor mode that will show the entire webpage as it will appear to visitors and also offers inline editing. However some aspects of a page can be better achieved using CSS styles rather than new components or new fields and content editor will need both an easy was to apply these style and a visual way to see that they have been applied, irrespective of if they are using the experience editor or the content editor.
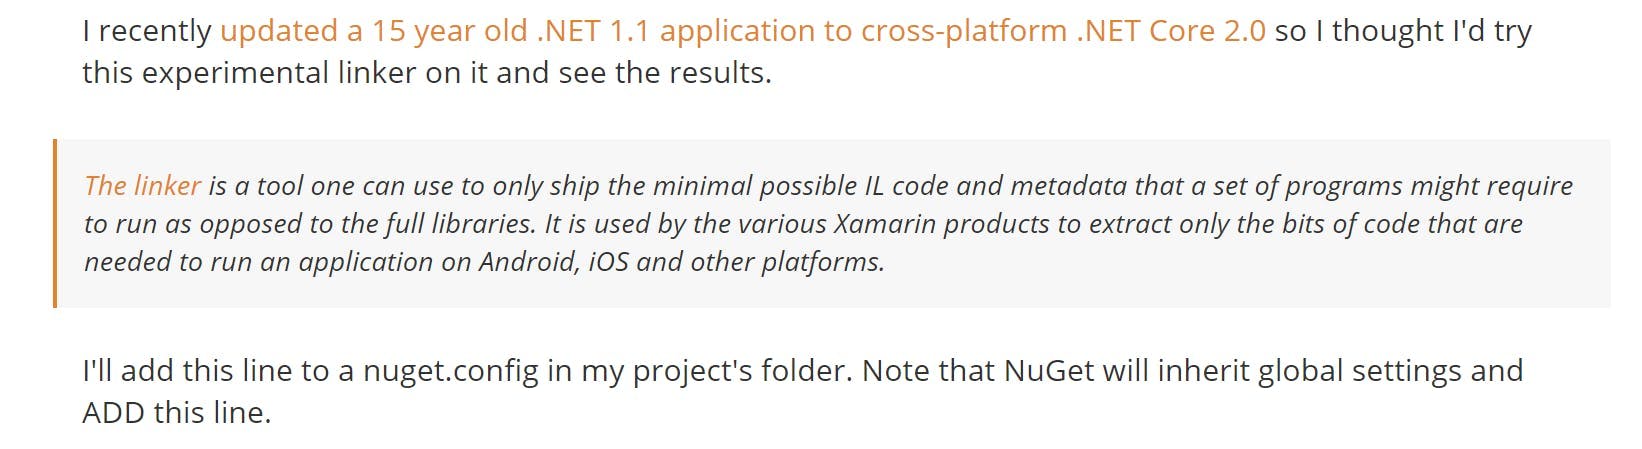
For example, in this section of a blog post from Scott Hanselman he has highlighted some text as an aside which can easily be achieved in a rich text editor by applying a CSS class.
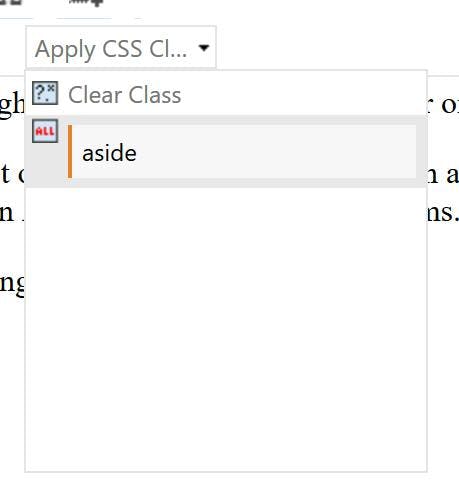
The first step to enabling this in Sitecore is to make sure you're using a toolbar that allows the user to select CSS classes (that's any but the default).
Next by creating a stylesheet that just contains the relevant style to be applied, the content editor can now select this in the CSS drop down;
1.aside {2 border-left: 2px solid #e2842c;3 background-color: #f7f7f7;4 padding: 5px;5 margin: 5px;6 display: block;7}