Tag: Windows Phone
Theme Manager for Windows Phone

Theme Manager for Windows Phone

One of Windows Phones features is the ability for a user to switch between light and dark themes. However as a developer creating a good experience in your apps that looks good in both themes can be a challenge. What's worse is it sometimes leads to apps that look great in one theme but not the other.

Unfortunately there is also no official easy way to tell the phone you want your app to run with a particular theme. Instead it's a manual process of either setting the colour of every object, or manually loading a theme in the apps start-up.

Thankfully there is a better way and it comes in the form of a NuGet package. By simply installing the wp-thememanager package you can call ThemeManager.ToLightTheme() in your apps contructor to make the theme light, or ThemeManager.ToDarkTheme() to make it dark.

1/// <summary>
2/// Constructor for the Application object.
3/// </summary>
4public App()
5{
6 // Global handler for uncaught exceptions.
7 UnhandledException += Application_UnhandledException;
8
9 // Standard Silverlight initialization
10 InitializeComponent();
11
12 // Phone-specific initialization
13 InitializePhoneApplication();
14
15 ThemeManager.ToLightTheme();
16
17 // Other code that might be here already...
18}

Links to resources

WP Theme Manager on GitHub
Jeff Wilcox blog post on the project
NuGet Package for WP Theme Manager

Integrating with the Windows Phone 8 Media Hub

Integrating with the Windows Phone 8 Media Hub

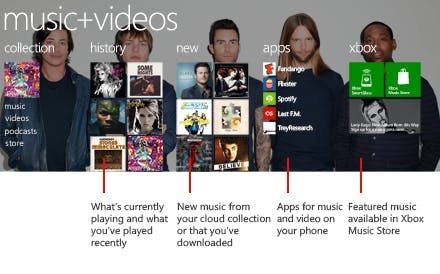
One of my favourite features of Windows Phone is the ability for apps to integrate with the different hubs on the phone. The Music and Video hub lets developers do this not only by having their app listed in the apps section, but also by feeding data to the new and history lists plus the currently playing tile.

To add a track to the history list have a look at the following code:

1MediaHistoryItem mediaHistoryItem = new MediaHistoryItem();
2mediaHistoryItem.ImageStream = image;
3mediaHistoryItem.Source = "";
4mediaHistoryItem.Title = "Track Title";
5mediaHistoryItem.PlayerContext["playSong"] = "Track Identifier";
6MediaHistory mediaHistory = MediaHistory.Instance;
7
8mediaHistory.WriteRecentPlay(mediaHistoryItem);

To add a track to the new list is relatively similar:

1MediaHistoryItem mediaHistoryItem = new MediaHistoryItem();
2mediaHistoryItem.ImageStream = image;
3mediaHistoryItem.Source = "";
4mediaHistoryItem.Title = "Track Title";
5mediaHistoryItem.PlayerContext["playSong"] = "Track Identifier";
6MediaHistory mediaHistory = MediaHistory.Instance;
7
8mediaHistory.WriteAcquiredItem(mediaHistoryItem);

Some things to note though; Your image must be 173 x 173px, a title must be given that describes what is playing (not just the name of your app) and the keyString property should be populated with an identifier that you can use to identify the track.
When a user presses the tile in either of the new or history lists it will trigger your app to be opened. In the OnNavigatedTo even you can query the QueryString from the NavigationContext to find the identifier for the song selected by the user.

1bool _historyItemLaunch = false; // Indicates whether the app was launched from a MediaHistoryItem.
2const String _playSongKey = "playSong"; // Key for MediaHistoryItem key-value pair.
3Song _playingSong = null; // The song to play.
4
5protected override void OnNavigatedTo(System.Windows.Navigation.NavigationEventArgs e)
6{
7 MediaLibrary library = new MediaLibrary();
8
9 if (NavigationContext.QueryString.ContainsKey(_playSongKey))
10 {
11 // We were launched from a history item.
12 // Change _playingSong even if something was already playing
13 // because the user directly chose a song history item.
14
15 // Use the navigation context to find the song by name.
16 String songToPlay = NavigationContext.QueryString[_playSongKey];
17
18 foreach (Song song in library.Songs)
19 {
20 if (0 == String.Compare(songToPlay, song.Name))
21 {
22 _playingSong = song;
23 break;
24 }
25 }
26
27 // Set a flag to indicate that we were started from a
28 // history item and that we should immediately start
29 // playing the song after the UI has finished loading.
30 _historyItemLaunch = true;
31 }
32}
33
34private void PhoneApplicationPage_Loaded(object sender, RoutedEventArgs e)
35{
36 if (_historyItemLaunch)
37 {
38 // We were launched from a history item, start playing the song.
39 if (_playingSong != null)
40 {
41 MediaPlayer.Play(_playingSong);
42 }
43 }
44}

There is also an option to write to the now playing section of the hub, however if you are playing your track using BackgroundAudioPlaer this is not needed as it is automatically handled for you from the track information.

Creating Training Buddy's Live Tile

Creating Training Buddy's Live Tile

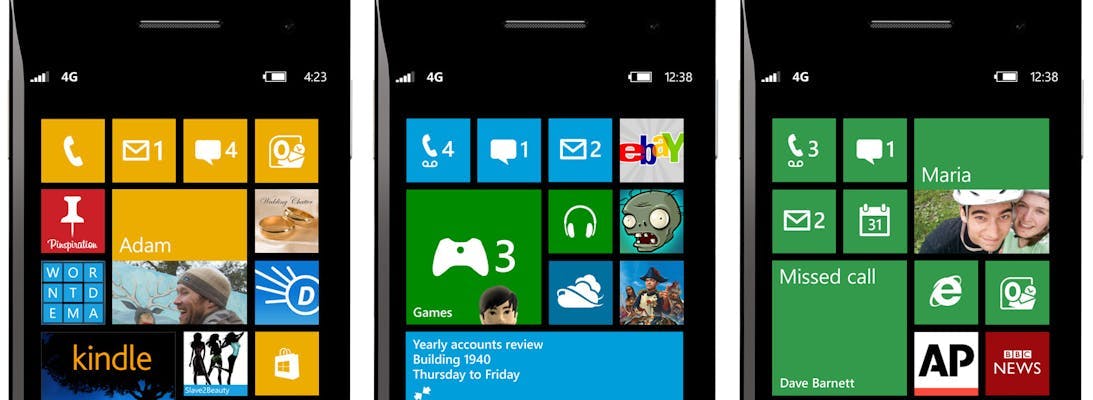
Live tiles are probably the best known feature about Windows Phone. Unlike iOS's plain grid of app icons Microsoft designed their phones home screen to provide users with data without having to open the app. With Windows Phone 8 the feature was updated so that 3rd party apps like Training Buddy could offer full width tiles along with new layout templates.

Adding a live tile to your app is a great idea as it is one of the features users often look for when their choosing an app. The app store also handily points out if an app uses a live tile or not.

The Design

There are 3 tile templates to choose from when you add a live tile to your app. These are Flip, Iconic and Cycle.

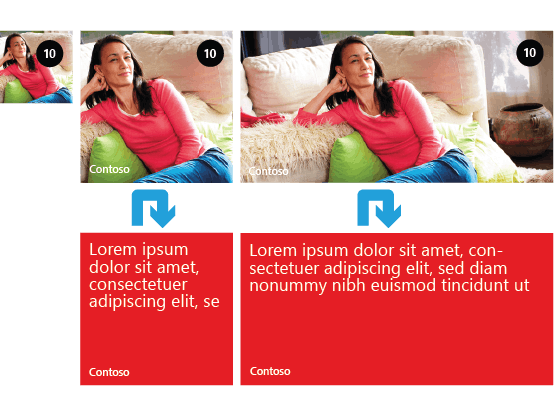
Flip gives the illusion that the tile has a front and a back and will flip over after a few seconds.

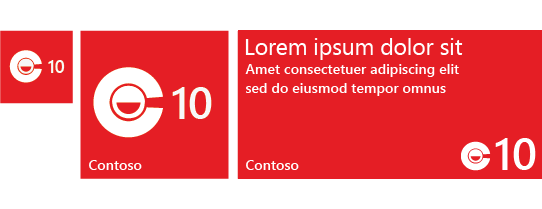
Iconic has space for an image and a large number, a bit like the icon for messages and emails. When in its largest size there is also wide content zones that can contain text.

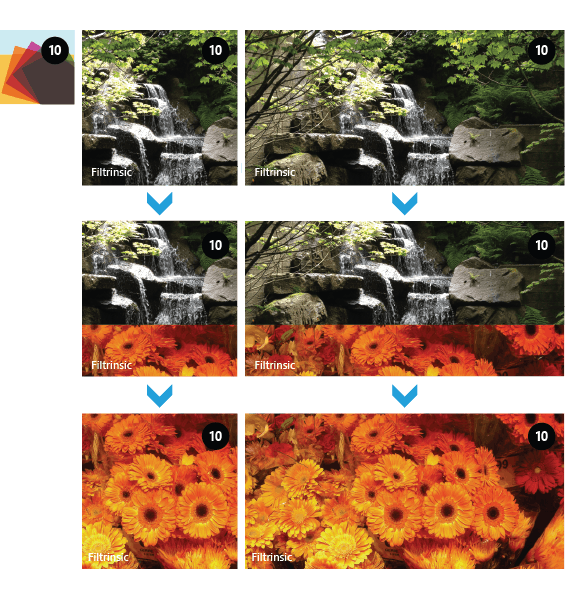
Cycle lets you choose 9 images that the app will Cycle through.

For Training Buddy I have used the Iconic template. You will probably find like myself that the type of app you are creating will more than likely determine what template you are going to use. As Training Buddy's live tile was ultimately going to show details of the users last activity, Iconic was the obvious choice. The smaller sizes don't really have enough space to give any activity stats and the large version gives you an additional space for a smaller image that was perfect for the activity type image (running, cycling, walking).

Another alternative is to make a completely custom design and write something in your app to render it as an image. You can then display the image using either the flip or cycle template.

The Code

The second reason you everyone should add live tiles to their app is because the code is so simple (this is the actual code from Training Buddy).

1// Application Tile is always the first Tile, even if it is not pinned to Start.
2 ShellTile TileToFind = ShellTile.ActiveTiles.First();
3
4 // Application should always be found
5 if (TileToFind != null)
6 {
7 string WideContent1 = "";
8 string WideContent2 = "";
9 string WideContent3 = "";
10 string activityLogo = "";
11 if (App.settings.LiveTile)
12 {
13 var lastActivity = (from a in AllActivities
14 orderby a.StartDateTime descending
15 select a).Take(1);
16
17 if (lastActivity.Count() > 0)
18 {
19 if (App.settings.DistanceMeasurement == "Miles")
20 {
21 WideContent3 = "Distance: " + lastActivity.First().Distance.ToString("0.##") + " miles";
22 }
23 else
24 {
25 WideContent3 = "Distance: " + (lastActivity.First().Distance * 1.609344).ToString("0.##") + " km";
26 }
27 WideContent2 = "Date: " + lastActivity.First().StartDateTime.ToShortDateString();
28 switch (lastActivity.First().ActivityType.ToLower())
29 {
30 case "running":
31 WideContent1 = "Last Run";
32 break;
33 case "walking":
34 WideContent1 = "Last Walk";
35 break;
36 case "cycling":
37 WideContent1 = "Last Cycle";
38 break;
39 case "swimming":
40 WideContent1 = "Last Swim";
41 break;
42 }
43
44 activityLogo = "/Assets/" + lastActivity.First().ActivityType + "Black-70.png";
45
46 if (lastActivity.First().CaloriesBurned > 0)
47 {
48 WideContent3 += " Calories: " + lastActivity.First().CaloriesBurned.ToString("0.#");
49 }
50
51 }
52
53 }
54
55 IconicTileData tileDate = new IconicTileData
56 {
57 Title = "Training Buddy",
58 WideContent1 = WideContent1,
59 WideContent2 = WideContent2,
60 WideContent3 = WideContent3,
61 IconImage = new Uri("/Assets/RunningBlack-150.png", UriKind.Relative),
62 SmallIconImage = new Uri(activityLogo, UriKind.Relative)
63 };
64
65 // Update the Application Tile
66 TileToFind.Update(tileDate);
67 }

First I'm finding the application tile. It is possible to create additional tiles for your app which is another great feature, but if you want to just update the main tile it will be the first one returned.

Next I'm checking to see if the user has turned on the live tile or not. If they haven't then I'm just setting the tile back to its default state.

The following lines are then getting the content to display on the tile and building up the strings on local variables.

Lastly and most importantly I'm creating a new instance of IconicTileData and setting each of its properties with the data to show. Then it's just a case of calling Update on the tile instance and providing it with the new IconicTileData object.

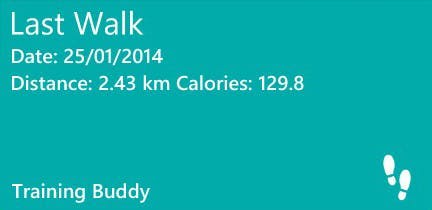
The Tile

And here's the result

Live tiles are really easy to create so if your developing an app you should definitely take the time to add one.

Screenshots in Windows Phone 8

As a person who's used Windows Phone since the very first version I know that one of the missing features was the ability to take screen shots! This was infuriating for developers who wanted a screen shot of their app working to place in the app store (then called marketplace). What made it even worse though was the simulator also lacked the button! Thankfully an update to the simulator fixed this, but the phone was still lacking.

Until..... I don't know when, but the other day I accidentally did it and now know that screenshots are taken by holding power and pressing the windows key before the slide to power off box appears.

I've also hear in WP8.1 this will be replaced with power button and volume down as the requirement for physical back, windows and search buttons is to be removed.

RestSharp with Async Await

RestSharp is an excellent open source project to use in a Windows Phone app if you want make http calls to a json api. However it doesn't have any inbuilt support for the async await syntax. Thankfully with C#'s extensions methods we can add this support in our app.

1namespace RestSharpEx
2{
3 public static class RestClientExtensions
4 {
5 public static Task<IRestResponse> ExecuteTaskAsync(this RestClient @this, RestRequest request)
6 {
7 if (@this == null)
8 throw new NullReferenceException();
9
10 var tcs = new TaskCompletionSource<IRestResponse>();
11
12 @this.ExecuteAsync(request, (response) =>
13 {
14 if (response.ErrorException != null)
15 tcs.TrySetException(response.ErrorException);
16 else
17 tcs.TrySetResult(response);
18 });
19
20 return tcs.Task;
21 }
22 }
23}

This will add a new function to the RestSharp client type called ExecutreTaskAsync. Inside the method it will call the ExecuteAsync function as you normally would, but has also implemented returning a Task and setting it's results when its complete.

To use the function would be as follows

1var client = new RestClient("http://www.YOUR SITE.com/api/");
2var request = new RestRequest("Products", Method.GET);
3var response = await client.ExecuteTaskAsync(request);

Using Microsoft pubCenter with AdDuplex

Not everyone realises but when you put an ad control such as Microsofts pubCenter control in your app, it doesn't mean that every single user will see an ad every single time. Microsoft and any other ad provided has a limited number of ad's to show based on the number they've sold. So sometimes there just isn't an ad to show. This is referred to as fill rate, usually expresses as a percentage this tells you what percentage of requests to show an ad actually resulted in an ad being shown.

Not having 100% fill rates causes 2 issues. Firstly your not maximising your revenue as people are using your app but not seeing an ad. Secondly, unless you've designed for it, there's potentially an odd looking blank space in your app where an ad is meant to go.

There is a solution though, when an ad isn't received by the ad control it does at least fire an event to inform you that this has happened. You can either then do something to update your UI or show something else in its place like another ad control.

The second ad control I am using is AdDuplex. Unlike a traditional ad, this isn't going to pay me out any money. Instead its specifically for Windows Phone developers to promote there apps and works on a basis that if you show an ad, your ad will get shown on another app. For every 10 ads your app shows, 8 of yours will be shown on other apps. The remaining 2 ad spaces are used by AdDuplex to make there money. The benefit of this system is there is a 100% fill rate, so your ad space is used to its full potential.

Enough talk, show me the code

In the xaml mark-up I have a MS pubCenter ad control and an AdDuplex control along with the properties set to make them fit the layout of my page. Nothing special over what you would normally do here, other than the fact there's 2 controls on top of each other and the AdDuplex one is collapsed.

1<UI:AdControl Name="MSAdControl" ApplicationId="YOUR APP ID"
2 AdUnitId="YOUR AD UNIT ID" HorizontalAlignment="Left"
3 Height="80" VerticalAlignment="Top" Width="480" BorderThickness="0" Grid.Row="0" />
4<adduplex:AdControl x:Name="AdDuplexAdControl"
5 AppId="YOUR APP ID" Visibility="Collapsed" />

In the code behind I'm setting up 2 event handlers on the MS pubCenter control for error occurred and ad refreshed.

The error occurred even will get fired when an Ad isn't loaded. In that instance I need to show the AdDuplex control. Having an event on the ad refreshed control also ensures that if an ad ever does manage to display the control will be shown again.

1public MainPage()
2: base()
3{
4InitializeComponent();
5MSAdControl.ErrorOccurred += MSAdControl_ErrorOccurred;
6MSAdControl.AdRefreshed += new EventHandler(MSAdControl_NewAd);
7}
8
9void MSAdControl_ErrorOccurred(object sender, Microsoft.Advertising.AdErrorEventArgs e)
10{
11System.Windows.Deployment.Current.Dispatcher.BeginInvoke(() =&gt;
12{
13MSAdControl.Visibility = Visibility.Collapsed;
14AdDuplexAdControl.Visibility = Visibility.Visible;
15});
16}
17
18void MSAdControl_NewAd(object sender, EventArgs e)
19{
20System.Windows.Deployment.Current.Dispatcher.BeginInvoke(() =&gt;
21{
22AdDuplexAdControl.Visibility = Visibility.Collapsed;
23MSAdControl.Visibility = Visibility.Visible;
24});
25}

Windows Phone: Sharing Content

If you writing an app and want to add some social sharing capabilities like posting link to Facebook or twitter. Your initial approach may be to go to and check out each of their api’s or to go to codeplex and search for a C# api someone’s written that makes the integration simpler. But right from that start Windows Phone has had a much simpler way of doing things.

The ShareLinkTask provides a simple way to post messages to any social network the user has registered on their phone. You don’t need to do anything with authorising your app with facebook etc which not only makes things easier for you, but your users are also pleased as they don’t have to worry about what you may be doing with their passwords.

It also only takes 4 lines of code. Simply create an instance of the ShareLinkTask, set the tile and message and call the show function:

1ShareLinkTask shareLinkTask = new ShareLinkTask();
2shareLinkTask.LinkUri = new Uri("http://www.himynameistim.com");
3shareLinkTask.Message = "Check out this great blog";
4shareLinkTask.Show();

As well as the ShareLinkTask there is also a ShareStatusTask and ShareMediaTask that can be used if you just want to post a status update or post and image.

1ShareStatusTask shareStatusTask = new ShareStatusTask();
2shareStatusTask.Status = "I'm developing a Windows Phone application!";
3shareStatusTask.Show();
4
5ShareMediaTask shareMediaTask = new ShareMediaTask();
6shareMediaTask.FilePath = path;
7shareMediaTask.Show();

Social media isn’t the only way of sharing content on a phone though, there is also email and sms. Both of these are just as easy to do as social media though:

For email use the EmailComposeTask

1EmailComposeTask emailComposeTask = new EmailComposeTask();
2emailComposeTask.Subject = "Awesome website";
3emailComposeTask.Body = "Foo bla bla";
4emailComposeTask.Show();

And for SMS use the SmsComposeTask

1SmsComposeTask smsComposeTask = new SmsComposeTask();
2
3smsComposeTask.To = "2065550123";
4smsComposeTask.Body = "Try this new application. It's great!";
5
6smsComposeTask.Show();

For more information have a look at the MSDN documentation:

Share Link Task - http://msdn.microsoft.com/en-us/library/windowsphone/develop/hh394009(v=vs.105).aspx

Share Status Task - http://msdn.microsoft.com/en-us/library/windowsphone/develop/hh394027(v=vs.105).aspx

Share Media Task - http://msdn.microsoft.com/en-us/library/windowsphone/develop/jj207027(v=vs.105).aspx

Email Componse Task - http://msdn.microsoft.com/en-us/library/windowsphone/develop/hh394003(v=vs.105).aspx

SMS Compose Task - http://msdn.microsoft.com/en-us/library/windowsphone/develop/hh394005(v=vs.105).aspx

Windows Phone: Rate My App

If you want your app to succeed one thing you need is reviews. More importantly you need good reviews!

Stats show that if an app has a rating of 4 stars or above it will do significantly better than an app with less. The higher the number of reviews, the more believable that rating is.

One issue you may have though is how to get reviews. Sadly most users don't rate apps unless they really like it or hate it. The Windows Phone OS also does nothing to prompt people to rate apps, so if you want to build up reviews then your going to need to do the prompting yourself.

The code to direct someone to the review page in the store for your app is quite simple. But even better is the fact Nokia have produced sample code that does the whole process!

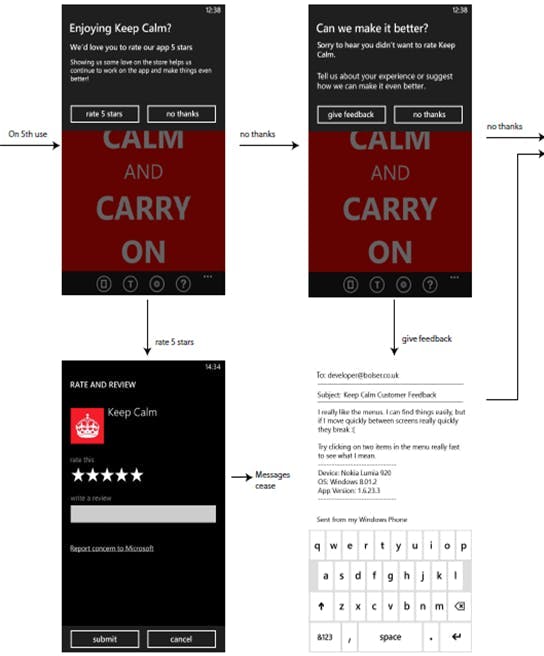
Once you've integrated the code on the 5th launch of your app the user will see a prompt asking them to rate your app. If they choose not to then they will be prompted to send you feedback via email.

If they didn't rate your app then on the 10th launch they will be prompted again.

Now getting good reviews is slightly harder, for that your actually going to have to build a good app that people like.

You can download the Rate My App code from Nokia here.

Calorie Buddy

Calorie Buddy is the latest of my apps released during summer of this year. Following on from the series of apps Training Buddy and Weight Buddy, Calorie Buddy is another app aimed at helping you keep track of your general health and fitness.

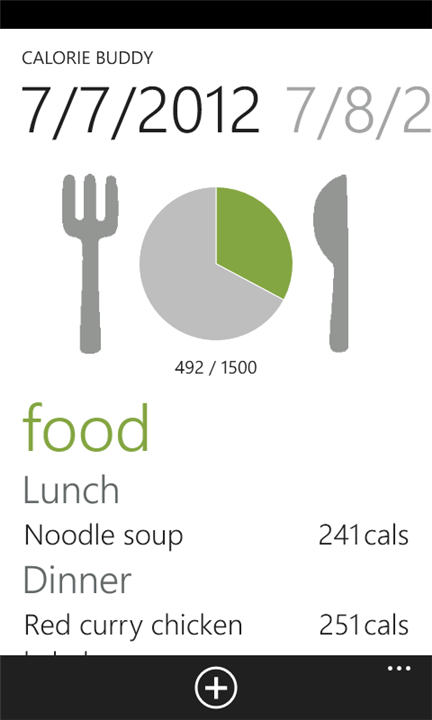
As the name suggests Calorie Buddy is all about monitoring your calorie intake. Simply set a target, enter your consumption each day and a handy pie chart will show you how many calories you have available left to eat that day. To navigate between different days simply swipe to the left or right.

One of Calorie Buddy's best features though is its live tile that enables you to see your remaining calories that day without even opening the app!

Download Calorie Buddy today

Training Buddy

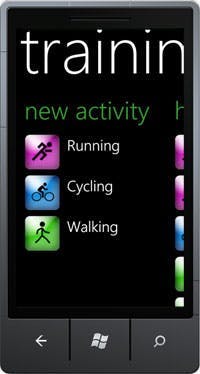
Training Buddy is an app that I wrote for Windows Phone 7, intended for anyone who likes Running, Cycling or Walking and would like to keep a log of their workouts.

The app will monitor the route you take along with various stats like speed, pace and how many calories you are burning. During the activity you can set up audio alerts to let you know how your doing and afterwards it will store a log of all the activities you have done for review later on.

For more information on the app visit www.trainingbuddyapp.com or view the app in the Zune Marketplace.