If you've done web development for any length of time, you'll know an important part of SEO is the ability to set up 301 Redirects on a page. The reason is simple, while pages exist people link to them, and they generate SEO value. When they're removed, the SEO value is removed, and even worse there could now be dead links existing pointing at that now removed page. The solution is to set up a redirect to that page that replaces it resulting in no dead links and the SEO value being transferred to the new page.
However, despite this being an almost essential part of any website, countless CMSs don't come with any inbuilt functionality to set them up and most guides will point you to config files requiring a developer to make the change. Not only does the average developer not want to spend their time adding redirects to config files, but content editors also don't want to have to wait for them to do it either.
Create a Document Type in Prismic
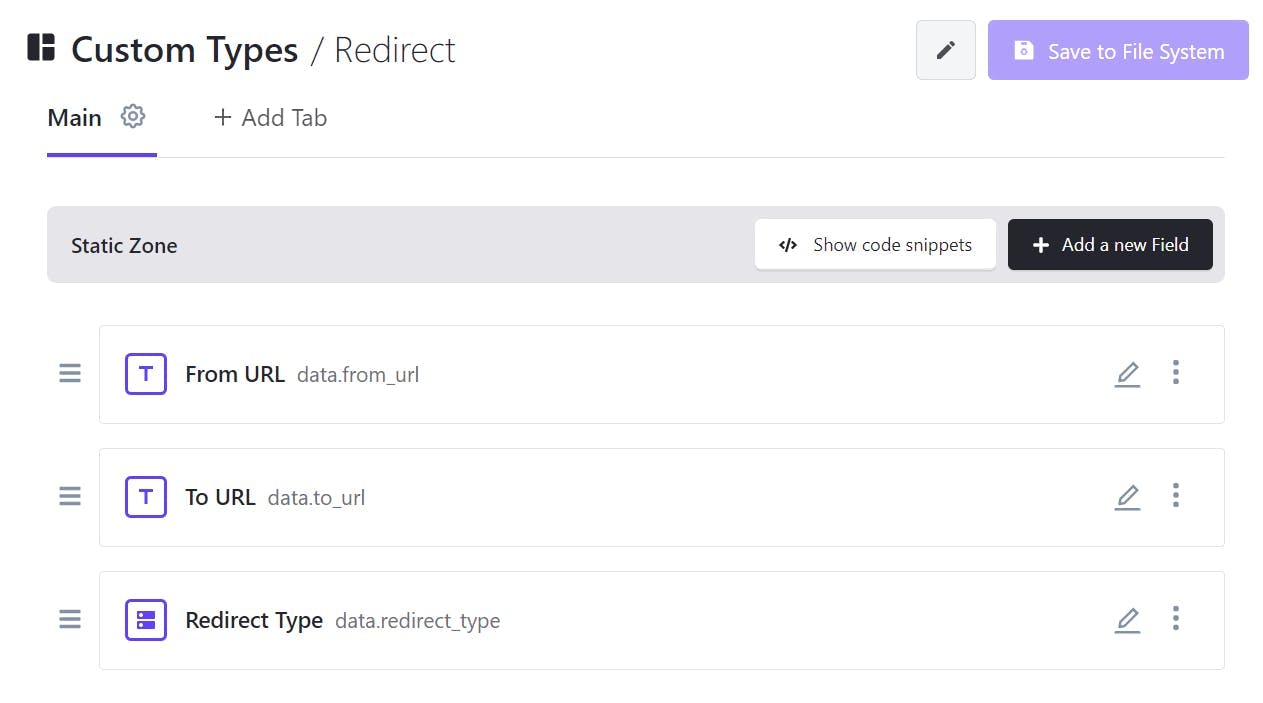
To give content editors the power to create redirects themselves, first, they will need a document type in Prismic with the relevant fields. The custom type needs to be repeatable so that the editor can enter multiple redirects, and it will need fields for source, destination and if the redirect is temporary or permanent.
For the redirect type, I've used a select drop-down with the default set to Permanent.
Using the redirects in NextJs
Since version 9.5.0 of NextJs, you have been able to set redirects in the next.config.js file (official NextJs documentation). What might not be immediately obvious though is the config file is a regular JS file so although all the examples are static hard-coded redirects there's no reason you couldn't just call a function that returns an array.
If like me, you're using TypeScript throughout your projects this is where the good news ends. The config file cannot be a TypeScript file and therefore if you've made a nice service layer with all your queries to the Prismic client, your logic for redirects, unfortunately, can't go there.
To create your client to retrieve content from Prismic, you likely import the createClient function from the prismicio.js file. Two things will trip you up here, the first will be an error about using import statements outside a module.
1(node:21168) Warning: To load an ES module, set "type": "module" in the package.json or use the .mjs extension.
2(Use `node --trace-warnings ...` to show where the warning was created)
3error - Failed to load next.config.js, see more info here https://nextjs.org/docs/messages/next-config-error
4C:\GitHub\TeamSport2022\next.config.js:1
5import * as prismic from '@prismicio/client'
8SyntaxError: Cannot use import statement outside a module
9 at Object.compileFunction (node:vm:352:18)
10 at wrapSafe (node:internal/modules/cjs/loader:1032:15)
11 at Module._compile (node:internal/modules/cjs/loader:1067:27)
12 at Object.Module._extensions..js (node:internal/modules/cjs/loader:1157:10)
13 at Module.load (node:internal/modules/cjs/loader:981:32)
14 at Function.Module._load (node:internal/modules/cjs/loader:822:12)
15 at ModuleWrap.<anonymous> (node:internal/modules/esm/translators:168:29)
16 at ModuleJob.run (node:internal/modules/esm/module_job:197:25)
17 at async Promise.all (index 0)
18 at async ESMLoader.import (node:internal/modules/esm/loader:337:24)
Thankfully next's config file does support ECMAScript modules and you can rename the file to next.cofig.msj. Just make sure you follow all the other changes in Next's documentation.
The next will be an error message that looks helpful with a suggested change.
1import { createClient } from './prismicio.js'
3SyntaxError: Named export 'createClient' not found. The requested module './prismicio.js' is a CommonJS module, which may not support all module.exports as named exports.
4CommonJS modules can always be imported via the default export, for example using:
6import pkg from './prismicio.js';
7const { createClient } = pkg;
9 at ModuleJob._instantiate (node:internal/modules/esm/module_job:127:21)
10 at async ModuleJob.run (node:internal/modules/esm/module_job:193:5)
11 at async Promise.all (index 0)
12 at async ESMLoader.import (node:internal/modules/esm/loader:337:24)
13 at async importModuleDynamicallyWrapper (node:internal/vm/module:437:15)
14 at async Object.loadConfig [as default] (C:\GitHub\TeamSport2022\node_modules\next\dist\server\config.js:68:36)
15 at async NextServer.prepare (C:\GitHub\TeamSport2022\node_modules\next\dist\server\next.js:127:24)
16 at async C:\GitHub\TeamSport2022\node_modules\next\dist\cli\next-dev.js:142:9
But that will just result in the first error message again, but now for the prismicio file.
The solution I ended up with was to recreate some of the logic from the prismicio file to create the client. Thankfully none of the routing logic needs to be replicated so it's still fairly minimal code, the one downside is the API endpoint now needs to come from the .env file rather than Prismics sm.json file. I did try using the sm.json file, however that leads to another error around loading json files.
1import * as prismic from '@prismicio/client'
3const apiEndpoint = process.env.PRISMIC_API_ENDPOINT
4export const repositoryName = prismic.getRepositoryName(apiEndpoint)
6export const createClient = (config = {}) => {
7 const client = prismic.createClient(apiEndpoint, {
15async function redirects() {
16 const client = createClient()
17 const redirects = await client.getAllByType('redirect')
19 return redirects.map((r) => {
21 source: r.data.from_url,
22 destination: r.data.to_url,
23 permanent: r.data.redirect_type == 'Permanent',
36export default nextConfig
As you can see once the client is created, it's a simple case of retrieving the redirects and mapping them into the correct format.
Overall, I'm happy that the redirects can be added through Prismic and they use the official NextJs config for creating redirects. However, I'm not so keen that my solution now has two places where the API endpoint is defined and the query for loading redirects being in what is essentially a config file, rather than with all my others and benefitting from the type checking it would have received had it been in typescript.