Blog
Parallel API calls in JavaScript

Parallel API calls in JavaScript

Although JavaScript is single-threaded, it is relatively simple to avoid blocking the thread by writing code in an asynchronous style through the use of functions with an async keyword that returns a promise and only awaiting when you need it.

For example, the following code contains an API call in an async function.

1 private async CallAPI() {
2 const response = await axios.get('https://fooapi.com/Films')
3
4 console.log(response.data)
5 }

If we wanted to call two APIs then we could do the following.

1 private async CallAPI() {
2 const response = await axios.get('https://fooapi.com/Films')
3 const response2 = await axios.get('https://fooapi.com/Music')
4
5 console.log(response.data)
6 console.log(response2.data)
7 }
8

However because both API calls are being immediately awaited, this will result in the execution of the function stopping while it waits for the result of the first API call before making the second.

As we don't need that response to make the second API call, we can improve the performance of the code by moving the await keywords to the point we actually need the responses. Both API calls will now be made in parallel rather than the second waiting for the first to finish.

1private async CallAPI() {
2 const response = axios.get('https://fooapi.com/Films')
3 const response2 = axios.get('https://fooapi.com/Music')
4
5 console.log(await response.data)
6 console.log(await response2.data)
7}

Call an API for each item in an array in parallel

Those initial examples were quite easy to understand, but what if we have a scenario where you get a list of films showing at the cinema on a particular day and display the show times for each? You have two APIs at your disposal; The first returns all the films and the second returns the showtimes for a given film.

To get all the data you need you first need to call the API to get the films and then loop through them to call the second API and get the show times.

1interface Film {
2 id: string
3 name: string
4 showtimes: ShowTime[]
5}
6
7interface ShowTime {
8 date: Date
9}
10
11class FilmService {
12 public async GetShowtimes(): Promise<Film[]> {
13 const filmResponse = axios.get('https://fooapi.com/Films')
14
15 const films: Film[] = []
16 for (let e of (await filmResponse).data) {
17 console.log("Get Showtimes")
18 const showTimes = await axios.get(
19 `https://fooapi.com/Films/${e.id}/ShowTimes`
20 )
21 console.log("Got Showtimes")
22
23 films.push({
24 id: e.id,
25 name: e.name,
26 showtimes: showTimes.data,
27 })
28 }
29
30 return films
31 }
32}
33
34// Output
35// Get Showtimes
36// Got Showtimes
37// Get Showtimes
38// Got Showtimes
39// Get Showtimes
40// Got Showtimes

The problem with this code though is that its execution length will be the films API call response time + (showtime API response time * the number of films).

As each call to the second API have no dependencies on each other, it doesn't make any sense for them to have to be performed sequentially in the loop.

Instead, we can refactor for loop to be a map calling an async function which returns the new array and make use of Promise.all() to ensure they have all completed before returning the results.

1interface Film {
2 id: string
3 name: string
4}
5
6interface FilmWithShowtime extends Film {
7 showtimes: ShowTime[]
8}
9
10interface ShowTime {
11 date: Date
12}
13
14class FilmService {
15 public async GetShowtimes(): Promise<FilmWithShowtime[]> {
16 const filmResponse = await axios.get('https://fooapi.com/Films')
17
18 const films: FilmWithShowtime[] = await Promise.all(
19 filmResponse.data.map(async (e: Film) => {
20 return await this.getFilmWithShowtimes(e)
21 })
22 )
23
24 return films
25 }
26
27 private async getFilmWithShowtimes(film: Film): Promise<FilmWithShowtime> {
28 console.log("Get Showtimes")
29 const showTimes = await axios.get(
30 `https://fooapi.com/Films/${film.id}/ShowTimes`
31 )
32
33 console.log("Got Showtimes")
34
35 return {
36 id: film.id,
37 name: film.name,
38 showtimes: showTimes.data,
39 }
40 }
41}
42
43// Output
44// Get Showtimes
45// Get Showtimes
46// Get Showtimes
47// Got Showtimes
48// Got Showtimes
49// Got Showtimes
50

The API calls for show times will now app be made in parallel reducing the overall execution time of the code.


Handy default Netlify toml file settings

Handy default Netlify toml file settings

With Netlify it's quite easy to quickly spin up a new website with a lot of good default out the box, but there's a few options that are good to set for both security and seo reasons.

Firstly it's good practice to have some headers set to improve security. For example setting X-Content-Type-Options to nosniff will disable sniffing of mime types. Setting X-Frame-Options to DENY will prevent the website being rendered in a frame on another site and Referrer-Policy of same-origin will reduce the amount of referrer information sent to other websites.

It's also a good idea to setup a redirect on the Netlify subdomain that Netlify will have created for your site. If you don't, then you could find the wrong URL ending up in Google.

1[[headers]]
2 for = "/*"
3 [headers.values]
4 Referrer-Policy = "same-origin"
5 Strict-Transport-Security = "max-age=15768000"
6 X-Content-Type-Options = "nosniff"
7 X-Frame-Options = "DENY"
8 X-XSS-Protection = "1; mode=block"
9[[redirects]]
10 from = "https://example.netlify.app"
11 to = "https://example.com/"
12 status = 301
13 force = true
How to setup CI with Azure App Service using GitHub Actions and deployment slots

How to setup CI with Azure App Service using GitHub Actions and deployment slots

Today I'm going to go through how you can setup automatic deployments when using a combination of Azure App Service (e.g. a Web App), deployment slots on the App Service and GitHub Actions. This is a setup to achieve zero downtime.

What are GitHub Actions?

GitHub Actions are the continuous integration and continuous delivery (CI/CD) platform from GitHub. If you're working with the Microsoft tech stack you may have used tools such as Team City or Azure Dev Opps in the past and this is just GitHubs version. Like the newer Azure Devops pipelines GitHub Actions define the pipeline in yaml files and while they are not the same they are very similar.

What are App Service Deployment Slots?

Deployment slots solve two issues; Firstly they allow zero downtime deployments by deploying the application to a separate instance to production, warming up that instance and then swapping it. Secondly, they can also be used as separate environments to preview changes without affecting the production code.

One thing to note is that although they are separate from the production code, they do share the same resources. So if your change has a processor-hungry bug, then that will have an affect your live environment. For this reason its also best to not leave them running all the time.

Configure App Service Deployment Slows

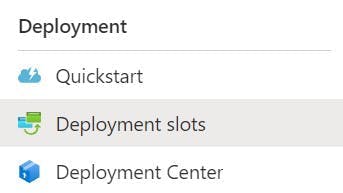
As a pre-requisite you need an App Service configured in Azure. Once you have this head to the Deployment slots section in the left nav.

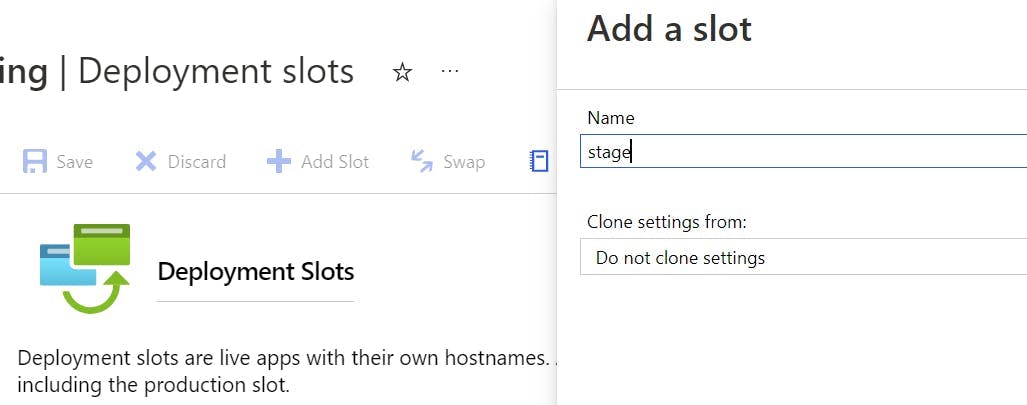
Click the Add Slot button, and create a slot named staging.

Create Azure Deployment Slot

Auto Swap Slots

At this point you could setup a deployment pipeline that deploys to the staging slot and then performs a slot swap, to change which one is in production. However Azure has a nifty setting that will do this all for you.

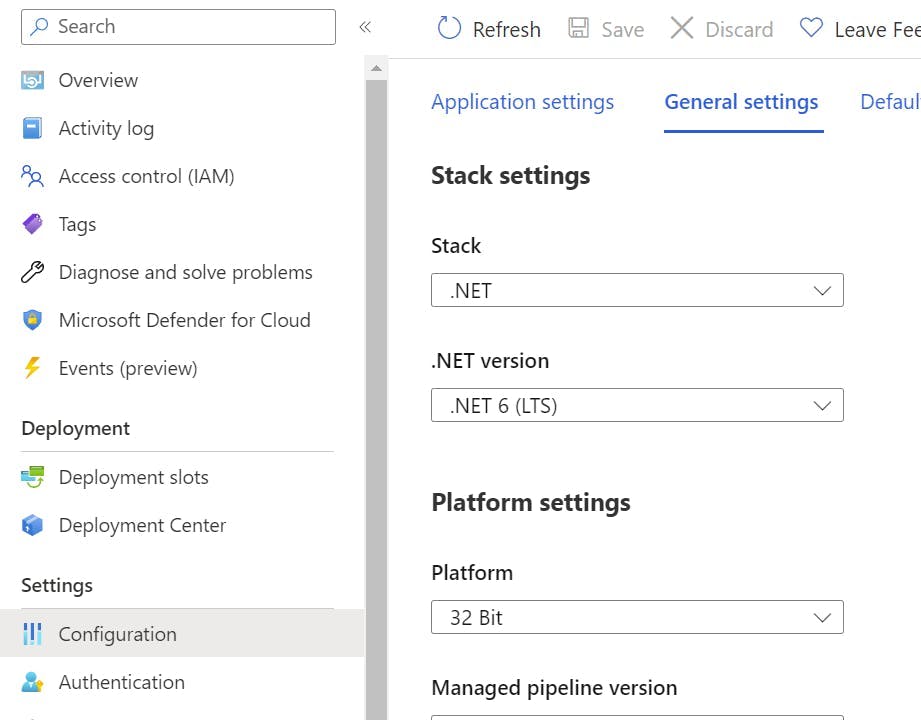
Click into the Deployment slot you just created and then go to Configuration, in the left-hand nav.

Switch to the General settings tab.

App Service - Configuration (General Settings tab)

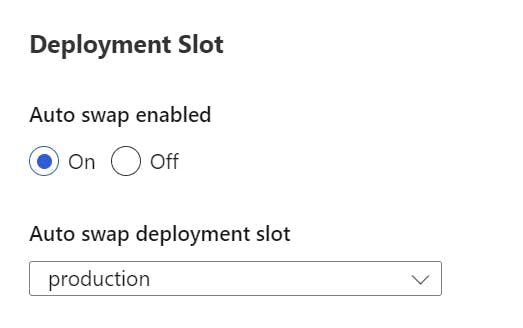
Scroll down to a section called Deployment Slot, and turn on auto swap. Within the drop-down select production.

Auto Deployment Swap setting

Now when a deployment is made to the staging slot it will warm up and then automatically swap with the production slot.

Configure GitHub Action

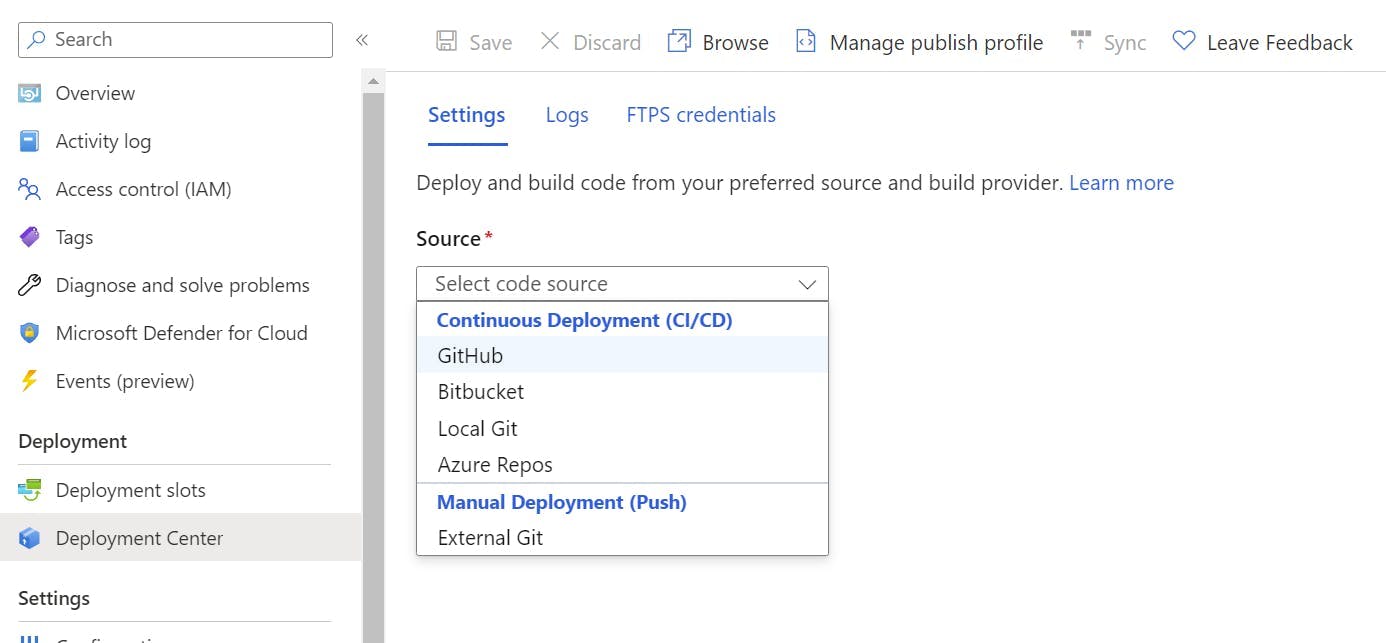
To configure the GitHub Action first make sure you are still in the staging deployment slot and select Deployment Center in the left nav.

From the source drop-down select GitHub.

Deployment Center - Selecting Source

Next select the Organization, Repository and branch to deploy for. This will give you the option to add a workflow. You may need to edit this file to get the build to work as needed but, this will provide the basics for building a .NET application and configuring the publish profile to get it into Azure.

Deployment Center - configure GitHub Action
Making your code neater with TypeScript Paths

Making your code neater with TypeScript Paths

When I started doing development with TypeScript one of the first things that irked me was all those relative paths in import statements.

Code organisation and creating layers for maintainability is one of the things I'm most OCD about, so things like a service to call Prismics API end up in a folder called services. However, to then use it in a NextJs page a few folders deep ends up with an import statement such as this.

1import { prismicService } from '../../../src/services/Prismic/Prismic.service'

Yuck. Look at all those ../../ and to make things worse this also means if you move a file its no longer pointing in the right place.

Fortunately, there is a solution. Typescript supports path mapping through the tsconfig.json file.

First set a base URL property in the compiler options.

1{
2 "compilerOptions": {
3 "baseUrl": ".",
4 }
5}

At this point, you could get rid of all those ../ and just start at the src. e.g.

1import { prismicService } from 'src/services/Prismic/Prismic.service'

This is a lot better and we can now move files around, but it's still not perfect. The fact it's in a folder called src is a bit irrelevant for my liking.

Using the path's property we can define a grouping even lower down. e.g.

1// tsconfig.json
2{
3 "compilerOptions": {
4 "baseUrl": ".",
5 "paths": {
6 "@Services/*": ["src/services/*"]
7 }
8 }
9}
10
11// New import
12import { prismicService } from '@Services/Prismic/Prismic.service'

For more information on TypeScript paths check out the official documentation here.

Going a bit further

As well as just making your code a bit easier to read. This also makes a simple solution to swapping out code in a way that would otherwise need a dependency injection framework.

Coming from a .net background where dependency injection and interfaces are frequently used there can be a desire to do it with TypeScript too. Although it is possible (you can read my blog post on dependency injection with NextJs and Tsyringe here) it has quite a heavy overhead to the amount of code you need to write.

A simpler solution can be like what Vercel have done in NextJs commerce for the different providers.

Check out this part of their tsconfig file.

1 "paths": {
2 "@lib/*": ["lib/*"],
3 "@utils/*": ["utils/*"],
4 "@config/*": ["config/*"],
5 "@assets/*": ["assets/*"],
6 "@components/*": ["components/*"],
7 "@commerce": ["../packages/commerce/src"],
8 "@commerce/*": ["../packages/commerce/src/*"],
9 "@framework": ["../packages/local/src"],
10 "@framework/*": ["../packages/local/src/*"]
11 }

That @framework section at the end defaults to local, but gets swapped out to a commerce provider like bigcommerce or shopify. As each one implements the same methods, anything importing from @framework simply uses the correct code when the solution is built.