Tag: GitHub
How to setup CI with Azure App Service using GitHub Actions and deployment slots

How to setup CI with Azure App Service using GitHub Actions and deployment slots

Today I'm going to go through how you can setup automatic deployments when using a combination of Azure App Service (e.g. a Web App), deployment slots on the App Service and GitHub Actions. This is a setup to achieve zero downtime.

What are GitHub Actions?

GitHub Actions are the continuous integration and continuous delivery (CI/CD) platform from GitHub. If you're working with the Microsoft tech stack you may have used tools such as Team City or Azure Dev Opps in the past and this is just GitHubs version. Like the newer Azure Devops pipelines GitHub Actions define the pipeline in yaml files and while they are not the same they are very similar.

What are App Service Deployment Slots?

Deployment slots solve two issues; Firstly they allow zero downtime deployments by deploying the application to a separate instance to production, warming up that instance and then swapping it. Secondly, they can also be used as separate environments to preview changes without affecting the production code.

One thing to note is that although they are separate from the production code, they do share the same resources. So if your change has a processor-hungry bug, then that will have an affect your live environment. For this reason its also best to not leave them running all the time.

Configure App Service Deployment Slows

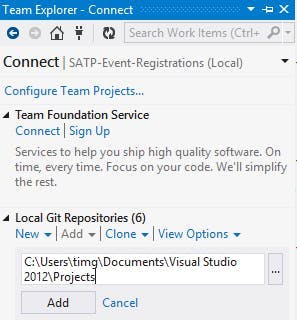
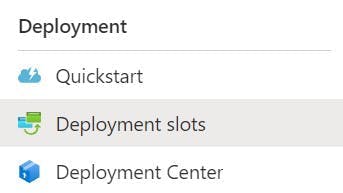
As a pre-requisite you need an App Service configured in Azure. Once you have this head to the Deployment slots section in the left nav.

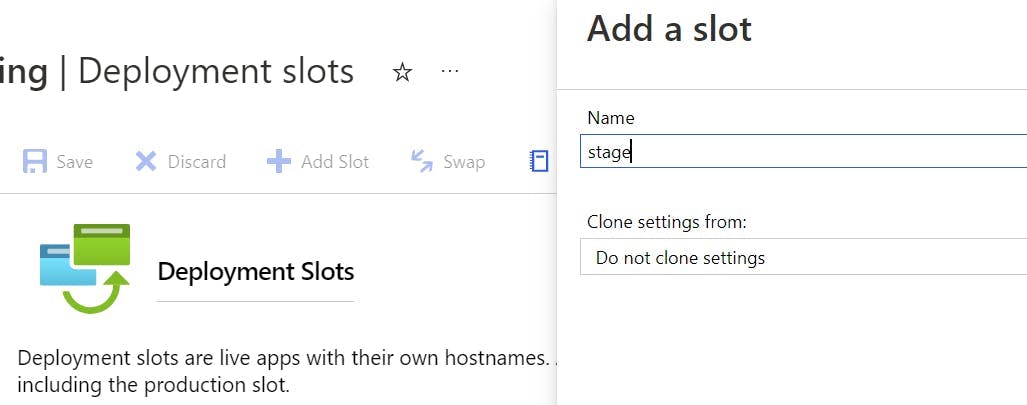
Click the Add Slot button, and create a slot named staging.

Create Azure Deployment Slot

Auto Swap Slots

At this point you could setup a deployment pipeline that deploys to the staging slot and then performs a slot swap, to change which one is in production. However Azure has a nifty setting that will do this all for you.

Click into the Deployment slot you just created and then go to Configuration, in the left-hand nav.

Switch to the General settings tab.

App Service - Configuration (General Settings tab)

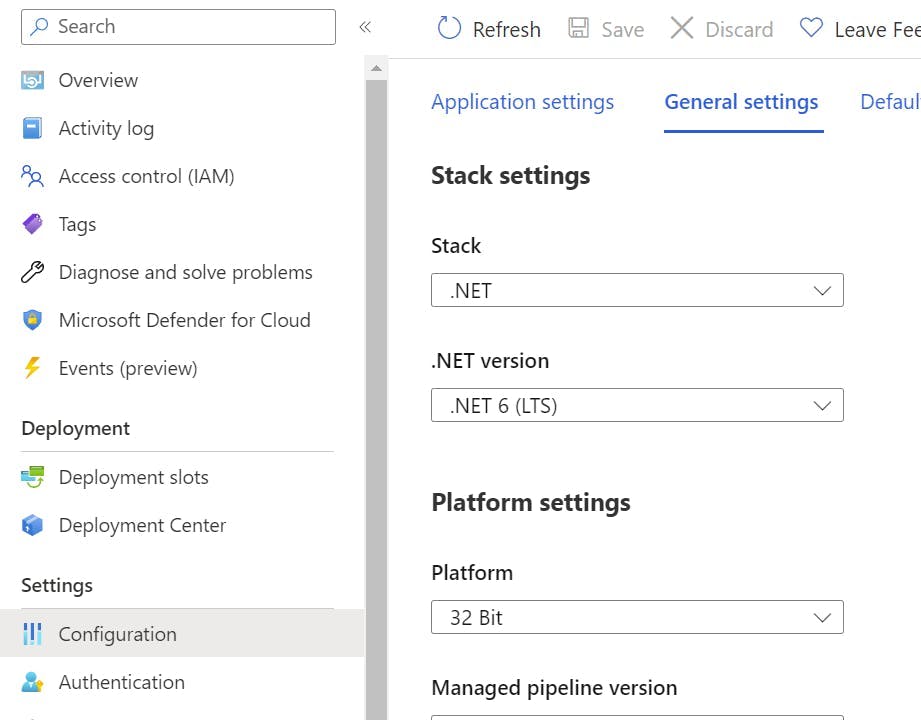
Scroll down to a section called Deployment Slot, and turn on auto swap. Within the drop-down select production.

Auto Deployment Swap setting

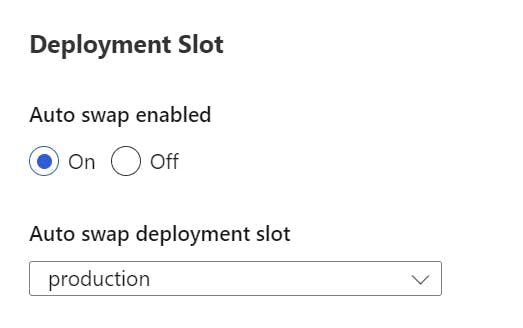
Now when a deployment is made to the staging slot it will warm up and then automatically swap with the production slot.

Configure GitHub Action

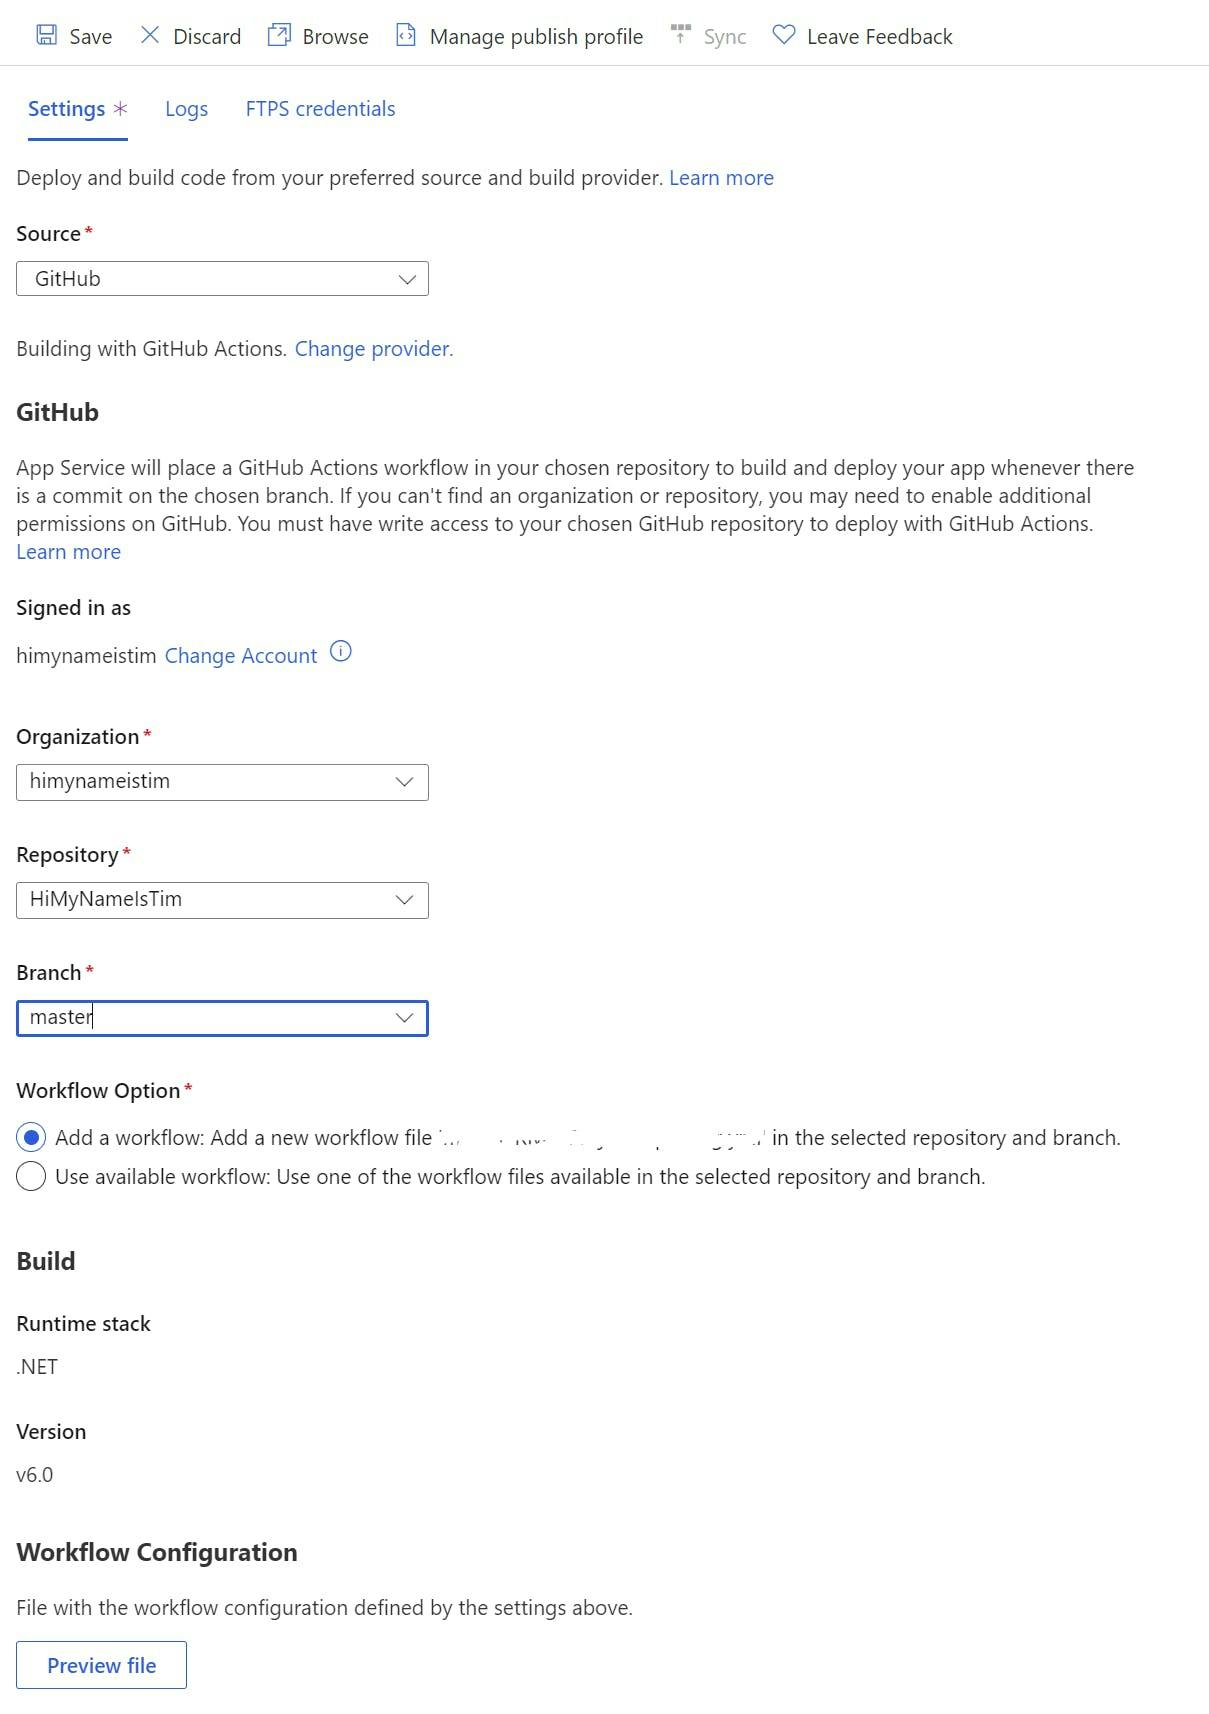
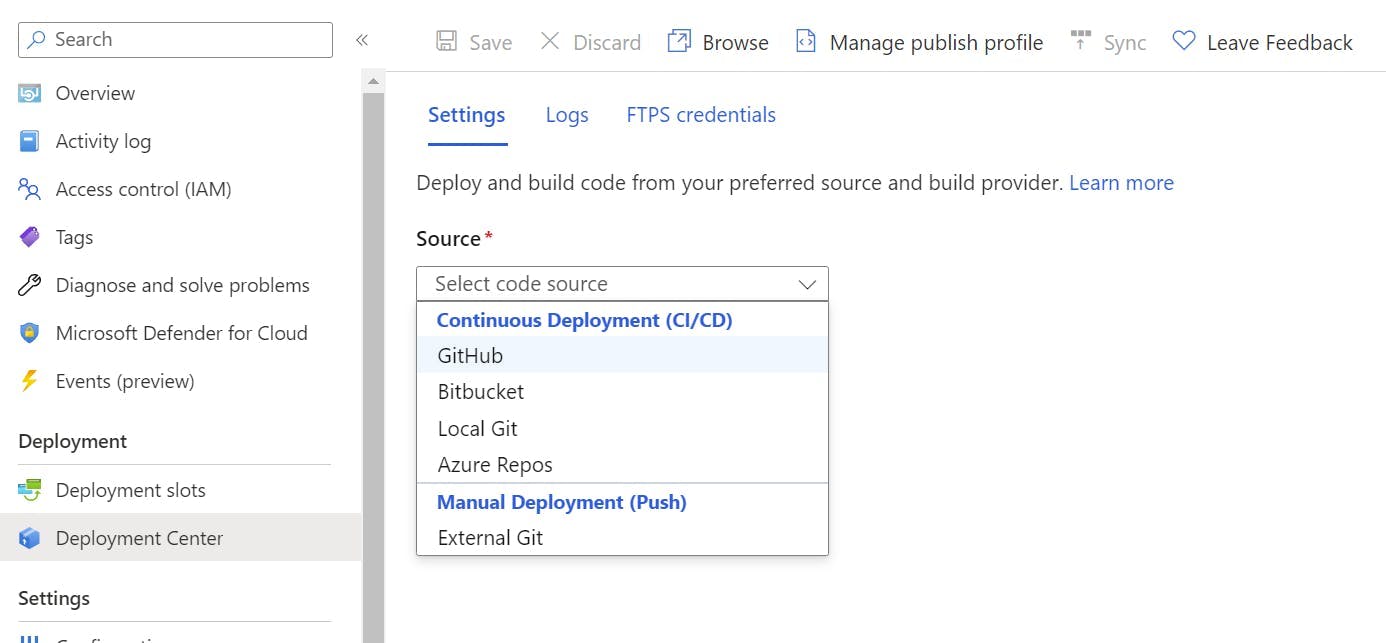
To configure the GitHub Action first make sure you are still in the staging deployment slot and select Deployment Center in the left nav.

From the source drop-down select GitHub.

Deployment Center - Selecting Source

Next select the Organization, Repository and branch to deploy for. This will give you the option to add a workflow. You may need to edit this file to get the build to work as needed but, this will provide the basics for building a .NET application and configuring the publish profile to get it into Azure.

Deployment Center - configure GitHub Action
SonarQube for .NET Framework with GitHub Actions

SonarQube for .NET Framework with GitHub Actions

If you haven't tried SonarQube or SonarCloud out then I suggest you do. The cloud version is quite straightforward to setup and from my experience the stuff it finds can be quite insightful. Like all these tools, at times you'll disagree with what they say, but there's always the option to change the rules.

What I particularly like with SonarQube is the examples you get with each bug that clearly explains why there's an issue and what you need to do in order to fix it.

What I didn't like however were the instructions for setting a project using .NET Framework. There are instructions labelled .NET, but this heavily assumes your using .NET Core, which while that might be our general preference, products like Sitecore could force your hand back to .NET Framework and all those legacy projects didn't just go away.

How to setup SonarQube using GitHub Actions for .NET Framework

The GitHub setup instructions (https://docs.sonarqube.org/latest/analysis/github-integration/) will give you the following code to create your GitHub Action with. This is also the same code you will get if you follow the wizard in SonarQube.

1name: Build
2on:
3 push:
4 branches:
5 - master # or the name of your main branch
6 pull_request:
7 types: [opened, synchronize, reopened]
8jobs:
9 build:
10 name: Build
11 runs-on: windows-latest
12 steps:
13 - name: Set up JDK 11
14 uses: actions/setup-java@v1
15 with:
16 java-version: 1.11
17 - uses: actions/checkout@v2
18 with:
19 fetch-depth: 0 # Shallow clones should be disabled for a better relevancy of analysis
20 - name: Cache SonarQube packages
21 uses: actions/cache@v1
22 with:
23 path: ~\sonar\cache
24 key: ${{ runner.os }}-sonar
25 restore-keys: ${{ runner.os }}-sonar
26 - name: Cache SonarQube scanner
27 id: cache-sonar-scanner
28 uses: actions/cache@v1
29 with:
30 path: .\.sonar\scanner
31 key: ${{ runner.os }}-sonar-scanner
32 restore-keys: ${{ runner.os }}-sonar-scanner
33 - name: Install SonarQube scanner
34 if: steps.cache-sonar-scanner.outputs.cache-hit != 'true'
35 shell: powershell
36 run: |
37 New-Item -Path .\.sonar\scanner -ItemType Directory
38 dotnet tool update dotnet-sonarscanner --tool-path .\.sonar\scanner
39 - name: Build and analyze
40 env:
41 GITHUB_TOKEN: ${{ secrets.GITHUB_TOKEN }} # Needed to get PR information, if any
42 shell: powershell
43 run: |
44 .\.sonar\scanner\dotnet-sonarscanner begin /k:"example" /d:sonar.login="${{ secrets.SONAR_TOKEN }}" /d:sonar.host.url="${{ secrets.SONAR_HOST_URL }}"
45 dotnet build
46 .\.sonar\scanner\dotnet-sonarscanner end /d:sonar.login="${{ secrets.SONAR_TOKEN }}"

There's two aspects to notice with this. Firstly the Build and analyze section is running a command dotnet build which is fine if your running .Net Core, but for .Net Framework it isn't going to work.

Secondly it's highly likely your solution will use NuGet packages and there's no step in here to restore them.

To setup and restore NuGet packages add in the following steps before the Build and analyze step. Be sure to put your solution filename in the restore command.

1 - name: Setup Nuget
2 uses: Nuget/setup-nuget@v1.0.5
3
4 - name: Restore nuget packages
5 run: nuget restore MySolution.sln

To do a build that will compile your .Net Framework code you will need to use MsBuild rather than dotnet. However if you just swap them over you'll get an invalid command error. First you need to add msbuild to PATH. Change your build steps as follows.

1 - name: Add msbuild to PATH
2 uses: microsoft/setup-msbuild@v1.0.2
3
4 - name: Build and analyze
5 env:
6 GITHUB_TOKEN: ${{ secrets.GITHUB_TOKEN }} # Needed to get PR information, if any
7 shell: powershell
8 run: |
9 .\.sonar\scanner\dotnet-sonarscanner begin /k:"example" /d:sonar.login="${{ secrets.SONAR_TOKEN }}" /d:sonar.host.url="${{ secrets.SONAR_HOST_URL }}"
10 dotnet build
11 .\.sonar\scanner\dotnet-sonarscanner end /d:sonar.login="${{ secrets.SONAR_TOKEN }}"

With that now in place you can now compile some .Net Framework code and have the results sent back to your SonarQube instance.

Team Development for Sitecore (TDS) with Github

f your using Team Development for Sitecore (TDS) and Github or Git as your source control you may experience an issue where TDS is unable to create/update some of the items in Sitecore, due to a content length issue.

The error will look something like this:

Failed to load version 1 for language en
Length of field content does not match the content-length attribute. File name: name, field id: {id}

What's happening comes down to how Github encodes line ending. If your item contains a Rich Text field you can end up with data that has been serialized with both CRLF and LF as the line feed. This will have been included in the content length. However when you push to Git, the CRLF value will have been removed making the content length value incorrect.

To overcome this issue you need to update your .gitattributes file to treat these files differently. Just add this to your file:

# TDS files should be treated as binary
*.item -text

How do I create a .gitattributes file?

If you don't have a .gitattributes file you may run into an issue with windows where it won't let you create it, due to requiring a file-name rather than just an extension.

To create the file:

  1. Create the text file gitattributes.txt
  2. Open it in a text editor and add your rules, then save and close
  3. Hold SHIFT, right click the folder you're in, then select Open command window here
  4. Then rename the file in the command line, with ren gitiattributes.txt .gitattributes

Using Visual Studio with Git Hub

This is one of those great examples of writing a blog post to yourself to remind you how to do something.

If your using Visual Studio 2012 then to add Git support you will need the Visual Studio Tools for Git plugin created by Microsoft's TFS Power Tools Team (http://visualstudiogallery.msdn.microsoft.com/abafc7d6-dcaa-40f4-8a5e-d6724bdb980c), if your using a later version of Visual Studio then it's already built in.

If you're thinking in of using Git Hub as your source control provider then the most basic thing you're going to need to know is how do you get the Git plugin to link up to GitHub. Here's a couple of different methods;

Creating a Project in Git Hub

Click New Repository. Enter a new, Select Public or Private and click Create new Repository.

A new repository will be created in Git Hub

Clone the Project in Visual Studio

Now the project has been created in Git Hub you will need to clone it to your machine so that you can start adding files and sync then back.

Open a new instance of Visual Studio and do the following:

  1. Open the Team Explorer window
  2. Click the connect button
  3. In the list of Local Git Repositories click clone
  4. In the URL box enter the HTTP URL from Git Hub
  5. The second box should auto populate with a location on your hard disk
  6. Click Clone

Creating a Repository on Git Hub using the Git Hub app

Rather than creating the Git Hub repo through the GitHub website you can use their app. Once you've got the app installed and logged in do the following:

  1. Select the GitHub account you want to add the repo to on the left
  2. Click Create button at the top
  3. Enter a name and click create
  4. The repository will be created in GitHub and automatically sync with the folder on your machine

Adding an existing Repository to Visual Studio

If you already have a repository cloned on your machine but it's not showing in Team Explorer you can add it by clicking on Add

  1. Click the Connect button to view the list of local repositories
  2. Click add an enter the path to the repository on your hard drive
  3. Click Add