Tag: Authentication
Checking Auth0 Roles and Permissions with a React SPA

Checking Auth0 Roles and Permissions with a React SPA

With Auth0 you can set up a completely SAAS-based Authentication and Authorization provider, freeing you of any worries surrounding losing passwords, implementing the latest authentication best practices and a whole heap of other things.

One thing that tripped me up with it, however, was checking what permissions have been assigned to my users.

In my setup, I was using a .NET Core Web API hosted in Azure and a React SPA hosted separately. My API would need to check the permissions assigned to my users in order to check they could perform actions such as updating another user, and my React front end would need to show and hide various pieces of functionality to match.

Checking Permissions in the .NET Core Web API

This article isn't about permissions in APIs but it's important to understand how this differs too what's needed in the React front end.

The tutorial ASP.NET Core Web API v2.1: authoization is relatively straightforward to follow and at the end, you will have an API that performs Authorization with a user's permissions.

Permissions in Auth0 are assigned to users via roles. i.e. A user gets assigned a role and roles have related permissions. This way we can design our application around granular permissions and the roles which give those permissions to a user can be configured separately.

The permissions are provided to the API within the user's authentication token, however for this to work they actually have to be in the token to start with. By default roles and permissions are not included in a token.

These can be included by setting the scope property when calling getAccessTokenSilently (the function to get a token) in React.

1const token = await getAccessTokenSilently({
2 authorizationParams: {
3 audience: 'https://api.example.com/',
4 scope: 'read:posts',
5 },
6});
7const response = await fetch('https://api.example.com/posts', {
8 headers: {
9 Authorization: `Bearer ${token}`,
10 },
11});

Alternatively, you can Enable Role-Based Access Control for APIs. This will increase the size of your token by including all permissions assigned to the person, but removes the need to request them.

Checking Permissions in React

It's likely that before calling an API you will want your React logic to check the users permissions. After all, it wouldn't be a great user experience if they're allowed to perform actions which result in permission errors.

As well as the getAccessTokenSilently the useAuth0 React Hook contains a property for the user and getIdTokenClaims. When using these you will be able to see the details associated with the logged in user. e.g. Name. However unlike getAccessTokenSilently, it doesn't matter what you include in the scope or if you've enabled role-based access control, the properties will not include what permissions or roles are assigned to the user.

To include them you must setup a login action to add them to the token. See Add user roles to ID and Access tokens in Auth0's documentation.

This will direct you to create a login flow where you add a custom action containing the following.

1/**
2 * @param {Event} event - Details about the user and the context in which they are logging in.
3 * @param {PostLoginAPI} api - Interface whose methods can be used to change the behavior of the login.
4 */
5exports.onExecutePostLogin = async (event, api) => {
6 const namespace = 'https://my-app.example.com';
7 if (event.authorization) {
8 api.idToken.setCustomClaim(`${namespace}/roles`, event.authorization.roles);
9 api.accessToken.setCustomClaim(`${namespace}/roles`, event.authorization.roles);
10 }
11}

Note, the namespace part is so that what you add to the token is unique and doesn't clash with anything Auth0 is adding.

You can now follow these examples to perform a claims checks on the user. E.g.

1import { User } from '@auth0/auth0-react';
2
3function checkClaims(claim?: User, role?: string) {
4 return claim?.['https://my-app.example.com/roles']?.includes(role);
5}
6
7export default checkClaims;

This as you may have spotted is only assigning a role to the token rather than actual permissions. In my case, this was enough, however, this is one area I think the react hook is severely lacking.

Writing custom logic to set a users permissions into the set of claims feels highly wrong, but after some back and forth with Auth0's support team, for now though this appears to be the only option.

User Authentication across sub domains in Sitecore

User Authentication across sub domains in Sitecore

The Scenario

In some scenarios you may have sub domains set up on your site, this may be to have an api configured as a separate site, or you may have a microsite set up on a sub domain. Depending on the scenario you may also want a user who it logged in on one of the sites to be logged in on the other.

When providing a login section to a site, after the visitor logs in their authentication is tracked using cookies. Cookies are linked to a domain and as your sites only differ by sub-domain you may be thinking great it should just work, no need for a single sign on solution. But you would be wrong.

The Solution

By default, cookies will be set on a specific domain including the sub-domain unless you tell it otherwise. Fortunately, this is quite easy to do.

In the web.config file, find the section for forms authentication and add an attribute domain set to the top-level domain. Your authentication should now always be set on the top level domain and work across all subdomains.

1<system.web>
2 <authentication mode="None">
3 <forms name=".ASPXAUTH" cookieless="UseCookies" domain="mydomain.com" timeout="30"/>
4 </authentication>
5<system.web>

Sitecore: Setting up Mongo with Authentication

One of the new features in Sitecore 7.5 was the xDB, a new analytics database that rather than using SQL Server was Mongo based. If your main job is as a Sitecore dev, like me this may be the first time you've ever had to use Mongo, or a least the first time you've ever had to commercially use it.

Installing Mongo DB is a relatively painless experience, Mongo provide a decent enough guide to installing on Windows. Half way through you may be wondering why its running in a console window, but eventually you get to instructions for setting it up as a service.

However there are a couple of gotchas:

  1. Sitecore doesn't work with the latest version of Mongo. At time of writing the latest version of Sitecore is 8.0 rev. 150427 and Mongo is 3.0. Sitecore however only supports version 2.6.x of Mongo though.
  2. None of the installation instructions include any details on authentication. Which while this is fine for your local dev machine is not so great for a live site.

So here's my guide for getting up and running with Mongo DB and Sitecore.

Installing Mongo

First off get Mongo DB installed as a service on your machine. I'm not going to include instructions here for this bit, just follow the guide on the Mongo DB website.

One thing to note though, the Windows installer for Mongo 2.6 will by default install Mongo to C:\Program Files\MongoDB 2.6 Standard\. However the instructions for setting up Mongo include example commands expecting it to be installed in C:\mongodb\

Setting Up Authentication

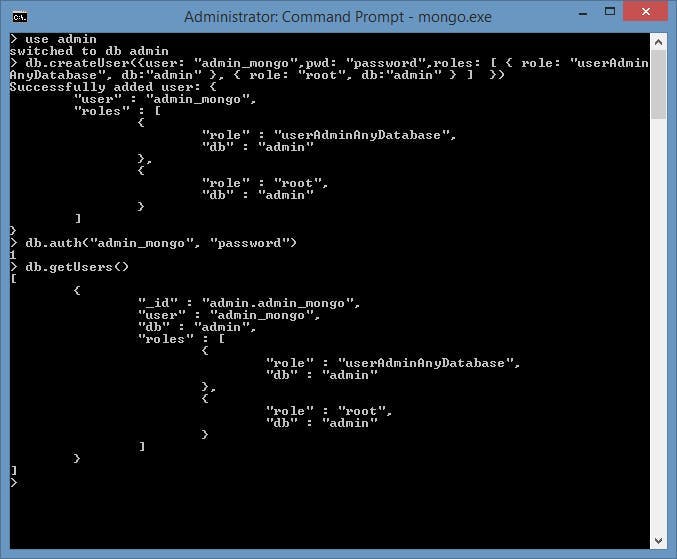
Once you've got Mongo up and running you'll need to create a user.

  1. Open a command prompt and connect to MongoDB

    C:\Program Files\MongoDB 2.6 Standard\bin\mongo.exe
  2. Switch to the admin db by doing

    use admin
  3. Create the user using

    db.createUser({user: "admin_mongo",pwd: "your password",roles: [ { role: "userAdminAnyDatabase", db:"admin" }, { role: "root", db:"admin" } ] })
  4. To verify the user has been created you can use the following commands

    db.auth("admin_mongo", "your password")
    db.getUsers()

Next update your config file to require authentication by adding auth=true. You will also need to restart the service for the change to take effect.

logpath=c:\data\log\mongod.log
dbpath=c:\data\db
auth=true

Sitecore uses 4 db's in Mongo; Analytics, tracking_live, tracking_history and tracking_contact. We need to create a user in each of them.

Open a mongo shell again, switch to the admin db and connect with your admin login.

Now create each of the users as follows:

use analytics
db.createUser({user: "mongo_user",pwd: "your password",roles: [ { role: "readWrite", db:"analytics" } ]  })

use tracking_live
db.createUser({user: "mongo_user",pwd: "your password",roles: [ { role: "readWrite", db:"tracking_live" } ]  })

use tracking_history
db.createUser({user: "mongo_user",pwd: "your password",roles: [ { role: "readWrite", db:"tracking_history" } ]  })

use tracking_contact
db.createUser({user: "mongo_user",pwd: "your password",roles: [ { role: "readWrite", db:"tracking_contact" } ]  })

Sitecore Connection Strings

All that's left now is to update the connection strings in Sitecore.

The default connection strings Sitecore give you look like this:

The format for a connection string with authentication is

mongodb://[username:password@]host1[:port1]/database