Sitecore
Sitecore Alias as Redirect

Sitecore Alias as Redirect

One feature of Sitecore that I have always disliked is Alias's. On each page of a site, content editors have the ability to click an alias button on the presentation tab and add alternative urls for the page.

Once added these will appear in the Aliases folder under system.
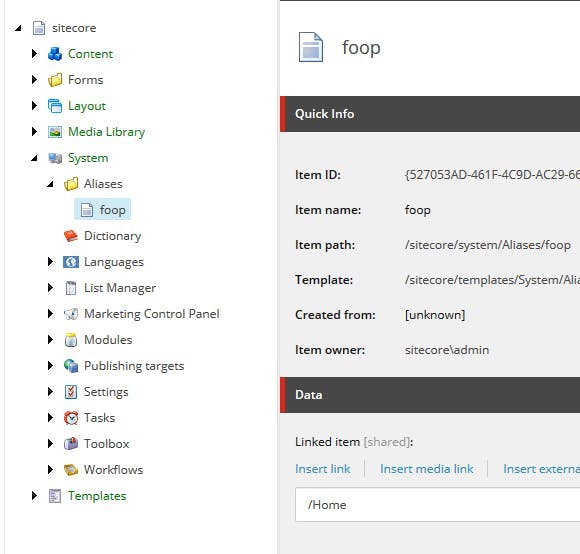
However all this accomplishes is multiple URLs existing for one page which is a big SEO no no.

Content editors like to do this in order to create simple URLs for things like landing pages. e.g. himynameistim.com/Sitecore but search engines hate it as they see multiple pages with the exact same content. As a result the value of each page gets lowered and appears lower in search engine results. What Content editors really want is to set up a 301 redirect so that they can have the simple URL but redirect users to the actual page on the site.

Aliases as Redirects

One solution is to updated the aliases functionality to cause a redirect to it's linked item rather than resolve the page.

To do this we need to create a pipeline processor that inherits from AliasResolver.

1using Sitecore; using Sitecore.Configuration; using Sitecore.Diagnostics; using Sitecore.Pipelines.HttpRequest; using System.Net; using System.Web; using AliasResolver = Sitecore.Pipelines.HttpRequest.AliasResolver; namespace HiMyNameIsTim.Pipelines { public class AliasAsRedirectResolver : AliasResolver { public override void Process(HttpRequestArgs args) { if (!Settings.AliasesActive) { return; // if aliases aren't active, we really shouldn't confuse whoever turned them off } var database = Context.Database; if (database == null) { return; // similarly, if we don't have a database, we probably shouldn't try to do anything } if (!Context.Database.Aliases.Exists(args.LocalPath)) { return; // alias doesn't exist } var targetID = Context.Database.Aliases.GetTargetID(args.LocalPath); // sanity checks for the item if (targetID.IsNull) { Tracer.Error("An alias for \"" + args.LocalPath + "\" exists, but points to a non-existing item."); return; } var item = args.GetItem(targetID); if (database.Aliases.Exists(args.LocalPath) && item != null) { if (Context.Item == null) { Context.Item = item; Tracer.Info(string.Concat("Using alias for \"", args.LocalPath, "\" which points to \"", item.ID, "\"")); } HttpContext.Current.Response.RedirectLocation = item.Paths.FullPath.ToLower() .Replace(Context.Site.StartPath.ToLower(), string.Empty); HttpContext.Current.Response.StatusCode = (int)HttpStatusCode.MovedPermanently; HttpContext.Current.Response.StatusDescription = "301 Moved Permanently"; HttpContext.Current.Response.End(); } } } }

And patch in in place of the regular Alias Resolver.

1<configuration xmlns:patch="http://www.sitecore.net/xmlconfig/">
2<sitecore> <pipelines>
3<httpRequestBegin> <processor type="HiMyNameIsTim.Core.Pipelines.AliasAsRedirectResolver, LabSitecore.Core" patch:instead="*[@type='Sitecore.Pipelines.HttpRequest.AliasResolver, Sitecore.Kernel']"/> </httpRequestBegin>
4</pipelines> </sitecore>
5</configuration>

The above code is adapted from a solution given by Jordan Robinson but with a bug fixed to stop every valid URL without an alias writing an error to the log file.

A first look at Sitecore SPEAK 3

A first look at Sitecore SPEAK 3

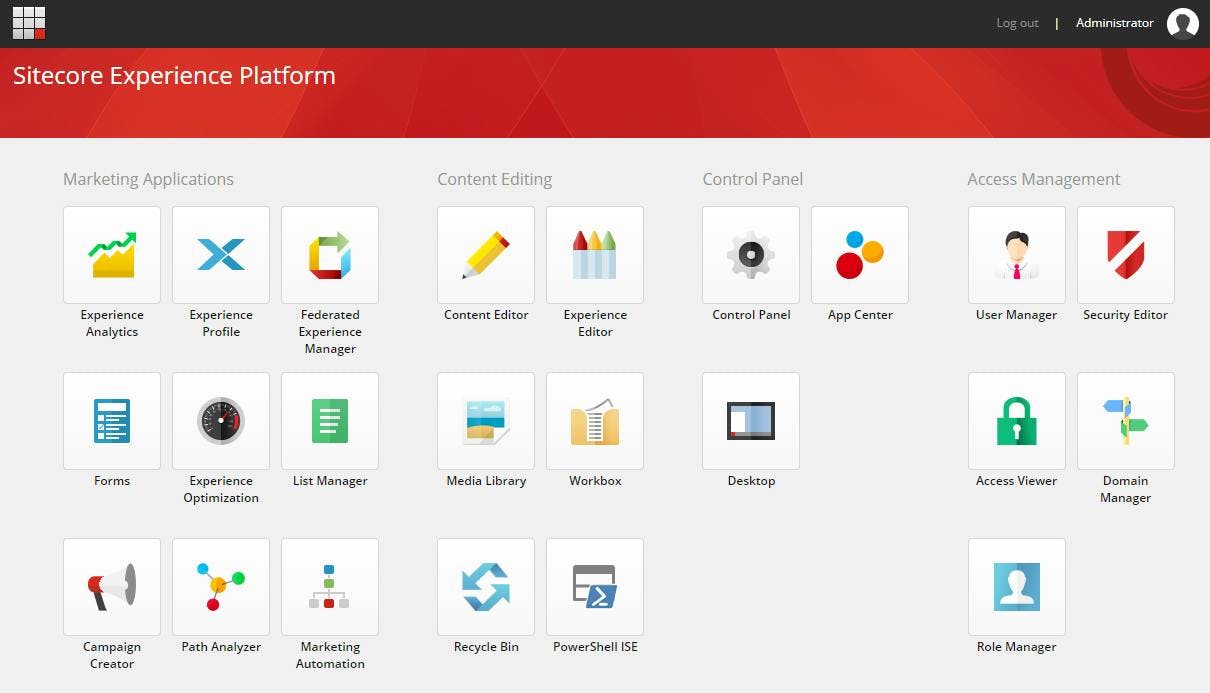
SPEAK (Sitecore Process Enablement and Accelerator Kit) is the framework for constructing admin interfaces in Sitecore. It was introduced to the platform prior to Sitecore 8, but really became the way to do things after Sitecore 8's UI refresh which introduced the start page and made accessing full page SPEAK applications logical.

SPEAK 1 and 2

The goals of SPEAK were to:

  • Provide a streamlined approach to application development.
  • Enable reuse of UI elements.
  • Enforce a consistent look and feel.

In order to achieve this SPEAK 1 and 2 provides a component library of controls that can be used to construct pages. This ensures that the UI retains a consistent look and feel, and also minimizes the amount of work on a Sitecore developer. Logic is then added to an application using JavaScript for the front end and C# for server side code.

While this all sounds great many developers find SPEAK hard to use. In order to construct a UI out of the re-usable components, Sitecore lent on it's existing functionality to be able to construct pages out of presentation items, however there is no WYSIWYG editor and the only real way to construct the layout is through Sitecore Rocks. This in itself isn't awful, but when combined with the fact the average Sitecore developer doesn't need to build an admin application that often, it presents a steep learning curve using a tool they may not use to put together components they're not familiar with.

SPEAK 3

SPEAK 3 aims to address complaints in previous versions by introducing a completely new framework based on Angular.

Since SPEAKs initial incarnation, client side application development has moved on a long way, so rather than continuing to construct their own framework, Sitecore has chosen Angular as the the platform to use going forward.

Begin Angular, SPEAK 3 applications can run independently of Sitecore, however the purpose of SPEAK 3 is still to make it simple to integrate Sitecore-branded applications into the content manager.

My First Look

Before being a Sitecore back-end developer I worked on bespoke web based applications using client side frameworks such as Knockout, so the news that Sitecore was going to adopt Angular was great. Digging into Angular again however has given me a first hand experience of how fast the JavaScript world is changing. Gone is the promotion of MVC on the client being replaced with service/controller patterns. Whereas with Knockout and AngularJS (what Angular 1.x is now known as) we could add data binding to just an aspect of a page, Angular is really for running an entire application, routing and all.

Building an SPEAK 3 application really means building an Angular application with some modules provided by Sitecore. These modules will provide integration features such as:

  • Sitecore context
  • Translations for applications
  • Translations for the SPEAK 3 component library
  • Component user access authorization
  • Preventing cross-site request forgery (Anti-CSRF)

In addition to this the SPEAK 3 components will also sort out compatibility issues such as modifying the routing so that the application no longer needs to be in the route of the site and can be in a sub-folder of Sitecore.

Angular for a Sitecore dev

To start it's good to know an outline of what developing Angular involves.

Angular 2+ is built using TypeScript. You don't need to use TypeScript, but as most of the examples are you probably will want to too. TypeScript is a superset of of JavaScript which adds strong typing support as well as other features of ECMAScript 2015 to backport it to older versions of JavaScript.

TypeScript needs to be compiled into JavaScript before it can run in the browser.

The easiest way to get started with Angular and TypeScript is using Node.js to install tools via NPM. Node is not a requirement for Angular and you won't need it in production, but for local dev using Node to host your application can make life a lot easier.

Angular has a CLI which makes things easy to create and run an Angular application.

Visual Studio can be used as an IDE for TypeScript and Angular, but you might find life easier using Visual Studio Code.

It's better than it sounds :)

All this might sound a bit daunting to the average C# developer. Technologies like Node and NPM traditionally are more at home in the open source community.

There is however a lot to be positive about. If your the type of dev that prefers writing c# to JavaScript, then the inclusion of TypeScript is going to please you, as it brings the type checking structure and class organisation that we're used too.

The angular cli (command line interface) is also a reason to be pleased. One large difference between the .net and open source world has been the ability to click a button and get going. Open source typically comes with the setup of many components to get a solution working. At times when you try to learn something it can feel like your spending more effort doing setup that actual dev on the platform. Angular still needs to have all these components put together, but the cli takes care of all this for you, effectively recreating a file new project experience, just through a command line.

Sitecore Logging

Sitecore Logging

One of the advantages of using a platform like Sitecore over completely bespoke development, is the number of features that are built-in that day to day you completely take for granted. An important one of those is logging.

If you're building a bespoke application, adding some sort of support for generating log files can be a bit of a pain. Granted there are solutions that can be added to your project that do most of the lifting for you, but you still need to think about it, decide which to use and understand how to use it. With Sitecore the ability to write to a log file has been built in along with the logic that's going to delete old log files and stop your servers hard disk filling up. Under the hood Sitecore is using Log4Net to generate log files, a side effect of this is that config changes can not be made using patch files.

Logs are written to the logs folder within your data folder. If your on Sitecore 8.2 or below this will be adjacent to your website folder. If your on Sitecore 9 or using Sitecore PaaS this will be in the App_Data folder within your sites folder.

The different log files

Sitecore generates 6 different log files while it's running, these are:

Log - A general log file which you can write to
Crawling - Logs from the Sitecore Search Providers for crawling
Search - Logs from the Sitecore search providers for searches
Publishing - Logs generated during Sitecore publishes
FXM - Logs from federated experience manager
WebDAV - A log for WebDAV activity

Customizing the amount of detail

At different times you will likely want to see a different amount of detail in your log files. For instance on a production server you will want to keep logs to a minimum to maximise performance. However in a different environment where you are trying to debug an issue you would want all the logs you can get.

For this reason when writing a log a priority level is assigned and each log file can be configured to only write logs at a certain level or below to disk.

Priority levels are:

  1. DEBUG
  2. INFO
  3. WARN
  4. ERROR
  5. FATAL

To configure what level of logging should be output, configure the priority value in the log4net section of the web.config file.

1<log4net>
2 <appender name="LogFileAppender"
3 type="log4net.Appender.SitecoreLogFileAppender, Sitecore.Logging">
4 <file value="$(dataFolder)/logs/log.{date}.txt" />
5 <appendToFile value="true" />
6 <layout type="log4net.Layout.PatternLayout">
7 <conversionPattern value="%4t %d{ABSOLUTE} %-5p %m%n" />
8 </layout>
9 </appender>
10 <root>
11 <priority value="INFO" />
12 <appender-ref ref="LogFileAppender" />
13 </root>
14</log4net>

Writing to the log file

Writing to the log file is super easy to do from within your Sitecore application. The Sitecore.Diagnostics.Log class contains static functions to write to the general log file at different priority levels.

1// Writes a log at the error priority level
2Sitecore.Diagnostics.Log.Error("That wasn't meant to happen", this);
Custom Experience Buttons vs Edit Frames in Sitecore

Custom Experience Buttons vs Edit Frames in Sitecore

So your going that extra mile and fully supporting the experience editor in your Sitecore solution, but how do you support a WYSIWYG editor when a field isn't actually visible, or you need to provide the ability to edit a complex field type such as a drop-down or a multi-list?

The solution is to use either Edit Frames or Custom Experience Buttons, both of which will display a dialog containing the fields to edit. The difference between them comes down to where the toolbar containing a button will appear.

Edit Frames require extra code to be added to your view and are designed to surround a section(s) of your view. Custom Experience buttons however appear on the existing tool bar that's shown when you select a component in the experience editor.

Edit Frame

With an edit frame you can surround a section of html within your view with a clickable target, that will display a toolbar with a button to launch the dialogue.

To set up an edit frame:

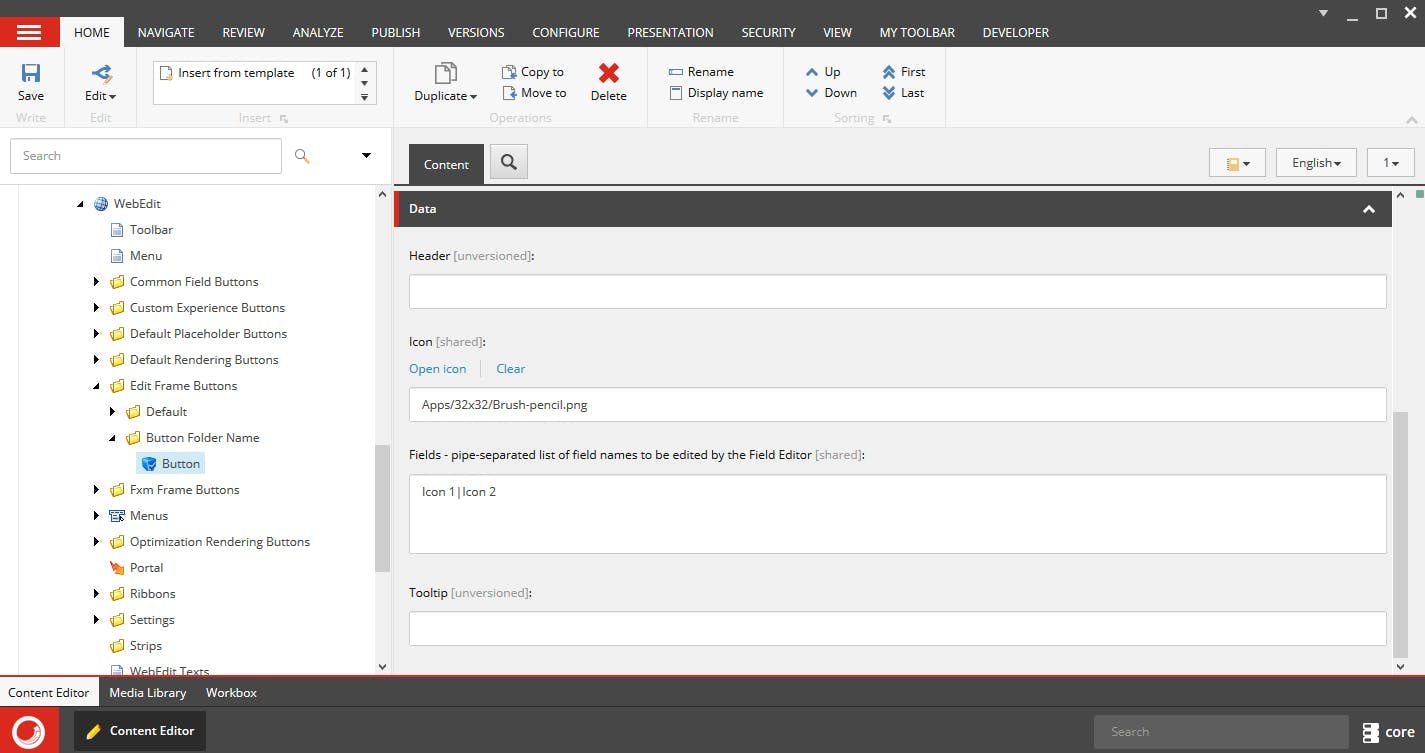
  • In the core database navigate to /sitecore/content/Applications/WebEdit/Edit Frame Buttons and create a new item based on Edit Frame Button Folder. This folder will be referenced in your view for the collection of buttons to be displayed.
  • Under the new folder create a new item based on Field Editor Button and give it the name of your button.
  • On your button item make sure you set an icon and the list of fields the button should allow the content editor to edit. These should be pipe separated.
  • In Visual Studio open the view for your rendering
  • Add a reference to Sitecore.Mvc.Extensions
  • Surround the section to show the button with a using block as follows:
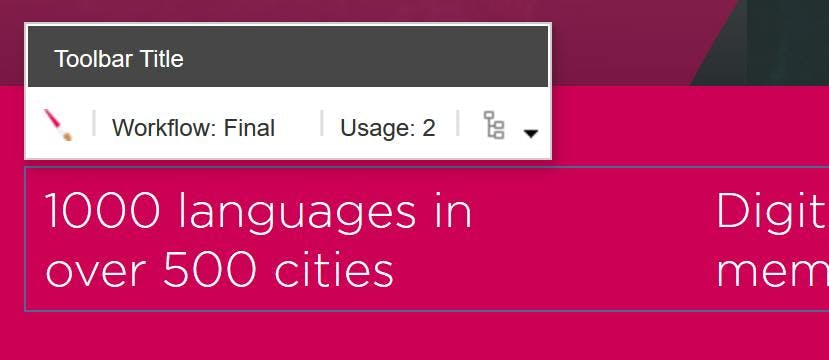
1@using (Html.BeginEditFrame(RenderingContext.Current.ContextItem.Paths.FullPath, "Button Folder Name", "Toolbar Title"))
2{
3 // HTML here
4}
  • You will now see a toolbar appear in the experience editor
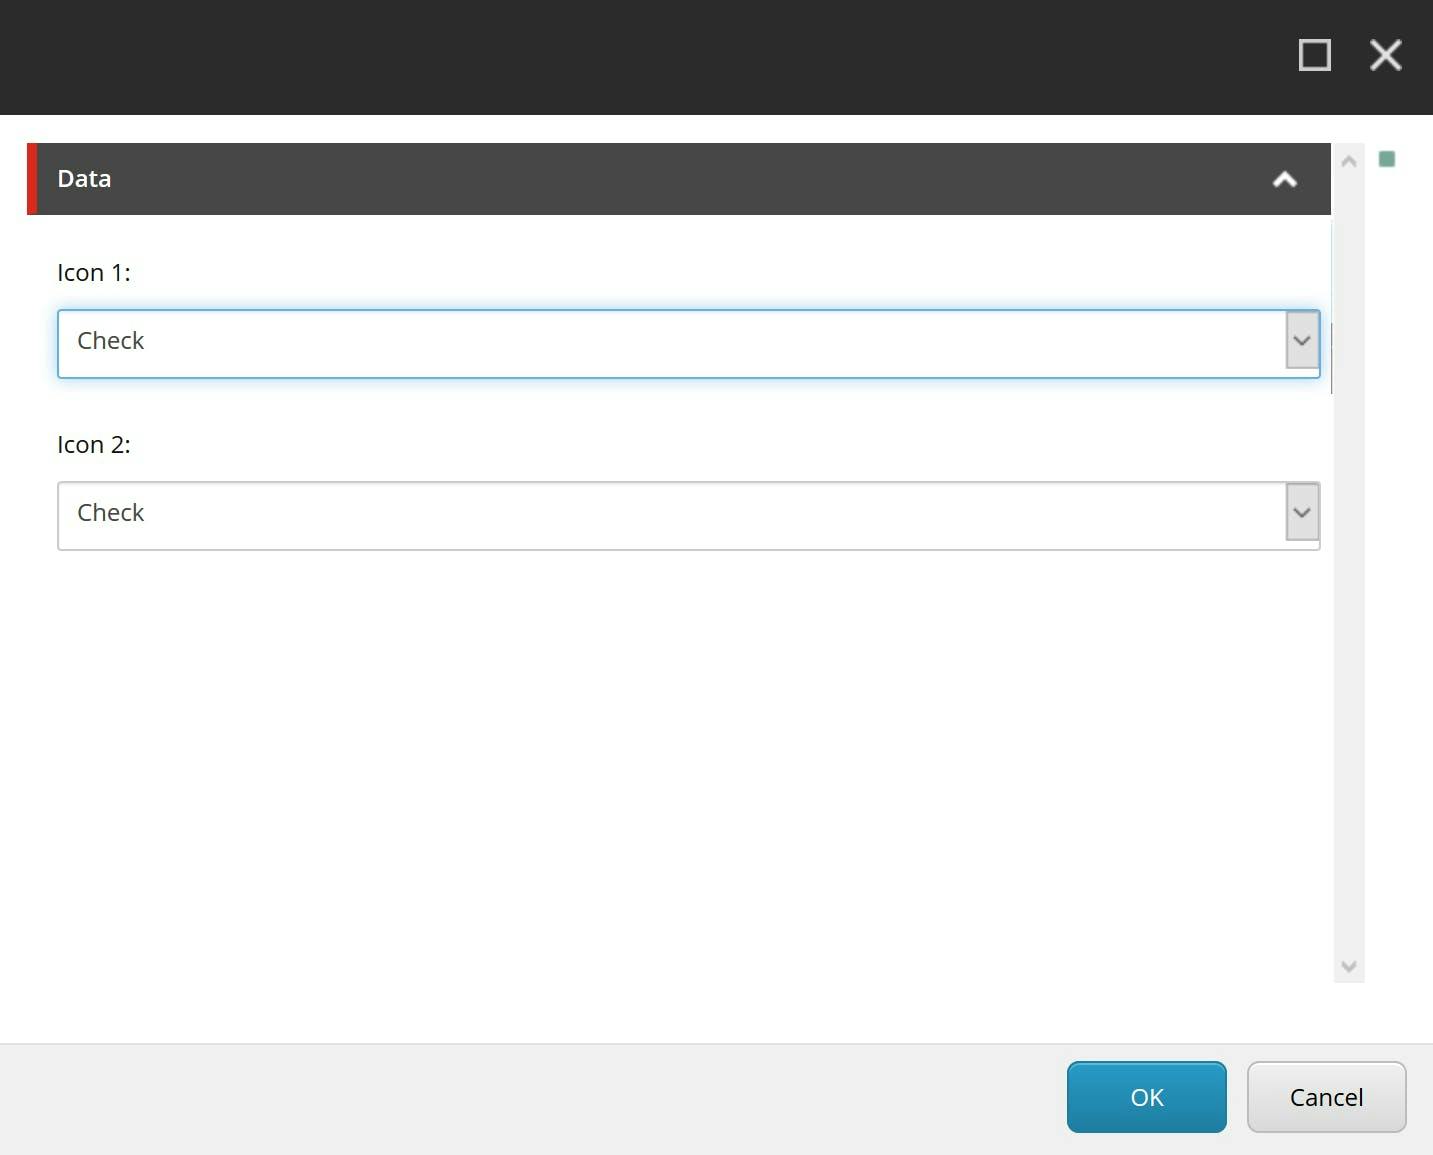
  • Clicking the icon will load a dialogue to edit the listed fields

Custom Experience Buttons

Custom experience buttons differ to edit frames in that you do not need to add any code to your views. Rather than having 1 or more clickable areas in your view the button will appear on the toolbar for the entire component. This makes them beneficial when the field doesn't directly relate to a section in the view. e.g. for editing a background video that may span the entire components background.

To set up a custom experience button:

  • In the core database navigate to /sitecore/content/Applications/WebEdit/Custom Experience Buttons and create a new item based on Field Editor Button.
  • On your button item make sure you set an icon and the list of fields the button should allow the content editor to edit. These should be pipe separated.
  • Switch to the master DB and navigate to the rendering item for your component
  • In the field for Experience Editor Buttons select the new button
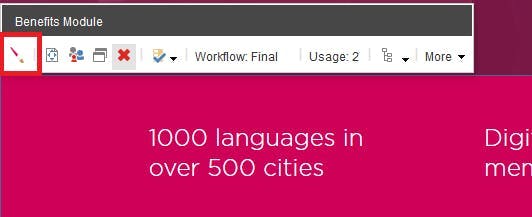
  • Selection the component will now show the additional button on the toolbar
  • Clicking the icon will load a dialogue to edit the listed fields