Blog
Managing Redirects in Sitecore

Managing Redirects in Sitecore

One of the most important aspects if not the most important aspect to managing a website is SEO. It doesn’t matter how good your website is, it doesn’t really matter if nobody can find it. Creating good SEO is a lot about having pages match what users are searching for, which then results in a high ranking for those pages. However, a second part to this formula is what happens with a page when it no longer exists. For instance, one day this blog post may no longer be relevant to have on our site, but up until that point search engines will have crawled it, people will have posted links to it and all of this adds to its value which we would to lose should it be removed. An even simpler scenario could be that we rename the blog section to something else and the page still exists under a different URL, but links to it no longer work.

Fortunately, the internet has a way of dealing with this and it’s in the form of a 301 redirect. 301 redirect are an instruction to anyone visiting the URL that the page has permanently moved to a different URL. When you set up a 301 redirect it achieves two things. Firstly, users following a link to your site end up on a relevant page rather a generic page not found message. Secondly search engines recrawling your site update their index with the new page and transfer all the associated value. So, to avoid losing any value associated with a page, whenever you move, rename or remove a page you should also set up a redirect.

Sitecore

Given how important redirects are it’s then surprising that an enterprise CMS platform like Sitecore doesn’t come with a universal way to set redirects up out of the box.

Typically, when we’ve taken over a site one of the support requests we will eventually receive is a question surrounding setting up a redirect from a marketer who’s ended up on Sitecore’s documentation site and is confused why they can’t find any of the things in this article https://doc.sitecore.com/users/sxa/17/sitecore-experience-accelerator/en/map-a-url-redirect.html.

The article appears to suggest that creating redirects is a feature that is supported, however it’s only available to sites built using Sitecore Experience Accelerator rather than the traditional approach.

More often that not, the developers who created the site will have added 301 redirect functionalities but will have done it using the IIS Redirect module, which while serves the purpose of creating redirects does not provide a Sitecore interface for doing so.

301 Redirect Module

Fortunately, there are some open source modules available which add the missing feature to Sitecore. The one we typically work with is neatly named 301 Redirect Module.
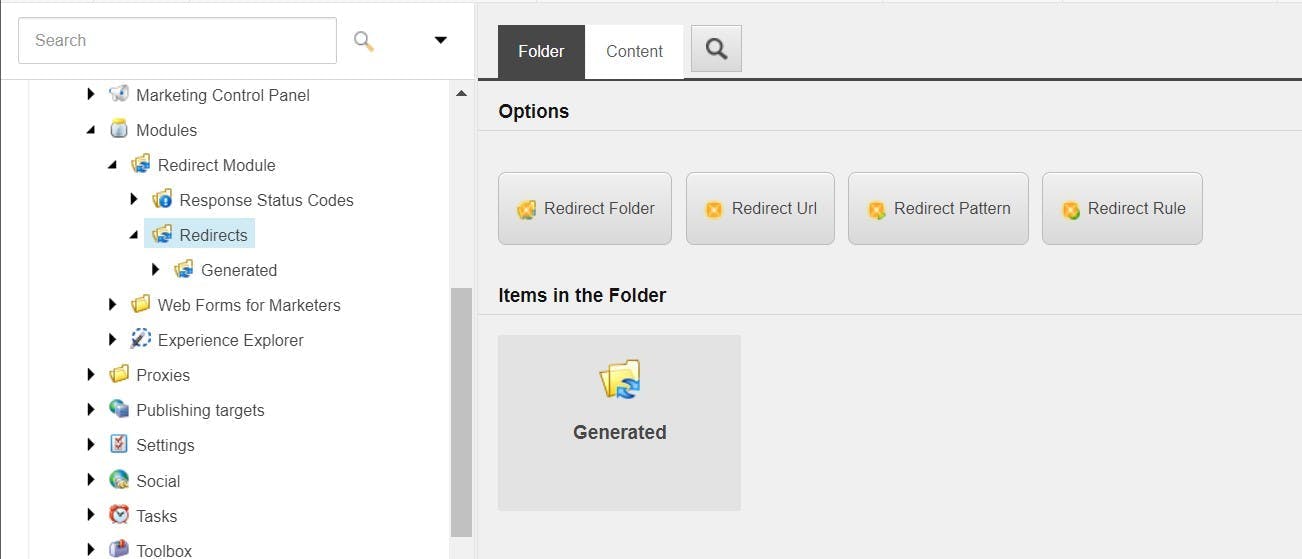
Once installed the module can be found in the System > Modules folder. Clicking on the Redirects folder will give you the option to either create another Redirect Folder to help group your redirect into more manageable folders, Redirect URL, Redirect Pattern or Redirect Rule.
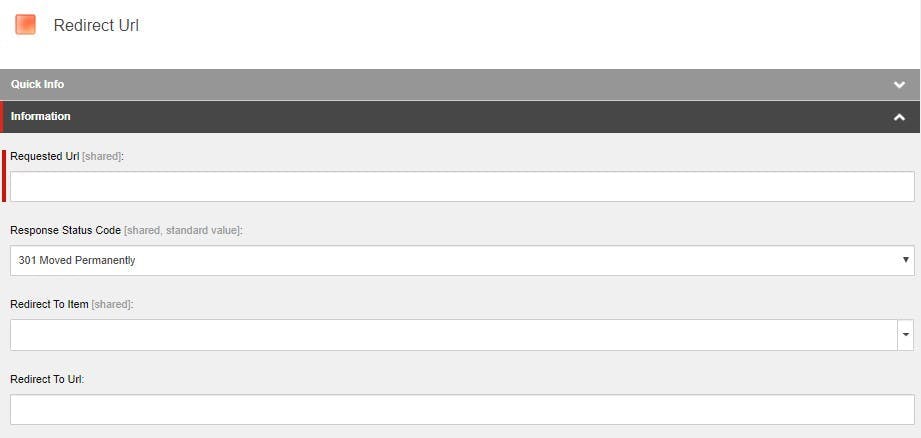
This is by far the most common redirect to be set up. You specify an exact URL that is to be redirected and set the destination as either another exact URL or a Sitecore item. There’s even an option to choose if it should be a permanent or temporary redirect.
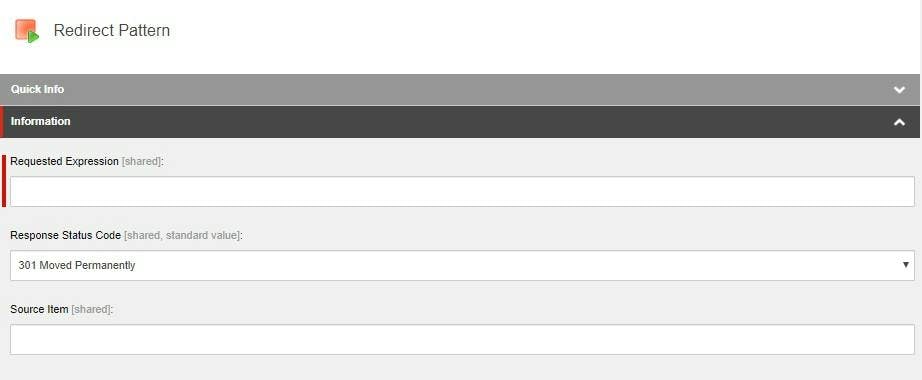
Redirect patterns are slightly more complex and require some knowledge of being able to write regular expressions. However, these are most useful if you ever want to move an entire section of your site. Rather than creating rules for each of the pages under a particular page, one rule can redirect all of them. Not only does this save time when creating the redirects, but it also makes your list of redirects far more manageable.

Auto Generated Rules

One of my favourite features of the 301 Redirect Module is that it can auto generate rules for any pages you move. For instance, if you decide a sub-page should become a top-level page moving it will result in a rule automatically being generated without you having to do a thing.

Summary

A marketer’s ability to manage 301 Redirect is as important as them being able to edit the content on the site and while traditional Sitecore sites may be missing this functionality it can easily be added using 3rd party modules, best of all they’re free!


User Authentication across sub domains in Sitecore

User Authentication across sub domains in Sitecore

The Scenario

In some scenarios you may have sub domains set up on your site, this may be to have an api configured as a separate site, or you may have a microsite set up on a sub domain. Depending on the scenario you may also want a user who it logged in on one of the sites to be logged in on the other.

When providing a login section to a site, after the visitor logs in their authentication is tracked using cookies. Cookies are linked to a domain and as your sites only differ by sub-domain you may be thinking great it should just work, no need for a single sign on solution. But you would be wrong.

The Solution

By default, cookies will be set on a specific domain including the sub-domain unless you tell it otherwise. Fortunately, this is quite easy to do.

In the web.config file, find the section for forms authentication and add an attribute domain set to the top-level domain. Your authentication should now always be set on the top level domain and work across all subdomains.

1<system.web>
2 <authentication mode="None">
3 <forms name=".ASPXAUTH" cookieless="UseCookies" domain="mydomain.com" timeout="30"/>
4 </authentication>
5<system.web>
Bulk Inserting data using Entity Framework

Bulk Inserting data using Entity Framework

Using tools like Entity Framework makes life far easier for a developer. Recently I blogged about how using them is what makes .Net Core one of the best platforms for prototype development, but the benefits don’t end there. They are also great from a security perspective by cutting a lot of risk around SQL injection attacks just by avoiding easy mistakes when using regular ADO.NET.

However, they do have some downsides, a main one being that they are particularly slow when it comes to doing bulk inserts to a database.

For example, assume you have an application which regularly receives an xml import file consisting of 200,000 records and each one either needs to be an insert of an update into the db. You’ll quickly learn that looping through the whole lot and then calling save changes results in a process taking an extremely long time to run, it may even just timeout. You then decide to get rid of that long save changes line by breaking it up into blocks of 500 and call save changes for each of those. That may save the timeout issue, but it still results in a process potentially lasting around an hour.

The problem is that this is a scenario Entity Framework or EF.Core just weren’t designed to handle. As a solution you could opt to drop Entity Framework altogether and revert to something like a native SQL Bulk Insert command, but what if you need to be doing some processing in code on the record before the import happens? What if you have one of those classic not quite always valid XML, XML files which would cause SQLs Bulk Insert to fail.

The solution is to use an open source extension called EFCore.BulkExtensions.

EFCore.BulkExtensions

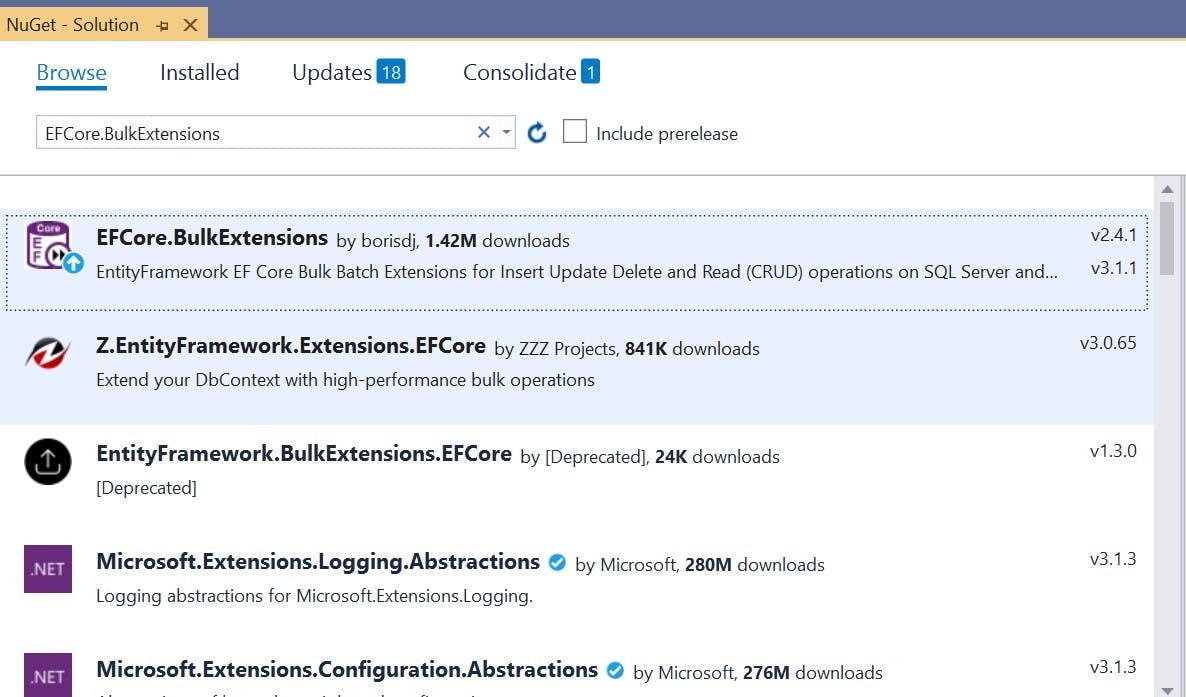
EFCore.BulkExtensions is a set of extension methods to Entity Framework that provide the functionality to do bulk inserts. You can add it to your project using NuGet and you’ll find the project on GitHub here https://github.com/borisdj/EFCore.BulkExtensions

Usage is also very simple to do. Let’s assume you have some existing tradition EF code that loops through a collection and for each one create a new db item and adds it to the db:

1public void DoImport(List<foo> collection)
2{
3 foreach (var item in collection)
4 {
5 Jobs job = new Jobs();
6
7 job.DateAdded = DateTime.UtcNow;
8 job.Name = item.Name;
9 job.Location = item.Location;
10
11 await dbContext.Jobs.AddAsync(job);
12 }
13
14 await dbContext.SaveChangesAsync();
15}

Rather than adding each item to the Entity Framework db context, you instead create a list of those objects and then call a BulkInsert function with them on your db context.

1public void DoImport(List<foo> collection)
2{
3 List<Jobs> importJobs
4 foreach (var item in collection)
5 {
6 Jobs job = new Jobs();
7
8 job.DateAdded = DateTime.UtcNow;
9 job.Name = item.Name;
10 job.Location = item.Location;
11
12 importJobs.Add(job);
13 }
14
15 await dbContext.BulkInsert(importJobs);
16}

If also works for updates, but rather than creating a new item, first retrieve it form the db and then at the end call BulkInsertOrUpdate with the list.

1await dbContext.BulkInsertOrUpdate(importJobs);

From my experience doing this took my import process that would run for over an hour down to something which would complete in a few minutes.

Top reasons .Net is amazing for prototyping

Top reasons .Net is amazing for prototyping

The other day someone told me .net was slow to get something built, and to be fair to the person I can see why he would have thought that. Most of his interaction with .net projects have been on complex with large enterprise applications that often have integrated multiple other applications.

However, I would maintain that .net is a framework that is actually really fast to develop on and that what he had perceived as being slow was the complexities of a project rather than the actual coding time.

In fact, I would say it's so fast to get something built in it, it actually becomes the fastest thing to develop a prototype in. Here are my top reasons why.

ASP.NET Core

ASP.NET Core inherits all the best bits from the ASP.NET Framework that came before it, giving the framework almost 20 years of refinement since its original release in 2002. The days of WebForms in the original ASP.NET are now long behind us and we now have the choice of building web applications with either MVC or Razor Pages.

Razor provides the perfect combination of a view language providing helpers to render your html without limiting what can be done on the front end. How you code your HTML is still completely up to you, the helpers just provide features like binding that make it even faster to do.

Another great thing about .Net core over that which came before it, is its platform independent. Rather than being confined to just Windows, you can run it on Mac or Linux too.

Great starter templates

What kicks of a great prototype project is starting with great templates, and ASP.NET Core has a bunch.

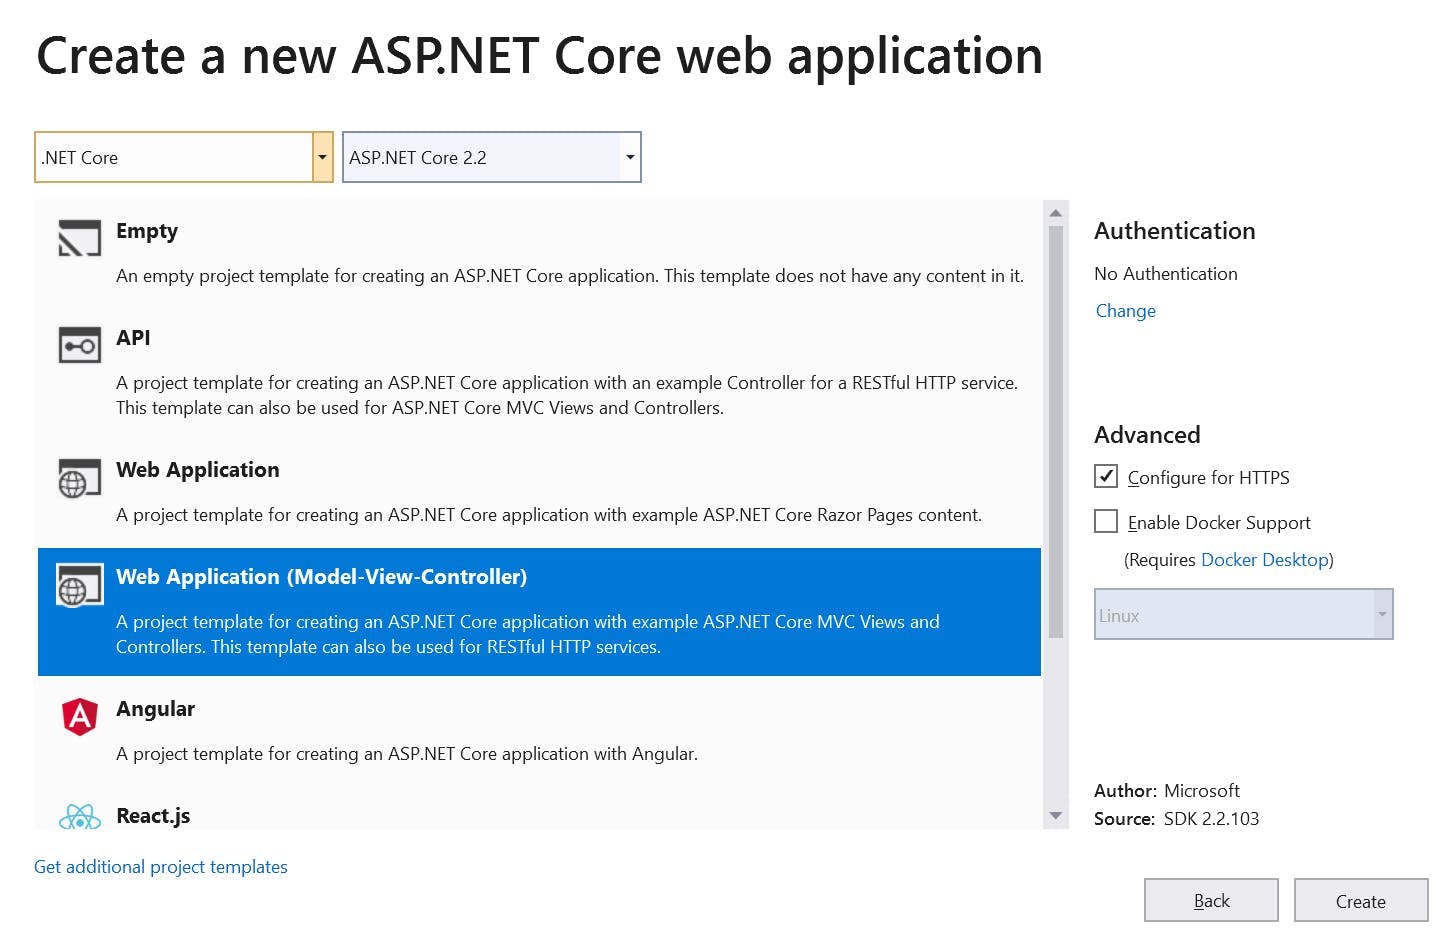
As already mentioned, you can build a Web Application with either Razor Pages or MVC, but the templates also provide you with the base for building an API, Angular App, React.js or React.js and Redux or you can simply create an Empty application.

My preference is to go for MVC as it's what I'm the most familiar with and a key thing for rapidly building a prototype is that you develop rapidly. The idea is to focus on creating something new and unique, not learn how to develop in a new framework.

The MVC Web Application gives you a base site to work with a few pages already set up, bootstrap and jQuery are already included so you start right at the point of working on your logic rather than spending time doing setup.

SQL Server and EF Core

I've always been a bit of a database guy. I'm not sure why, but its a topic that has always just made sense to me, and despite being a topic that can get quite complex, the reasons behind it being complex always feel logical.

When it comes to building a prototype though there are two aspects which make storage with .net core super simple.

Firstly, Entity Framework Core (EF Core) means you don't really need to know any SQL or spend any time writing it. It helps if you do, but at a minimum all you need to be doing is creating a model in your code, adding a few lines for a DB context that tells EF.Core that a model is a table and how they relate. Then turn on migrations and you're done. When you run the application, the DB gets created for you and each time you change your model, you just add another migration and the next time the application runs the application the DB schema gets updated.

Querying your DB is done by writing LINQ queries against your entity framework model, allowing you to have next to no understanding of SQL and how the DB works. Everything is just done by magic for you.

The second part is SQL Server and its different versions. Often when you think of SQL Server you think of the big DB engine with its many many components that you install on a server or your local machine but there's two others which are even more important. LocalDB and Azure SQL.

LocalDB is an option that can be installed as part of Visual Studio. No separate application is needed or services to be running in the background. It is essentially the minimum required to start the DB engine to be used for development purposes. In practical terms this means when you start your application EF.Core can run off a LocalDB which didn't require any setup, but as far as your application in concerned it is no different than working with any other version of SQL Server.

Azure SQL as the name implies is SQL Server on Azure. The only thing I really need to say about this is that you can swap LocalDB and Azure SQL with ease. They may be different but as far as your prototype is concerned, they are the same.

Scaffolding

The only thing quicker than writing code is having someone else do it for you. So we've created our application from a template, added a model which generated our database and now its time to create some pages. Well the good news is it's still not time to write much code because Visual Studio can scaffold out pages based on our model for us!

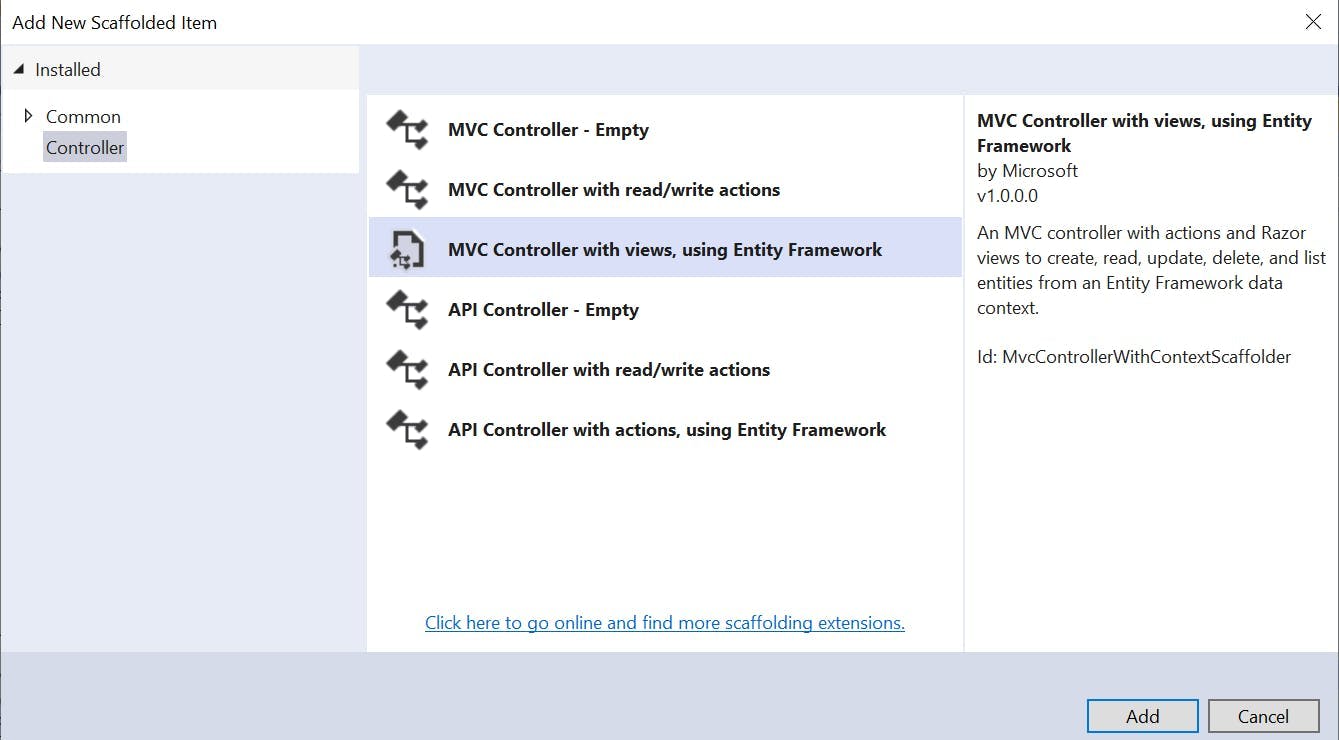
Adding a controller to our project in Visual Studio gives us some options on what should be generated for us, one of which is MVC Controller with views, using Entity Framework. What that means is given a model it will create controllers and views for listing items, creating them, editing them and deleting them. No coding by us required!

Now it's unlikely that is exactly what you're after, but it's generally a good starting place and deleting code you don't need is far quicker then writing it.

Azure

Lastly there is Azure. You may have spotted a theme to all these points and that is they all remove any effort required to do any setup and instead focus on building your own logic, and this point is no different.

I remember a time, when if I wanted a server to put an application on, I had to request it, and then wait a while. What I would get back would either be a server that already had resources running on it, or a blank server that would need applications installed on it. e.g. SQL Server or .Net Framework. IIS wouldn't have been configured and it would be a number of hours before my application would be running.

With Azure you don't even really need to leave Visual Studio. From the publish dialog box you can create a new App Service and DB, and then publish. All the connection strings are sorted out for you. There are service plans which cost next to nothing, a domain is configured for you and at the end of the publish the website opens and is working. The whole process has taken less than 10 minutes.