Tag: SQL Azure
Exporting a Database from SQL Azure

Exporting a Database from SQL Azure

If you need to copy your SQL Azure database locally then exporting it as a Bacpac file is the simplest route to go.

There's many ways you can do this including PowerShell, REST API, and even SQL Server Management Studio. However I am going to show you how to do it through the Azure Portal.

Exporting a Bacpac file

First off find your DB in the Azure Portal.

In the top set of buttons when you view your DB (make sure you're on the actual DB not the server), you will see an export button 3rd from the left.

Clicking Export takes you to a page where you need to configures the filename to export as, the storage account to export to and the authentication to log into the DB. The storage account is required as a place for the export to be saved, you will get the choice of configuring the container for it to go into, so I like to create one called backups.

Checking the status of the export

When you start the export you will get a confirmation that it has started, but knowing how to check what the progress is isn't obvious.

To check the progress, navigate to the DB server in the portal.

In the left nav, under Data management, select Import/Export history.

From here you can view the status of each of the exports.

Once they are complete you can download them through blob storage.

Managing SQL Azure Users in the Portal

Managing SQL Azure Users in the Portal

Managing users for a SQL Azure DB is something which I have found is more complex that you would expect. A lot of guides will also tell you it's something which can't be done through the admin portal and needs to be done using scripts in the DB.

This is true to some extent. If you want to set specific role permissions to a DB then you have to do it by assigning roles through SQL scripts. Also if you want to set usernames and passwords at a DB level rather than using Active Directory then this also needs to be done in the DB.

However if you want to give a bunch of active directory users admin access to all the DB's in a server or if you want to give a group of people the same access then this can be done through the azure portal.

Admin Permissions For All

When you create your DB instance an admin user will get created, and for some teams you could just share the password. However sharing passwords isn't that great and there is a better way.

In the Azure Portal search for groups in the big search box at the top.

Create a security group with a sensible name, description and add all the members who you want to give admin permission to.

Go to your SQL server resource (this is the parent of the database), and got to the Azure Active Directory setting.

Click the top button to Set Admin, choose your new group and then click save. This will create the user with the correct permissions in the master DB of the server.

That's it, the members of the group will now be able to access any of the DB's on the server by logging in using Active Directory with Password through SSMS, or through the azure portal using Query Editor.

Query editor will actually give you a nice green tick if you have permission to log in.

To add or remove peoples access to the DB, just add and remove them from the group.

If you can't log in it could be due to a firewall permission for your IP rather than an actual login permission.

Permissions to Specific DBs

Giving everyone admin permission to every DB on the instance might not be what your after. Fine for a dev instance, but probably not something you want for production.

Fortunately the same concept of using groups can make life a lot easier but you will need to do some SQL scripting.

Create your group as above and then make sure your logged in as someone who is an active directory admin for the SQL Server. You can do this with the instructions above or if you want to be the only admin then rather than setting a group to be the admin, just set yourself.

Next log into the DB either using SSMS or Query Editor. Personally I prefer to use Query Editor as I'm doing everything else through the portal.

Our first script is to create an external user in our DB. In our case the external user is the group we want to give permission to rather than a specific user.

1CREATE USER [GROUP NAME]
2FROM EXTERNAL PROVIDER
3WITH DEFAULT_SCHEMA = dbo;

This is called adding a contained user to the DB.

Next we need to give the group some role permissions to do something.

1ALTER ROLE db_datareader ADD MEMBER [GROUP NAME];
2ALTER ROLE db_datawriter ADD MEMBER [GROUP NAME];

Repeat these steps for each DB you want to give the group access too.

The members of your new group should now have permissions to the individual DBs with reader and writer permissions.

If you want to give access to more people, just add them to the group.

Deploying a SQL DB with Azure Pipelines

Deploying a SQL DB with Azure Pipelines

Normally when I work with SQL Azure I handle DB schema changes with Entity Framework migrations. However if you using Azure Functions rather than Web Jobs it seems there's a number of issues with this and I could not find a decent guide which resulted in a working solution.

Migrations isn't the only way to release a DB change though. SQL Server Database projects have existed for a long time and are a perfectly good way of automating a DB change. My preference to use EF Migrations really comes from a place of not wanting to have an EF model and a separate table scheme when they're essentially a duplicate of each other.

Trying to find out how to deploy this through Azure Devops Pipelines however was far harder than I expected (my expectation was about 5 mins). A lot of guides weren't very good and virtually all of them start with Click new pipeline, then select Use the classic editor. WAIT Classic Editor on an article written 3 months ago!?!?! Excuse me while I search for a solution slightly more up to date.

Creating a dacpac file

High level the solution solution is to have a SQL Server Database project, use an Azure Pipeline to compile that to a dacpac file. Then use a release pipeline to deploy that to the SQL Azure DB.

I'm not going to go into any details about how you create a SQL Server Database project, its relatively straightforward, but the one thing to be aware of is the project needs to have a target platform of Microsoft Azure SQL Database otherwise you'll get a compatibility error when you try to deploy.

Building a SQL Server Database project in Azure Devops

To build a dacpac file create a new pipeline in Azure Devops (the yaml kind), select your repo and get yourself a blank configuration file. Also at this point make sure your code is actually in the repo!

The configuration I used looks like this; I've included notes in the code to explain what's going on.

1# The branch you want to trigger a build
2trigger:
3- master
4
5pool:
6 vmImage: "windows-latest"
7
8variables:
9 configuration: release
10 platform: "any cpu"
11 solutionPath: # Add the path to your Visual Studio solution file here
12
13steps:
14 # Doing a Visual Studio build of your solution will trigger the dacpac file to be created
15 # if you have more projects in your solution (which you probably will) you may get an error here
16 # as we haven't restored any nuget packages etc. For just a SQL DB project, this should work
17 - task: VSBuild@1
18 displayName: Build solution
19 inputs:
20 solution: $(solutionPath)
21 platform: $(platform)
22 configuration: $(configuration)
23 clean: true
24
25 # When the dacpac is built it will be in the projects bin/configuation folder
26 # to get into an artifact (probably with some other things you want to publish like an Azure function)
27 # we need to move it somewhere else. This will move it to a folder called drop
28 - task: CopyFiles@2
29 displayName: Copy DACPAC
30 inputs:
31 SourceFolder: "$(Build.SourcesDirectory)/MyProject.Database/bin/$(configuration)"
32 Contents: "*.dacpac"
33 TargetFolder: "$(Build.ArtifactStagingDirectory)/drop"
34
35 # Published the contents of the drop folder into an artifact
36 - task: PublishBuildArtifacts@1
37 displayName: "Publish artifact"
38 inputs:
39 PathtoPublish: "$(Build.ArtifactStagingDirectory)/drop"
40 ArtifactName: # Artifact name goes here
41 publishLocation: container

Releasing to SQL Azure

Once the pipeline has run you should have an artifact coming out of it that contains the dacpac file.

To deploy the dacpac to SQL Azure you need to create a release pipeline. You can do this within the build pipeline, but personally I think builds and releases are different things and should therefore be kept separate. Particularly as releases should be promoted through environments.

Go to the releases section in Azure Devops and click New and then New release pipeline.

There is no template for this kind of release, so choose Empty job on the next screen that appears.

On the left you will be able to select the artifact getting built from your pipeline.

Then from the Tasks drop down select Stage 1. Stages can represent the different environments your build will be deployed to, so you may want to rename this something like Dev or Production.

On Agent Job click the plus button to add a task to the agent job. Search for dacpac and click the Add button on Azure SQL Database deployment.

Complete the fields to configure which DB it will be deployed to (as shown in the picture but with your details).

And that's it. You can now run the pipelines and your SQL Project will be deployed to SQL Azure.

Some other tips

On the Azure SQL Database deployment task there is a property called Additional SqlPackage.exe Arguments this can be used to specify things like should loss of data be allows. You can find the list of these at this url https://docs.microsoft.com/en-us/sql/tools/sqlpackage/sqlpackage?view=sql-server-ver15#properties

If you are deploying to multiple environments you will want to use variables for the server details rather than having them on the actual task. This will make it easier to clone the stages and have all connections details configured in one place.

Data Factory: How to upsert a record in SQL

Data Factory: How to upsert a record in SQL

When importing data to a database we want to do one of three things, insert the record if it doesn't already exist, update the record if it does or potentially delete the record.

For the first two, if your writing a stored procedure this often can lead to a bit of SQL that looks something like this:

1IF EXISTS(SELECT 1 FROM DestinationTable WHERE Foo = @keyValue)
2BEGIN
3 UPDATE DestinationTable
4 SET Baa = @otherValue
5 WHERE Foo = @keyValue
6END
7ELSE
8BEGIN
9 INSERT INTO DestinationTable(Foo, Baa)
10 VALUES (@keyValue, @otherValue)
11END

Essentially an IF statement to see if they record exists based on some matching criteria.

Data Factory - Mapping Data Flows

With a mapping data flow, data is inserted into a SQL DB using a Sink. The Sink let's you specify a dataset (which will specify the table to write to), along with mapping options to map the stream data to the destination fields. However the decision on if a row is an Insert/Update/Delete must already be specified!

Let's use an example of some data containing a persons First Name, Last Name and Age. Here's the table in my DB;

And here's a CSV I have to import;

1FirstName,LastName,Age
2John,Doe,10
3Jane,Doe,25
4James,Doe,50

As you can see in my import data Jane's age has changed, there's a new entry for James and Janet doesn't exist (but I do want to keep here in the DB). There's also no ID's in my source data as that's an identity created by SQL.

If I look at the Data preview on my source in the Data Flow, I can see the 3 rows from my CSV, but notice there is also a little green plus symbol next to each one.

This means that they are currently being treated as Inserts. Which while true for one of them is not for the others. If we were to connect this to the sink it would result in 3 new records being added to the DB, rather than two being updated.

To change the Insert to an update you need an alert row step. This allows us to define rules to state what should be an insert and what should be an update.

However to know if something should be an insert or an update requires knowledge of what is in the DB. To do that would mean a second source, followed by a join on First Name/Last Name and then conditions based on which rows have an ID from the DB or not. This all seems a bit needlessly complicated, and it is.

Upsert

When using a SQL sink there is a 4th option for what kind of method should be used and that is an Upsert. An upsert will result in a SQL merge being used. SQL Merges take a set of source data, compare it to the data already in the table based on some matching keys and then decide to either update or insert new records based on the result.

On the sink's Settings tab untick Allow insert and tick Allow upsert. When you tick Allow upsert properties for Key columns will appear which is where you specify which columns should be used as a key. For me this is FirstName and LastName.

If you don't already have an Alter Row step it will warn you that this is missing.

Even though we are only doing what equates to a SQL merge, you still need to alter the rows to say they should be an upsert rather than an insert.

As we are upserting everything our condition can just be set to return true rather than analysing any row data.

And there we have it, all rows will be treated as an upsert. If we look at the Data preview we can now see the upsert icon on each row.

And if we look at the table after running the pipeline, we can see that Janes age has been update, James has been added and John and Janet stayed the same.

Top reasons .Net is amazing for prototyping

Top reasons .Net is amazing for prototyping

The other day someone told me .net was slow to get something built, and to be fair to the person I can see why he would have thought that. Most of his interaction with .net projects have been on complex with large enterprise applications that often have integrated multiple other applications.

However, I would maintain that .net is a framework that is actually really fast to develop on and that what he had perceived as being slow was the complexities of a project rather than the actual coding time.

In fact, I would say it's so fast to get something built in it, it actually becomes the fastest thing to develop a prototype in. Here are my top reasons why.

ASP.NET Core

ASP.NET Core inherits all the best bits from the ASP.NET Framework that came before it, giving the framework almost 20 years of refinement since its original release in 2002. The days of WebForms in the original ASP.NET are now long behind us and we now have the choice of building web applications with either MVC or Razor Pages.

Razor provides the perfect combination of a view language providing helpers to render your html without limiting what can be done on the front end. How you code your HTML is still completely up to you, the helpers just provide features like binding that make it even faster to do.

Another great thing about .Net core over that which came before it, is its platform independent. Rather than being confined to just Windows, you can run it on Mac or Linux too.

Great starter templates

What kicks of a great prototype project is starting with great templates, and ASP.NET Core has a bunch.

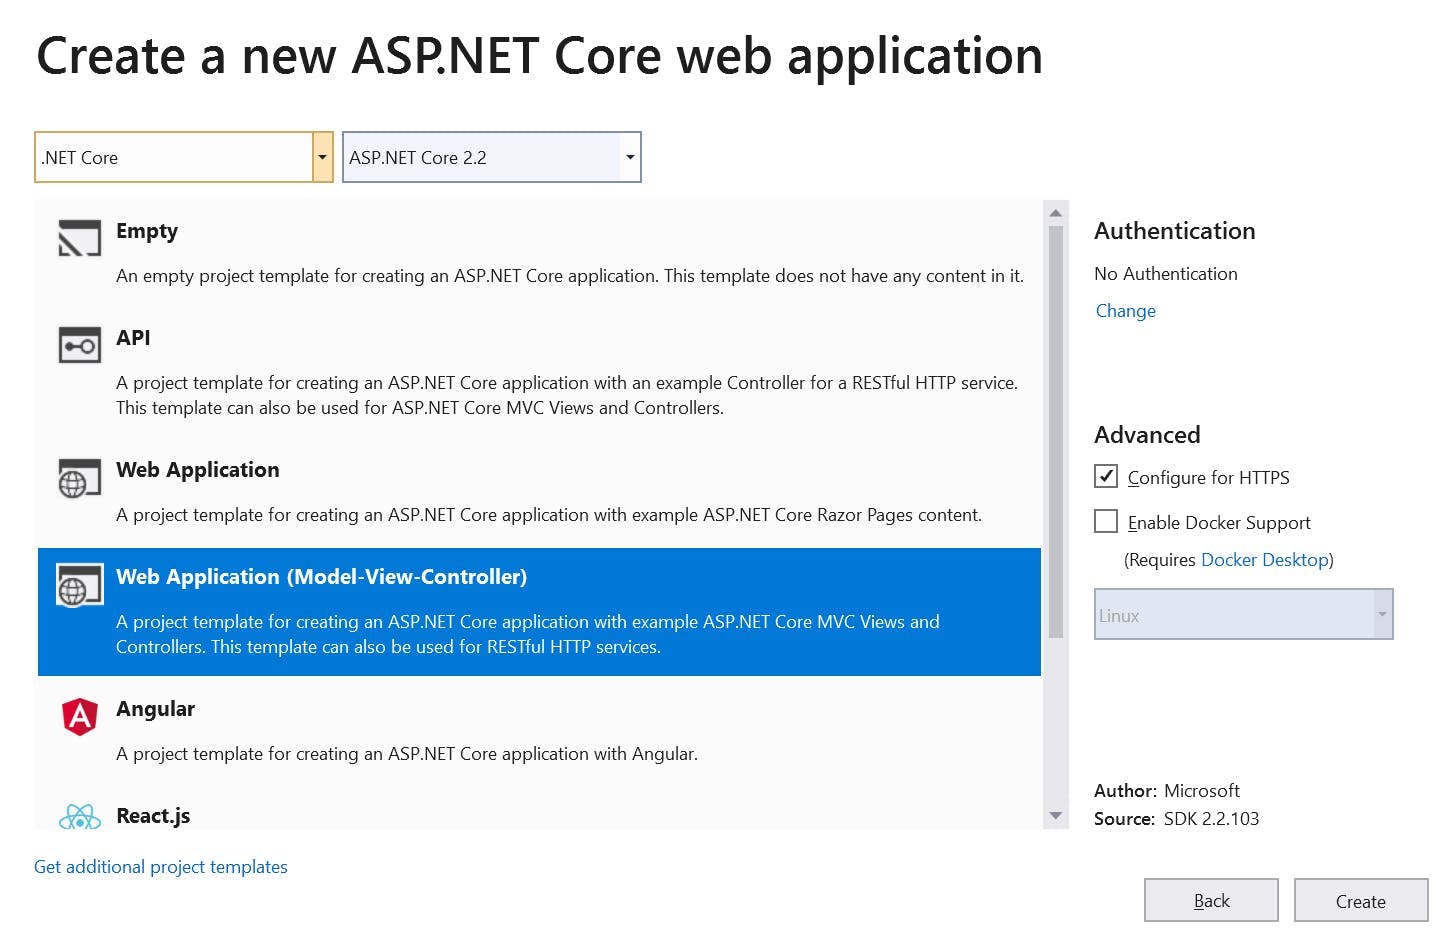
As already mentioned, you can build a Web Application with either Razor Pages or MVC, but the templates also provide you with the base for building an API, Angular App, React.js or React.js and Redux or you can simply create an Empty application.

My preference is to go for MVC as it's what I'm the most familiar with and a key thing for rapidly building a prototype is that you develop rapidly. The idea is to focus on creating something new and unique, not learn how to develop in a new framework.

The MVC Web Application gives you a base site to work with a few pages already set up, bootstrap and jQuery are already included so you start right at the point of working on your logic rather than spending time doing setup.

SQL Server and EF Core

I've always been a bit of a database guy. I'm not sure why, but its a topic that has always just made sense to me, and despite being a topic that can get quite complex, the reasons behind it being complex always feel logical.

When it comes to building a prototype though there are two aspects which make storage with .net core super simple.

Firstly, Entity Framework Core (EF Core) means you don't really need to know any SQL or spend any time writing it. It helps if you do, but at a minimum all you need to be doing is creating a model in your code, adding a few lines for a DB context that tells EF.Core that a model is a table and how they relate. Then turn on migrations and you're done. When you run the application, the DB gets created for you and each time you change your model, you just add another migration and the next time the application runs the application the DB schema gets updated.

Querying your DB is done by writing LINQ queries against your entity framework model, allowing you to have next to no understanding of SQL and how the DB works. Everything is just done by magic for you.

The second part is SQL Server and its different versions. Often when you think of SQL Server you think of the big DB engine with its many many components that you install on a server or your local machine but there's two others which are even more important. LocalDB and Azure SQL.

LocalDB is an option that can be installed as part of Visual Studio. No separate application is needed or services to be running in the background. It is essentially the minimum required to start the DB engine to be used for development purposes. In practical terms this means when you start your application EF.Core can run off a LocalDB which didn't require any setup, but as far as your application in concerned it is no different than working with any other version of SQL Server.

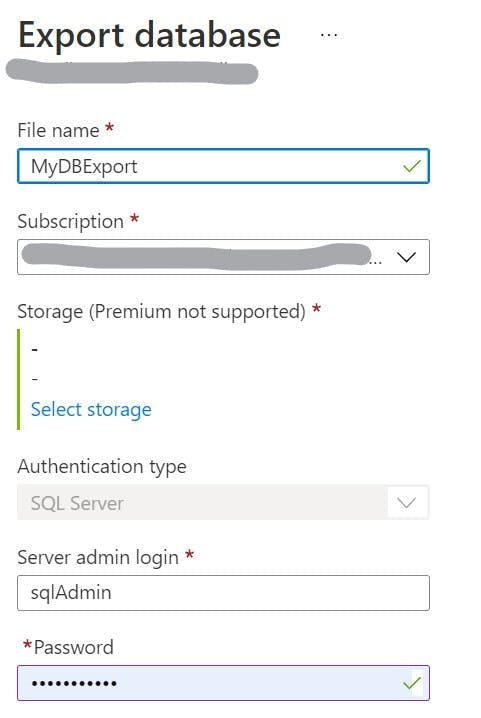
Azure SQL as the name implies is SQL Server on Azure. The only thing I really need to say about this is that you can swap LocalDB and Azure SQL with ease. They may be different but as far as your prototype is concerned, they are the same.

Scaffolding

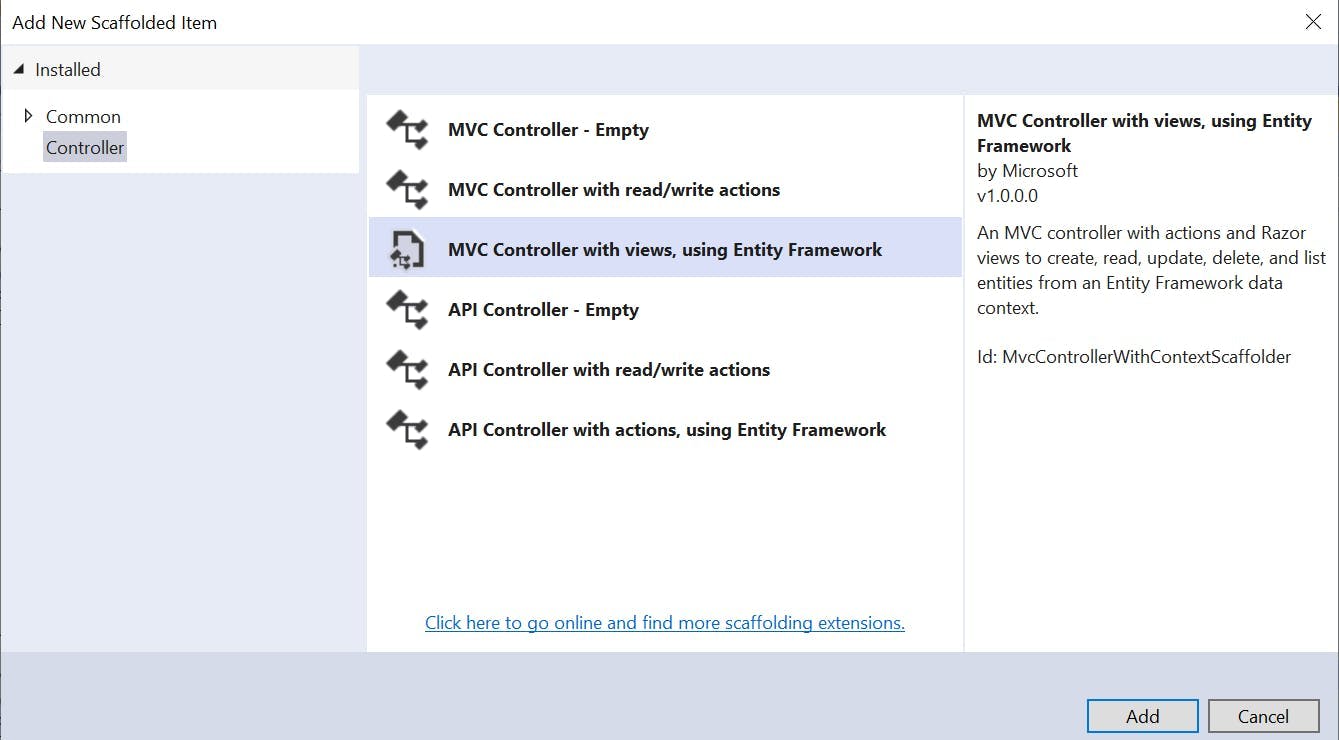
The only thing quicker than writing code is having someone else do it for you. So we've created our application from a template, added a model which generated our database and now its time to create some pages. Well the good news is it's still not time to write much code because Visual Studio can scaffold out pages based on our model for us!

Adding a controller to our project in Visual Studio gives us some options on what should be generated for us, one of which is MVC Controller with views, using Entity Framework. What that means is given a model it will create controllers and views for listing items, creating them, editing them and deleting them. No coding by us required!

Now it's unlikely that is exactly what you're after, but it's generally a good starting place and deleting code you don't need is far quicker then writing it.

Azure

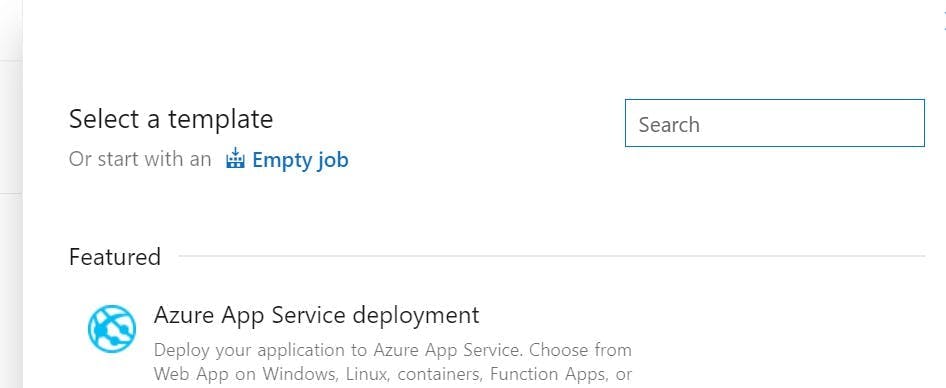
Lastly there is Azure. You may have spotted a theme to all these points and that is they all remove any effort required to do any setup and instead focus on building your own logic, and this point is no different.

I remember a time, when if I wanted a server to put an application on, I had to request it, and then wait a while. What I would get back would either be a server that already had resources running on it, or a blank server that would need applications installed on it. e.g. SQL Server or .Net Framework. IIS wouldn't have been configured and it would be a number of hours before my application would be running.

With Azure you don't even really need to leave Visual Studio. From the publish dialog box you can create a new App Service and DB, and then publish. All the connection strings are sorted out for you. There are service plans which cost next to nothing, a domain is configured for you and at the end of the publish the website opens and is working. The whole process has taken less than 10 minutes.