Blog

Responsive Images in Sitecore

By default, when you add an image to a page in Sitecore using the <sc:Image > control it will render height and width attributes on the resulting html. These are based on the images dimensions or any height and width properties you may have set server side.

The benefit of doing this is that when the browser renders the page, it already knows what space the image will take up before the image has loaded. This reduces the number of repaints the browser has to make and ultimately speeds up the page rendering time. If the height and width weren't specified then a repaint would happen after the image was loaded as the size would now be known.

However this can cause an issue when you are producing a responsive site that changes its layout based on the size of a device or width of a browser window. Because responsive design is done though CSS media tags the server does not know what the height and width of the image will be, unfortunately there's also no built in way to tell Sitecore to stop rendering the height and width tags. Not very good when you want to size your image to 100% width of an area that can change size.

The solution is to create a Pipeline. Pipelines are Sitecore's way of enabling you change how Sitecore works and their not overly complex to implement.

To create a pipeline that will affect the way an Image field is rendered your first need to create a GetImageFieldValueResponsive class as follows. The name of the class can be anything you want but I've called it GetImageFieldValueResponsive as it will be called after Sitecores GetImageFieldValue class.

1namespace SitecoreCustomization.Pipelines.RenderField
2{
3 public class GetImageFieldValueResponsive
4 {
5 public void Process(RenderFieldArgs args)
6 {
7 if (args.FieldTypeKey != "image")
8 return;
9 if (args.Parameters.ContainsKey("responsive"))
10 {
11 string imageTag = args.Result.FirstPart;
12 imageTag = Regex.Replace(imageTag, @"(&lt;img[^&gt;]*?)\s+height\s*=\s*\S+", "$1", RegexOptions.IgnoreCase);
13 imageTag = Regex.Replace(imageTag, @"(&lt;img[^&gt;]*?)\s+width\s*=\s*\S+", "$1", RegexOptions.IgnoreCase);
14 imageTag = Regex.Replace(imageTag, @"(&lt;img[^&gt;]*?)\s+responsive\s*=\s*\S+", "$1", RegexOptions.IgnoreCase);
15 args.Result.FirstPart = imageTag;
16
17 }
18 }
19 }
20}

The process function in the class is what will get called as the control is rendered. First it will check that the field type is an image and then will look to see if there is a parameter called responsive. This will allow us to control when Sitecore should output height and width tags and when it shouldn't. Lastly some Regex is used to remove the height, width and responsive properties from the image tag that will already have been generated by this point.

Next we need to tell Sitecore to start using this pipeline. We do this by creating a RenderField.config file and placing it in the App_Config\Include folder of your Sitecore solution.

1<configuration xmlns:patch="http://www.sitecore.net/xmlconfig/">
2 <sitecore>
3 <pipelines>
4 <renderField>
5 <processor
6 patch:after="*[@type='Sitecore.Pipelines.RenderField.GetImageFieldValue, Sitecore.Kernel']"
7 type="SitecoreCustomization.Pipelines.RenderField.GetImageFieldValueResponsive, DLLNameOfWhereYouCreatedTheClass"/>
8 </renderField>
9 </pipelines>
10 </sitecore>
11</configuration>

Lastly your control will need to have an attribute to say it should be responsive. For an xslt rendering your code will look like this:

1<sc:image field="Image" responsive="1" />

And for an ascx sublayout it will look like this:

1<sc:Image runat="server" Field="Image" Parameters="responsive=1" />

SQL Server – Selecting Top 1 in a Left Join

This scenario doesn't come up too often, but the other day I had a requirement to do a left join through a one to many relationship but only get 1 result from the right side of the join. This kind of scenario can often be accomplished using sub selects, but in this case I needed access to multiple columns so a sub select would be out of the question.

The solution was to do an OUTER APPLY instead of a LEFT JOIN. An outer apply allows you to write a sub query referencing the ID from the original table just like a sub select. However as this is effectively a kind of join you have access to multiple columns.

Example Scenario

Imagine you have a table of customers and a table of addresses and each customer can have multiple addresses.

Our tables will look like this:

Customer (CustomerID, FirstName, LastName)

Address (AddressID, CustomerID, Line1, Line2, Town, County, Country, DateAdded)

The task is to get a list of customers and their most recent address.

Solution

By using an OUTER APPLY we can join the 2 tables and get the most recent address like this:

1SELECT c.*, la.*
2FROM Customer c
3OUTER APPLY
4 (SELECT TOP 1 *
5 FROM Address a
6 WHERE a.CustomerID = c.CustomerID
7 ORDER BY a.DateAdded DESC
8 ) AS la
Theme Manager for Windows Phone

Theme Manager for Windows Phone

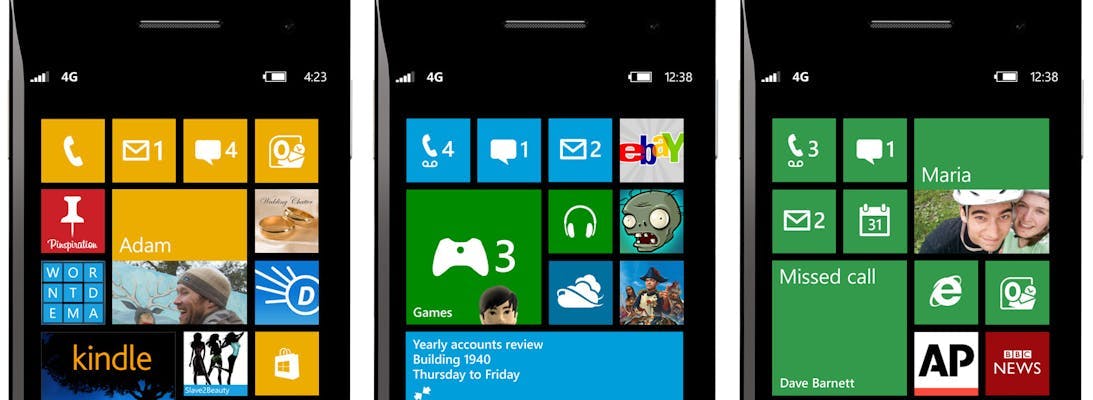
One of Windows Phones features is the ability for a user to switch between light and dark themes. However as a developer creating a good experience in your apps that looks good in both themes can be a challenge. What's worse is it sometimes leads to apps that look great in one theme but not the other.

Unfortunately there is also no official easy way to tell the phone you want your app to run with a particular theme. Instead it's a manual process of either setting the colour of every object, or manually loading a theme in the apps start-up.

Thankfully there is a better way and it comes in the form of a NuGet package. By simply installing the wp-thememanager package you can call ThemeManager.ToLightTheme() in your apps contructor to make the theme light, or ThemeManager.ToDarkTheme() to make it dark.

1/// &lt;summary&gt;
2/// Constructor for the Application object.
3/// &lt;/summary&gt;
4public App()
5{
6 // Global handler for uncaught exceptions.
7 UnhandledException += Application_UnhandledException;
8
9 // Standard Silverlight initialization
10 InitializeComponent();
11
12 // Phone-specific initialization
13 InitializePhoneApplication();
14
15 ThemeManager.ToLightTheme();
16
17 // Other code that might be here already...
18}

Links to resources

WP Theme Manager on GitHub
Jeff Wilcox blog post on the project
NuGet Package for WP Theme Manager

Two Google Maps Tips

Two Google Maps Tips

Centre a map on a collection of pins

The basic way to centre a Google Map is to give it co-ordinates of where you want the map to centre. But what if you have a collection of pin/markers and you want to show all of them but don't know beforehand where they will be.

The solution is to create a LatLngBounds object and for each of your pins call the extend method of your bounds object. Once this is done call fitBounds on your map.

1var bounds = new google.maps.LatLngBounds();
2
3$.each(mapMarkers(), function(index, value) {
4 bounds.extend(value.marker.position);
5});
6
7map.fitBounds(bounds);

Loading a map in a hidden div

The reason for doing this could be that you have a set of tabs and a non-visible one contains the Google Map. If you instantiate a Google Map when it isn't visible you end up with the smallest map size possible.

One popular solution for this is to only create the map when the tab is being displayed, which is a good option as it means the map is only loaded when it's viewed. However if your using something like Knockout to bind you've views to a model it may not be possible to attach an event to the tab change.

Google Maps actually have an event handler for just this scenario called resize. You simply need to trigger it at the point in which you can size the map.

1google.maps.event.trigger(map, 'resize')