Devops

Setting IP restrictions in IIS

It's a frequent scenario that a website your in the process of building needs to be accessible over the internet before it should actually be publicly available over the internet. This can come in the form of clients needing to review staging sites before there live, test sites needing to be accessible to testers who may not be in a location that can access private servers, or working jointly with other suppliers.

This scenario presents a lot of dangers such as, the URL of a site could get leaked early ruining a marketing strategy, or the site could end up in Google destroying the SEO value on the clients current site and even worse, actually get real customers visiting it.

There are only 2 real methods of protecting test/staging sites. One is adding authentication to the site restricting access to people with a valid username and password. The other is IP white-listing so only people from a valid IP can access the site.

In the past I've seen people suggest using a robots.txt to tell search engines to ignore the site. This is guaranteed to fail, Google will index a site with a robots file saying not to. Your robot's file may say don't crawl, but that auto generated Sitemap will be obeyed an the files indexed. There will also come a time the robots file gets copied live de-indexing the live site, or someone forgets the file on staging and the staging site is indexed.

Using IIS to set up IP restrictions

Using IIS to set up IP restrictions is quick and easy, and what's best about it is you can set it at the server level and not worry about people forgetting to add it to new sites. Better still you can also easily add configuration at a website level to allow certain people to see certain sites rather than the whole box.

Installing the Feature

First you need to make sure you have the feature installed on IIS. To do this on Windows Server 2012:
  1. Go to Server Manager and click "Add roles and features"
  2. Click next to take you from the Before you begin page to Installation Type
  3. Leave Role-based selected and click next
  4. On the Server Selection screen the server your on should be auto selected. Click next
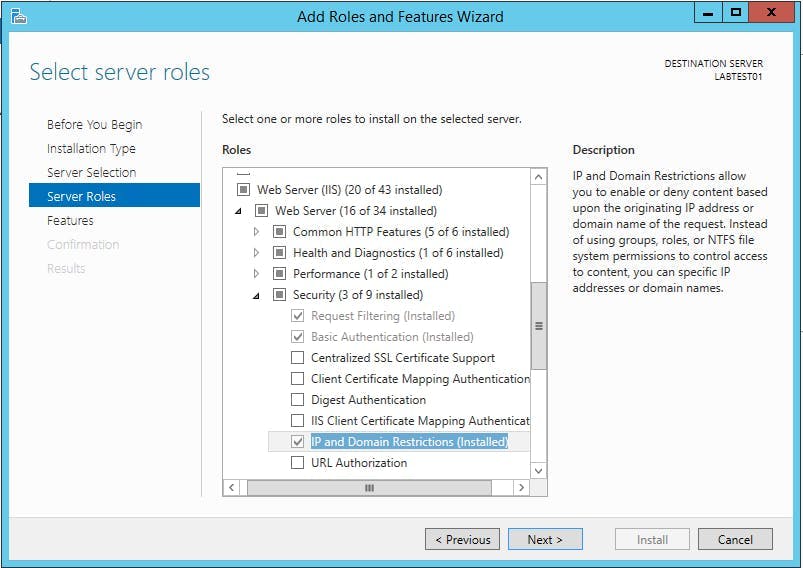
  5. On the Server Roles screen scroll down to "Web Server (IIS)". IP and Domain Restrictions is located under Web Server (IIS) > Web Server > Security
  6. Click the check box on IP and Domain Restrictions if its not already selected and complete the wizard to install the features.

Configuring IIS

The set up an IP restriction in IIS do the following:

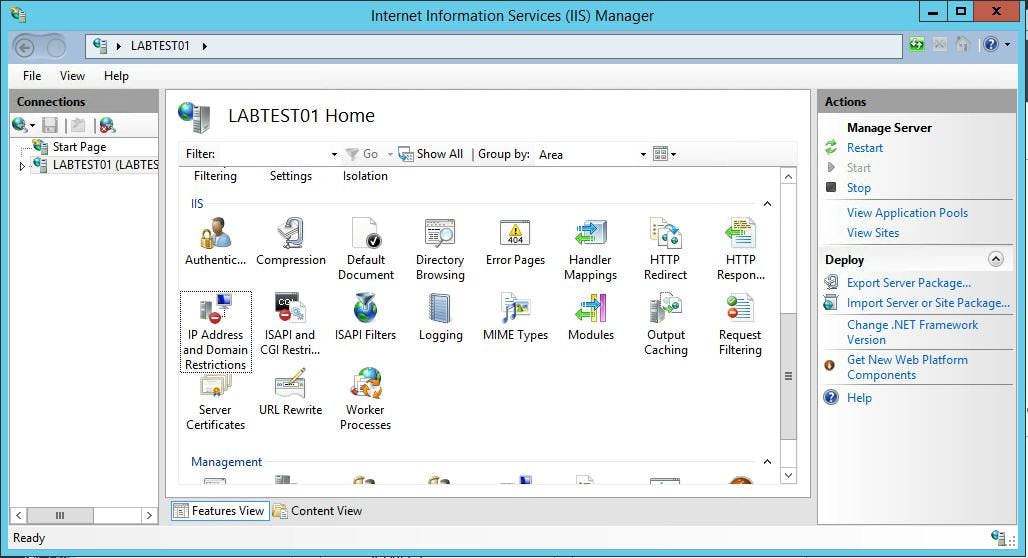
Open IIS and select your server in the left hand treeview. Alternatively if you wanted to add the restrictions to an individual site, select that site.

Within the IIS section you should have an item titled IP Address and Domain Restrictions
The configured IP address will be listed out. To add a new one click the "Add Allow Entry" action on the right.
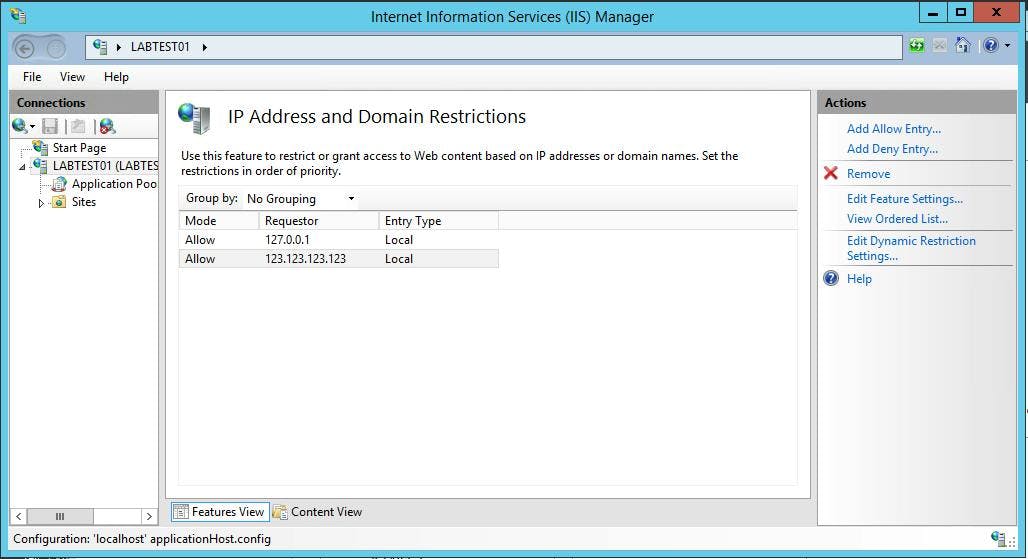
This screen allows you to set up allow and deny lists, but the restrictions don't actually have an effect until you edit the feature settings.
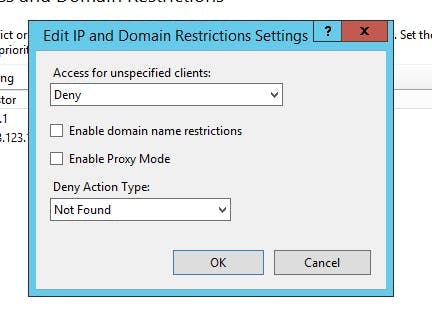
On this screen you need to set the access for unspecified clients to deny. You can also specify a deny action type which alters the status code between unauthorized, forbidden, not found and abort.

What this doesn't do

What this won't do is block all traffic not in the allow list to your server. It will only cover IIS, so if you have other services running on your box like SQL Server, Mongo, Apache etc this will all still be publicly available.
What’s your source control strategy?

I've seen companies that have no form of source control, companies using backups as source control, people still using Source Safe along with a whole bunch of actual good source control solutions such as Git and SVN. But when I say what's your source control strategy I don't mean what tool are you using, I mean how are you using it.

Checking you're code into source control adds many benefits such as merging, versioning, reverting etc, but to get the most out of it you really need a strategy to define how you will use it. There is no one right way and the strategy you use ultimately depends on your team size and what you are doing.

Here are a few example strategies:

The didn't know about a strategy approach

You've got a source control solution, you're regularly checking your code in but you've never made a branch.

This is actually quite common. Everyone is developing against the same branch, you've got all the benefits of seeing who changed which piece of code, you can revert when you need to revert and when you do an update there's some help with merging.

What you don't get though is the ability to have work happening in parallel and one being released before the other. If you needed to do a release either you have to have a way of hiding the unfinished updates as the code is pushed to live or some way of reverting just those bits.

A branch for every feature

The other extreme is to have all development work happen on a new branch. When it's ready to be release the code is merged back into the trunk and then released (plus some testing along the way).

The advantages of this are your trunk is always the same as what's on live meaning emergency fix's can be made without trying to find the last release in the source control history. Developers can also work separately without stepping each other toes and can release.

However with more than one development happening at the same time, whoever merges second could have a big job on their hands. All that branching is also going to be time consuming.

Updating branches often

So you're using branches and to avoid a tricky merge are keeping the branch up to date regularly, possibly daily. Anyone who's tried to merge a feature branch after 3 months of development can testify that it doesn't always go smoothly and can take some time.

Only updating the branch at the end

You've decided to accept the large merge at the end of the project. You don't like it but figure all those small merges during the project actually add up to more time than one big one at the end. You can then also concentrated on getting the feature built without the regular merge distraction.

A tag for each release

If you've ever needed to find a previous release and only have the history to go on it can be hard. If there's no comment that says release to live you are basically guessing based on release date and last commit.

A tag is basically the same as a branch and if its part of your release plan, you've got a good way of finding each release to live.

A branch for live, a branch for dev

In this setup you have a live branch that always match's what's on the live site. There's less need for tags as commits to this branch are normally also a release to live, and because the branch is always in sync with live, emergency fix's are taken care of.

The downside with this approach is everyone is working on the dev branch, so exceptions should be made and feature branches used when it makes sense.

So…

So there are some of the strategies I've come across, but there will be plenty more. What you do ultimately relates to what kind of work you do, how frequently you release and what kind of team size you have. But the one thing you must do with all of them is make comments on each commit. If you don't then source control becomes virtually useless.

IIS Where are my log files?

This is one of those things that once you know is very very simple, but finding out can be very very annoying.

IIS by default will store a log file for each site that it runs. This gives you valuable details on each request to the site that can help when errors are being reported by users.

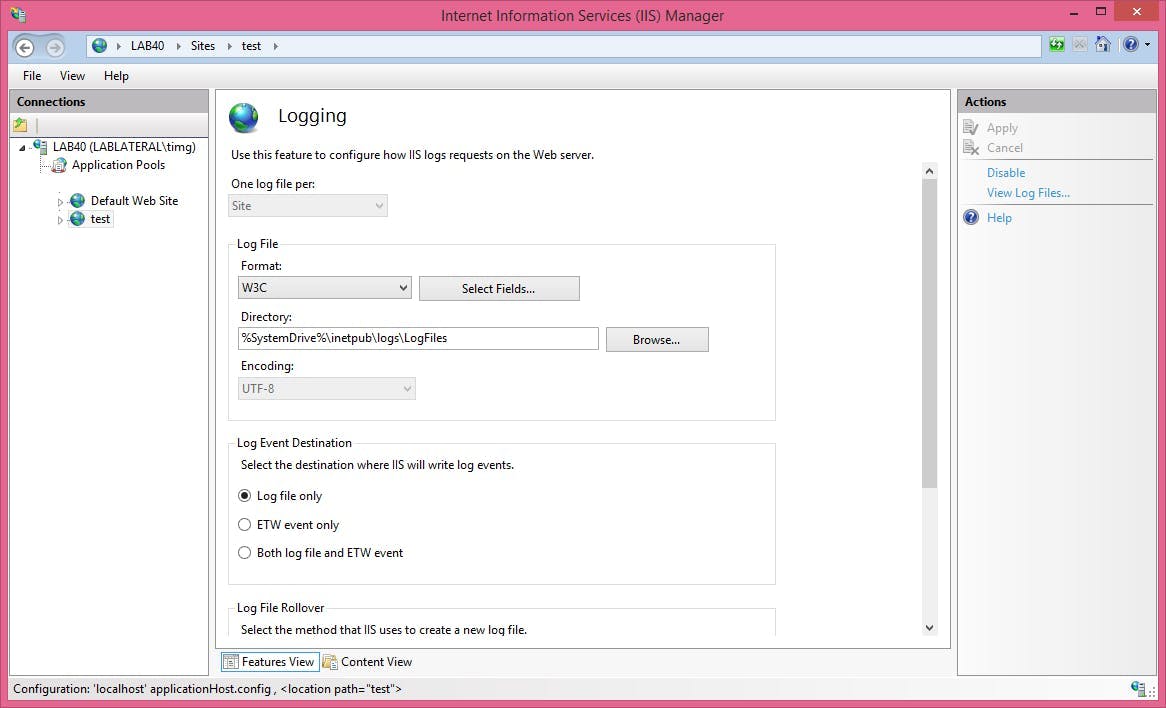
When you go searching for them your initial thought may be to go to IIS and look at the site you want the files for. There you will see an item called logging. Excellent you think, this will tell you all you need to know.

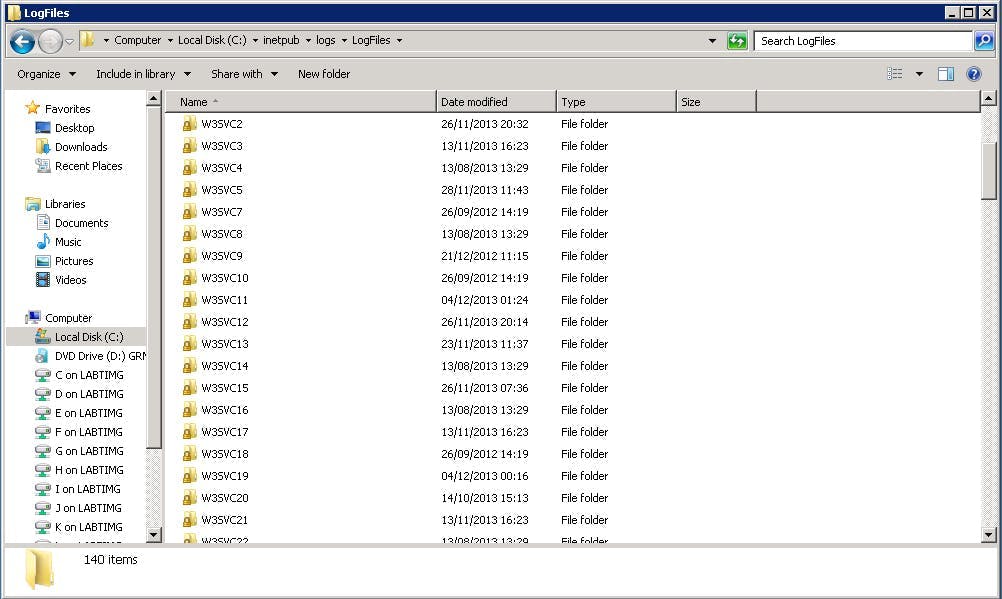
There's even a button saying "View Log File...", but once you click it you realise things aren't so simple. The link and folder path on the logging page both take you to a folder, containing more folders. In those folders are the logs, but there's a folder for each site in IIS and they've all got a weird name. How do you know which folder has the log files for the site you want?

Back on the IIS logging screen there's nothing to say which folder the files will be in. There isn't any indication anywhere.

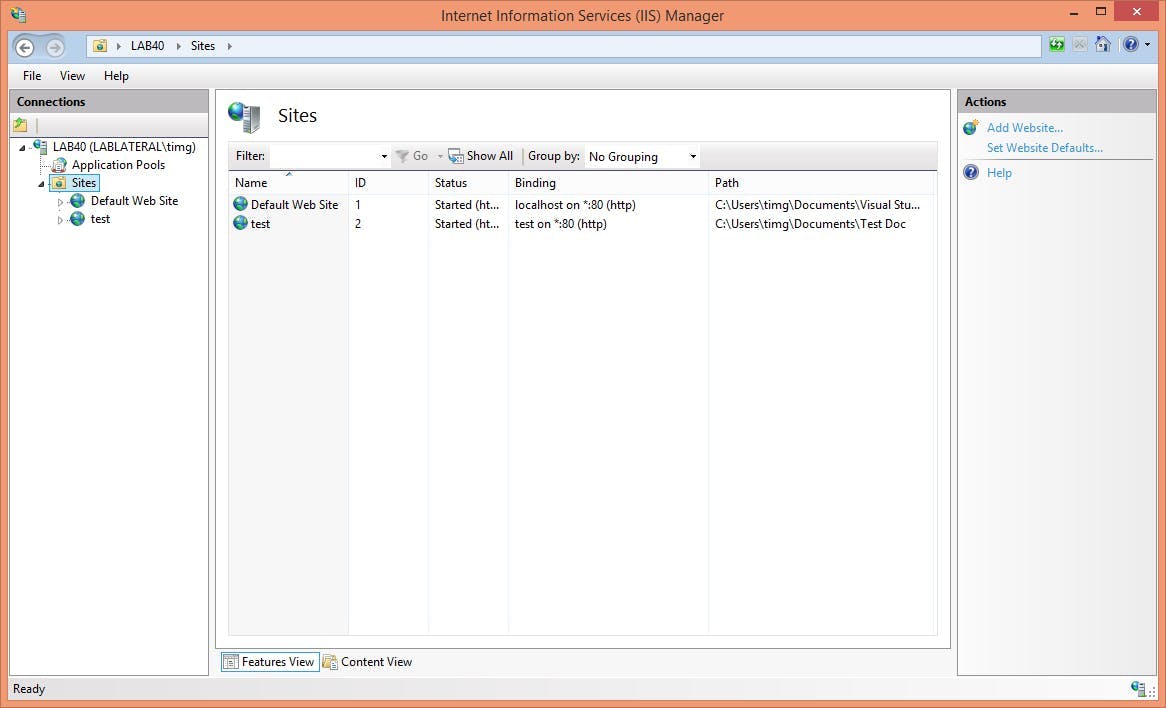
The answer however is very easy. Each folder has the Site ID in its name. You can find the Site ID for your site in IIS either by looking at the sites list

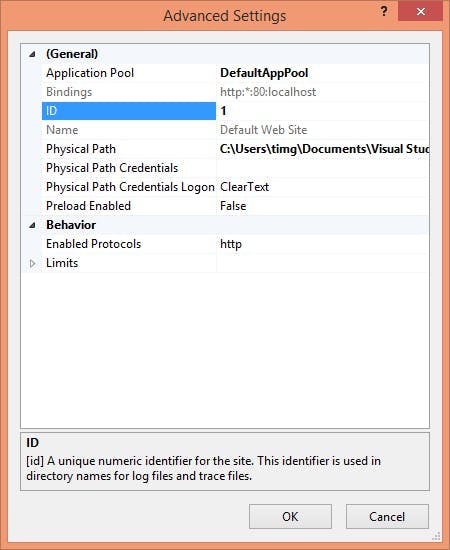
or clicking on a site and clicking advanced settings