Sitecore
Moving the Media Cache folder in Sitecore

Moving the Media Cache folder in Sitecore

One of the cache’s that Sitecore has is the Media Cache. Whenever you use an image from Sitecore’s media library, Sitecore will retrieve the image from the database, scale it to the size you requested and then store it to disk in the media cache folder. On any subsequent request the image will now be retrieved from the media cache rather than the database.

By default each content management and content delivery server will locate the media cache in /App_Data/MediaCache

This is a relatively logical place to store a cache for images that wont cause you many issues. However, if you have automated deployments setup then you are likely wiping the whole of your website folder each time you do a deploy to ensure that your deploy remains the same on all environments. As the App_Data folder is in the website, your Media Cache will be deleted too.

Depending on your site then deleting the media cache potentially isn’t much of an issue. After all it’s a cache so all that will happen is the images will get cached the next time they are requested. But depending how many images get retrieved at the same time this could slow down performance, particularly if your content editors decided to put every image they ever uploaded into the same folder. Opening the that folder in the admin will create a nice amount of load on your server, particularly if you also have some extra image optimization logic installed.

Like most things in Sitecore though, you can change the location through a config setting.

In Sitecore.config you will find a property called Media.CacheFolder. Change this to somewhere outside of your website folder and Sitecore will now start storing the Media Cache in this location and it will be safe your all your deploys.

1<!-- MEDIA - CACHE FOLDER
2 The folder under which media files are cached by the system.
3 Default value: /App_Data/MediaCache
4 -->
5 <setting name="Media.CacheFolder" value="/App_Data/MediaCache"/>
Managing Redirects in Sitecore

Managing Redirects in Sitecore

One of the most important aspects if not the most important aspect to managing a website is SEO. It doesn’t matter how good your website is, it doesn’t really matter if nobody can find it. Creating good SEO is a lot about having pages match what users are searching for, which then results in a high ranking for those pages. However, a second part to this formula is what happens with a page when it no longer exists. For instance, one day this blog post may no longer be relevant to have on our site, but up until that point search engines will have crawled it, people will have posted links to it and all of this adds to its value which we would to lose should it be removed. An even simpler scenario could be that we rename the blog section to something else and the page still exists under a different URL, but links to it no longer work.

Fortunately, the internet has a way of dealing with this and it’s in the form of a 301 redirect. 301 redirect are an instruction to anyone visiting the URL that the page has permanently moved to a different URL. When you set up a 301 redirect it achieves two things. Firstly, users following a link to your site end up on a relevant page rather a generic page not found message. Secondly search engines recrawling your site update their index with the new page and transfer all the associated value. So, to avoid losing any value associated with a page, whenever you move, rename or remove a page you should also set up a redirect.

Sitecore

Given how important redirects are it’s then surprising that an enterprise CMS platform like Sitecore doesn’t come with a universal way to set redirects up out of the box.

Typically, when we’ve taken over a site one of the support requests we will eventually receive is a question surrounding setting up a redirect from a marketer who’s ended up on Sitecore’s documentation site and is confused why they can’t find any of the things in this article https://doc.sitecore.com/users/sxa/17/sitecore-experience-accelerator/en/map-a-url-redirect.html.

The article appears to suggest that creating redirects is a feature that is supported, however it’s only available to sites built using Sitecore Experience Accelerator rather than the traditional approach.

More often that not, the developers who created the site will have added 301 redirect functionalities but will have done it using the IIS Redirect module, which while serves the purpose of creating redirects does not provide a Sitecore interface for doing so.

301 Redirect Module

Fortunately, there are some open source modules available which add the missing feature to Sitecore. The one we typically work with is neatly named 301 Redirect Module.

Once installed the module can be found in the System > Modules folder. Clicking on the Redirects folder will give you the option to either create another Redirect Folder to help group your redirect into more manageable folders, Redirect URL, Redirect Pattern or Redirect Rule.

This is by far the most common redirect to be set up. You specify an exact URL that is to be redirected and set the destination as either another exact URL or a Sitecore item. There’s even an option to choose if it should be a permanent or temporary redirect.

Redirect patterns are slightly more complex and require some knowledge of being able to write regular expressions. However, these are most useful if you ever want to move an entire section of your site. Rather than creating rules for each of the pages under a particular page, one rule can redirect all of them. Not only does this save time when creating the redirects, but it also makes your list of redirects far more manageable.

Auto Generated Rules

One of my favourite features of the 301 Redirect Module is that it can auto generate rules for any pages you move. For instance, if you decide a sub-page should become a top-level page moving it will result in a rule automatically being generated without you having to do a thing.

Summary

A marketer’s ability to manage 301 Redirect is as important as them being able to edit the content on the site and while traditional Sitecore sites may be missing this functionality it can easily be added using 3rd party modules, best of all they’re free!

User Authentication across sub domains in Sitecore

User Authentication across sub domains in Sitecore

The Scenario

In some scenarios you may have sub domains set up on your site, this may be to have an api configured as a separate site, or you may have a microsite set up on a sub domain. Depending on the scenario you may also want a user who it logged in on one of the sites to be logged in on the other.

When providing a login section to a site, after the visitor logs in their authentication is tracked using cookies. Cookies are linked to a domain and as your sites only differ by sub-domain you may be thinking great it should just work, no need for a single sign on solution. But you would be wrong.

The Solution

By default, cookies will be set on a specific domain including the sub-domain unless you tell it otherwise. Fortunately, this is quite easy to do.

In the web.config file, find the section for forms authentication and add an attribute domain set to the top-level domain. Your authentication should now always be set on the top level domain and work across all subdomains.

1<system.web>
2 <authentication mode="None">
3 <forms name=".ASPXAUTH" cookieless="UseCookies" domain="mydomain.com" timeout="30"/>
4 </authentication>
5<system.web>
Connecting Sitecore to Salesforce

Connecting Sitecore to Salesforce

When it comes to creating CMS websites the most common integration requirement is one to a CRM system. In this article I’m going to explain the different methods of integrating Sitecore and Salesforce along with the advantages and disadvantages of each.

Salesforce Web to Lead

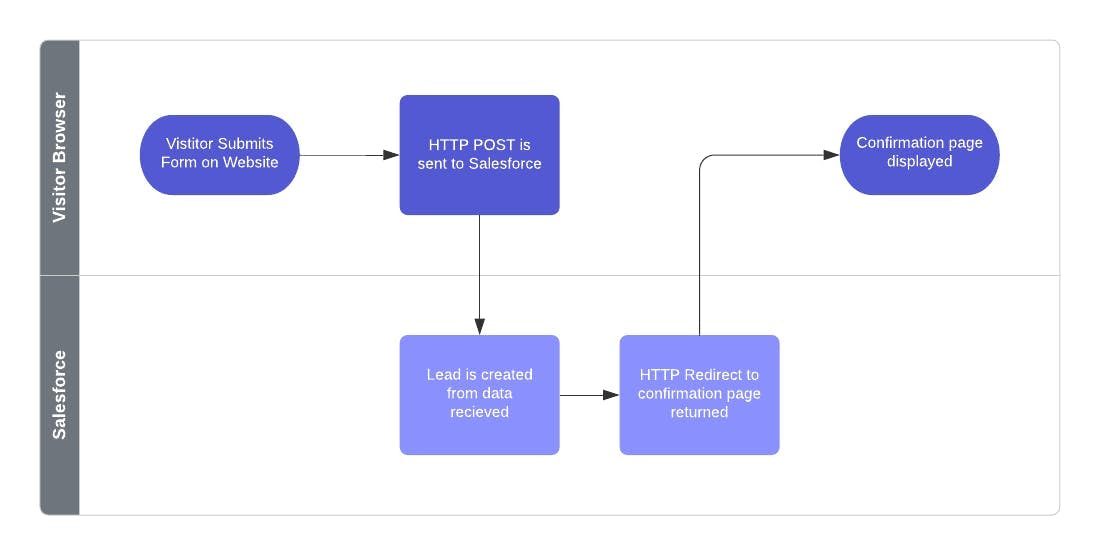
The first option isn’t Sitecore specific at all and is functionality provided and supported by Salesforce. Web to Lead allows you to create a HTML form from within Salesforce that when submitted will create a Lead item in Salesforce. To add it to your Sitecore instance can be as simple as copy and pasting the generated HTML and setting up a confirmation page for Salesforce to redirect to once the form has been submitted.

The process for the form submission is then as follows:

With some extra technical input, as the HTML for the form is hosted on your site rather than through an iFrame, it is also possible to customise it with your own CSS and validation to fit in with the rest of your site.

Advantages

  • Very simple to set up
  • Very low in terms of complexity
  • Easy to maintain
  • No duplication of data in Sitecore (simpler for GDPR)
  • Potential for form to be CMS managed by pasting in HTML from Salesforce

Disadvantages

  • Vulnerable to spam
  • No data is fed back into Sitecore analytics
  • Limited to form submissions
  • Limited functionality

For more information on web to lead see: https://www.salesforce.com/products/guide/lead-gen/web-to-lead/

Salesforce Web to Lead plus some custom code

What’s good about web to lead is it provides a simple platform that can be built upon to fix some of its disadvantages.

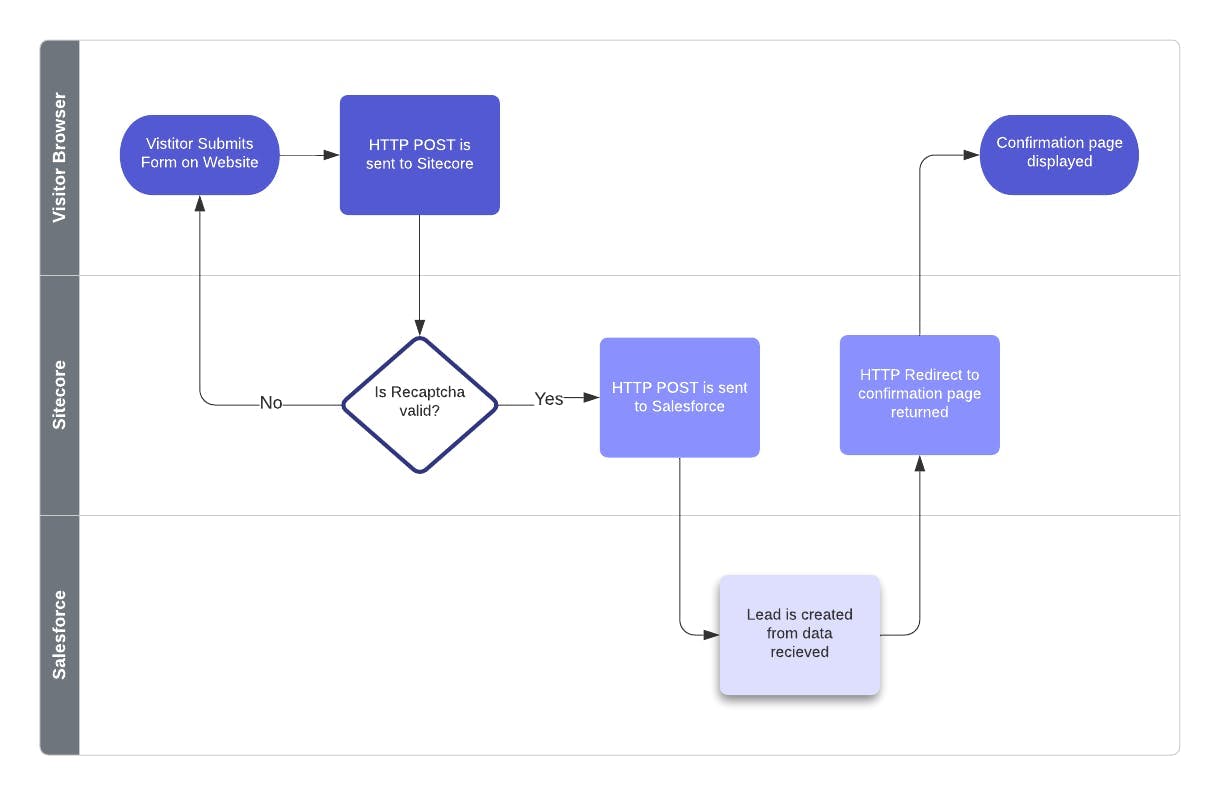
With some custom code on the Sitecore side, we can change the process from the visitor submitting a form directly to Salesforce, to a form submitting to Sitecore which in turn does an HTTP Post to Salesforce. This gives us the ability to also add in some protection against spam using something like re-captcha and the ability to record some analytics information in Sitecore analytics.

The process for the form submission is as follows:

Advantages

  • Low complexity
  • Easy to maintain
  • No duplication of data in Sitecore (simpler for GDPR)
  • Protected against spam
  • Built on top of Salesforces web to lead functionality

Disadvantages

  • To make fully CMS-able requires a larger bespoke implementation
  • Limited to form submissions

Sitecore Connect for Salesforce CRM

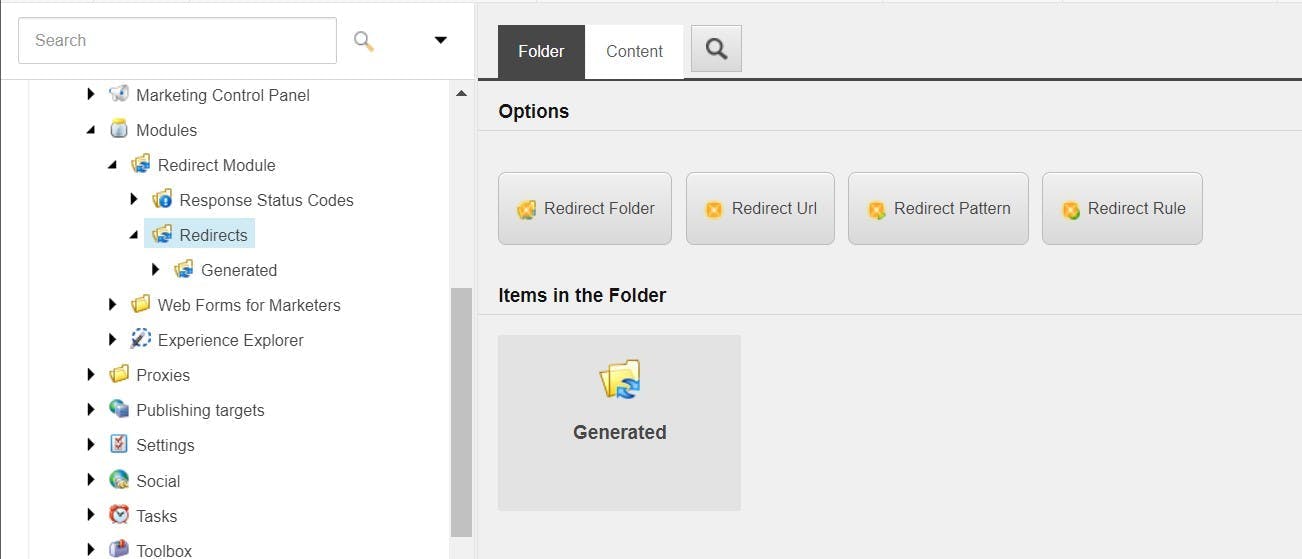
If you’re after something greater than simple lead creation from a form on the site, then another option is the Sitecore Connect for Salesforce CRM module from Sitecore. This is built on top of Sitecore’s data exchange framework and works by syncing data between the two platforms.

Out of the box it is set up with some default mappings for contact information, but this can be expanded to included additional facets of information against a contact.

Using this type of integration as new contacts are created on the site, they will be created in salesforce too. Or a contact being in a salesforce campaign could be synced to the Sitecore instance to customise the users experience there.

For more information on Sitecore Connect for Salesforce CRM see: https://doc.sitecore.com/developers/salesforce-connect/20/sitecore-connect-for-salesforce-crm/en/sitecore-connect-for-salesforce-crm-configuration-guide.html

Advantages

  • Built and supported by Sitecore
  • Ability to build a more complex integration on a framework

Disadvantages

  • Much higher complexity
  • No quick wins for common scenarios such as creating a lead

Fuse IT S4S Connector

Since 2009 Fuse IT have been building a Sitecore to Salesforce connector targeting the biggest use cases for connecting the two platforms.

The connector is installed as packages into both Sitecore and Salesforce and provide out the box functionality such as:

  • Sitecore Forms and Web Forms for Marketers field mapping wizard to create leads in Salesforce. Which gives marketers complete freedom to add a form to a site that creates a lead in Salesforce
  • Sitecore analytics integration to sync behavioural data to salesforce leads and contacts
  • Sitecore personalisation for a contact from Salesforce

The package also includes sample code to enable expanding the solutions with bespoke development.

For more information on S4S see: https://www.fuseit.com/products/sitecore-salesforce-connector/

Advantages

  • Out the box functionality that takes advantages of Sitecore’s features
  • Ability to build a more complex integration on a framework

Disadvantages

  • Additional license fee
  • Creates a dependency that may affect upgrades in the future

Fully Bespoke

Often when you suggest a fully bespoke solution people can take an instant reaction to fear it will be costly, hard to maintain or will break. Writing traditional code often can get viewed as being bad or hard, but the reality is most alternative implementations still involve writing code but just have a nice interface at the start. Depending on the kind of integration your trying to achieve going fully bespoke might be the easiest solution. After all code is essentially an easy tool to achieve a complex scenario and it is generally the scenario which leads to the problem being hard, rather than a developer’s ability to write code in any given language.

A bespoke solution could be something as simple as a webservice being provided by a Salesforce developer that Sitecore will post to, much in the same way as web to lead, but capable of achieving some additional functionality on top.

Or it could be a middleware API layer that is used to connect multiple systems together. E.g. If your site needed to talk to Salesforce and a stock level system at the same time. Or it could be used to completely abstract the CRM system in order to facilitate Salesforce being swapped out with something else in the future.

Advantages

  • Anything’s possible

Disadvantages

  • Could be to complex for simple scenarios
  • Everything must be built