Sitecore

Sitecore: Translating text in your presentation

This is the second in a series of blog posts covering everything you should need to know for building a multilingual website in Sitecore.

In Part 1, I covered how to add a language to Sitecore so that content editors could create content in that language. In this post I'm going to show you how to create a dictionary in Sitecore so that hard coded text in your presentation or views can be translated into the relevant language.

Creating the dictionary

A dictionary is created within your content tree and then referenced from the <sites> section of your web.config file.

Somewhere outside of your sites home node (I like to create a settings folder for this sort of thing), create an item of type "Sitecore/templates/System/Dictionary/Dictionary Domain". This will be the root item of your dictionary.

Under your root dictionary item you will be able to create Dictionary Groups and Dictionary Entry's. I find a good way to organise your dictionary is to create a group for each letter of the alphabet and then sort your entry's into each of these based on the key name.
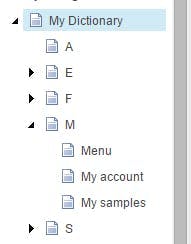
A dictionary entry consists of a Key and a Phrase. The key is the value that will be referenced in code to lookup the entry, and the phrase is the translation that will be returned.

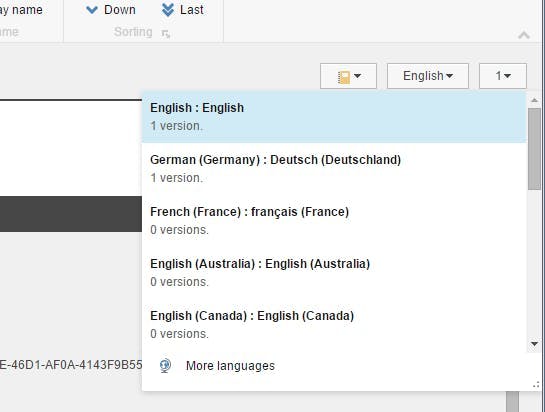
Translations for each language are created using regular language versions of content.
Configuring the site to use the dictionary

For a site to use the dictionary you need to add a dictionaryDomain to the sites node. Below is an example of the default website site updated to use a dictionary called "My Dictionary"

1<site name="website" virtualFolder="/" physicalFolder="/" rootPath="/sitecore/content" startItem="/home" database="web" dictionaryDomain="My Dictionary" domain="extranet" allowDebug="true" cacheHtml="true" htmlCacheSize="50MB" registryCacheSize="0" viewStateCacheSize="0" xslCacheSize="25MB" filteredItemsCacheSize="10MB" enablePreview="true" enableWebEdit="true" enableDebugger="true" disableClientData="false" cacheRenderingParameters="true" renderingParametersCacheSize="10MB" />

Translating text in your view

Now that your dictionary has been set up you can start translating text in your views.

The following line of code will lookup the dictionary entry based on the key and return the phrase for the current context language.

1@Sitecore.Globalization.Translate.Text("dictionary key")
Sitecore: Adding languages for a multilingual site

This is the first in a series of blog posts covering everything you should need to know for building a multilingual site in Sitecore.

The first requirement for a multilingual site is for the content editors to be able to enter content in different languages.

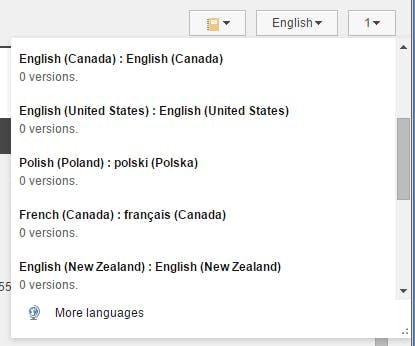
In the top right corner of the content editor on any item, is the language drop down that content editors will use to switch between the language version they are editing. However by default it will only show English : English

Configure the language options

To configure the language options on the drop down:

  • In the content editor go to System > Languages
  • Right click the language node and choose Insert Language
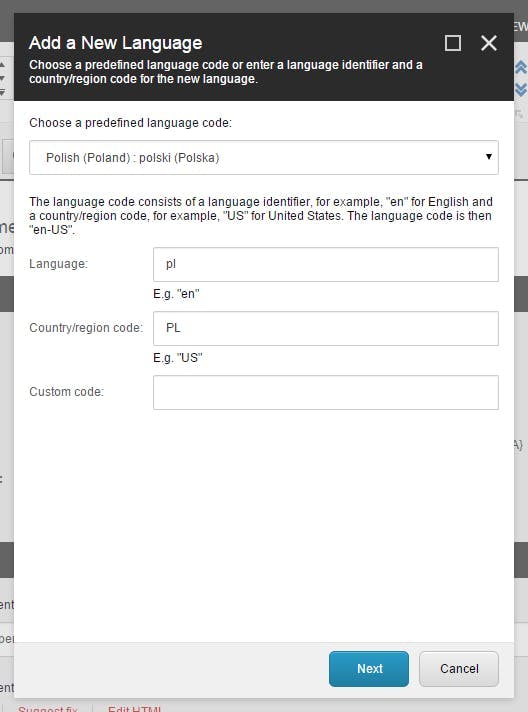
  • A predefined language code drop down lets you pick between a set of predefined languages
  • Click Next, Next, Next until the dialog window closes. The language will be added to the language list and your content editors can start adding there content
  • Starting with Sitecore 8, languages are no longer automatically assigned a corresponding flag as there icon as it is no longer used in the language selector. If you wish to add an icon however you can still do this in the normal way by going to the configure tab, clicking the icon drop down and selecting More Icons. The flags are all still in an icon group called flags.

Sitecore: Setting up Mongo with Authentication

One of the new features in Sitecore 7.5 was the xDB, a new analytics database that rather than using SQL Server was Mongo based. If your main job is as a Sitecore dev, like me this may be the first time you've ever had to use Mongo, or a least the first time you've ever had to commercially use it.

Installing Mongo DB is a relatively painless experience, Mongo provide a decent enough guide to installing on Windows. Half way through you may be wondering why its running in a console window, but eventually you get to instructions for setting it up as a service.

However there are a couple of gotchas:

  1. Sitecore doesn't work with the latest version of Mongo. At time of writing the latest version of Sitecore is 8.0 rev. 150427 and Mongo is 3.0. Sitecore however only supports version 2.6.x of Mongo though.
  2. None of the installation instructions include any details on authentication. Which while this is fine for your local dev machine is not so great for a live site.

So here's my guide for getting up and running with Mongo DB and Sitecore.

Installing Mongo

First off get Mongo DB installed as a service on your machine. I'm not going to include instructions here for this bit, just follow the guide on the Mongo DB website.

One thing to note though, the Windows installer for Mongo 2.6 will by default install Mongo to C:\Program Files\MongoDB 2.6 Standard\. However the instructions for setting up Mongo include example commands expecting it to be installed in C:\mongodb\

Setting Up Authentication

Once you've got Mongo up and running you'll need to create a user.

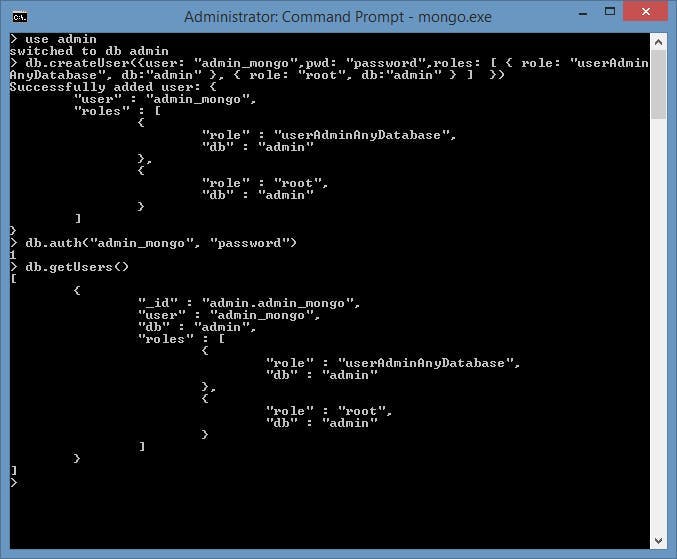
  1. Open a command prompt and connect to MongoDB

    C:\Program Files\MongoDB 2.6 Standard\bin\mongo.exe
  2. Switch to the admin db by doing

    use admin
  3. Create the user using

    db.createUser({user: "admin_mongo",pwd: "your password",roles: [ { role: "userAdminAnyDatabase", db:"admin" }, { role: "root", db:"admin" } ] })
  4. To verify the user has been created you can use the following commands

    db.auth("admin_mongo", "your password")
    db.getUsers()

Next update your config file to require authentication by adding auth=true. You will also need to restart the service for the change to take effect.

logpath=c:\data\log\mongod.log
dbpath=c:\data\db
auth=true

Sitecore uses 4 db's in Mongo; Analytics, tracking_live, tracking_history and tracking_contact. We need to create a user in each of them.

Open a mongo shell again, switch to the admin db and connect with your admin login.

Now create each of the users as follows:

use analytics
db.createUser({user: "mongo_user",pwd: "your password",roles: [ { role: "readWrite", db:"analytics" } ]  })

use tracking_live
db.createUser({user: "mongo_user",pwd: "your password",roles: [ { role: "readWrite", db:"tracking_live" } ]  })

use tracking_history
db.createUser({user: "mongo_user",pwd: "your password",roles: [ { role: "readWrite", db:"tracking_history" } ]  })

use tracking_contact
db.createUser({user: "mongo_user",pwd: "your password",roles: [ { role: "readWrite", db:"tracking_contact" } ]  })

Sitecore Connection Strings

All that's left now is to update the connection strings in Sitecore.

The default connection strings Sitecore give you look like this:

The format for a connection string with authentication is

mongodb://[username:password@]host1[:port1]/database

Sitecore: How to change the personalisation trigger page count

One of Sitecores features is the ability to assign profile cards or profile key scores to pages. As visitors browse the website the profile key scores from each page are added to the visitors profile. Visitors are then assigned a pattern card using N-Dimonsional Euclidean Distance to calculate the closest matching pattern card to the visitors profile.

However before a pattern card is assigned to a visitor they must visit a minimum number of pages. The default for this is set to 3.

Reasons for changing this could be that you actually want to be more certain of a users profile before triggering personalisation this could be to avoid visitors landing pages on the site heavily dictating which persona they initially become profiled as, which in turn could influence personalisation that keeps them in that persona.

Or it could be because you want to lower the number of pages for a more immediate effect.

Whatever the reason to change the default from 3 you need to add the following setting to your config:

1<setting name="Analytics.Patterns.MinimalProfileScoreCount" value="3"/>