Tag: Azure Pipelines
Automated Deployments with Sitecore Managed Cloud

Automated Deployments with Sitecore Managed Cloud

I think it's fair to say automated deployments are a fairly standard practice at this point, long gone are the days when we would remote onto a server and copy some files over.

However when you get your shiny new Sitecore managed cloud environment, unlike other cloud offerings it doesn't come with any automated deployments setup for you. Which to be frank is a bit of a let down. Getting one setup though isn't the hardest thing in the world.

A few requirements we're after:

  1. Deployments should be a button click, no copying and pasting files.
  2. Deployments should get promoted through multiple environments. e.g. Test, Staging and Production.
  3. Deployments should be gated and approved to be released.
  4. There shouldn't be any downtime during the deployment.

So lets dive in.

Azure Devops

The first thing to note, is that Sitecore Managed Cloud is essentially vanilla Microsoft Azure with Sitecore setup on it. As a developer or devops engineer you get given a regular login to the Azure portal and as far as I've seen there's nothing specifically Sitecore about it.

This means however you would normally deploy other things to Azure will work perfectly well for Sitecore. My preference is to use Azure Devops as being from Microsoft it fits really well into the Azure ecosystem.

To do this, first off sign up for Azure Devops, get a pipeline created that compiles your solution and outputs it to an artifact. I'm going to skip past all the details on how you do this as it's not specific to managed cloud and at this point lots of people have written articles on how to do it, there's also a high chance your solution is already doing this. If not then go Google it :)

Release Pipeline

To do a release we need a release pipeline. Unlike build pipelines which control a build and are written in yaml, release pipelines control a release and are created through a UI. With these you can configure the different steps, add gates, configure variables, everything you need for a release.

Once you've got a Devops project and your solution compiling, the next step is to create a release pipeline. So head onto the release pipeline section and click the big blue button to make your first pipeline.
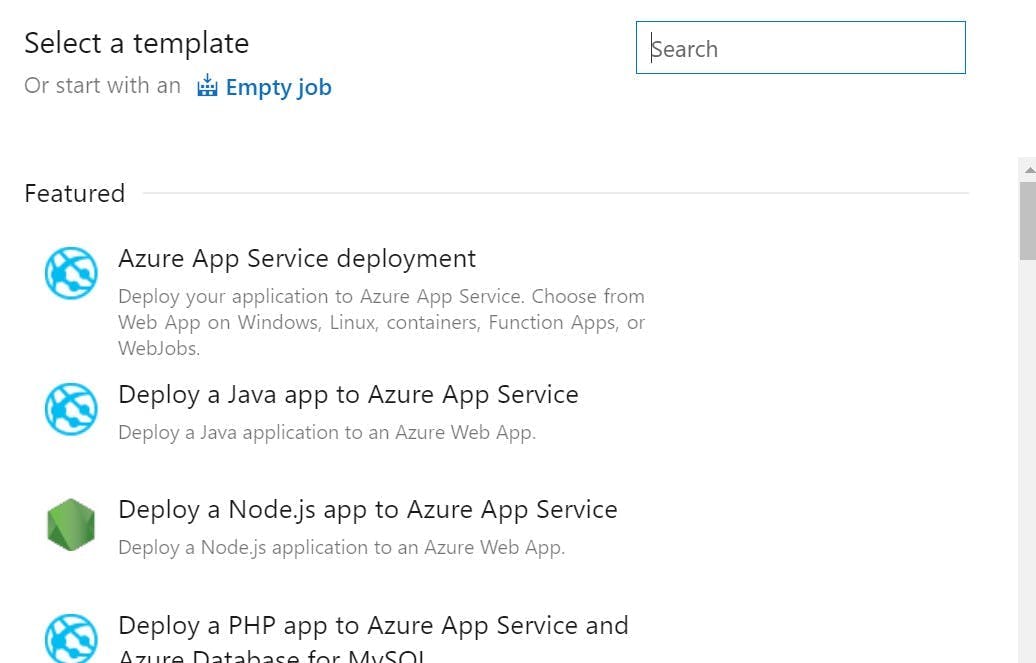
Sitecore Managed Cloud runs Sitecore as Azure App Services, so you will want to pick the Azure App Service deployment template.
This template will create a stage with a job, but before it can release anything it needs an artifact to deploy.
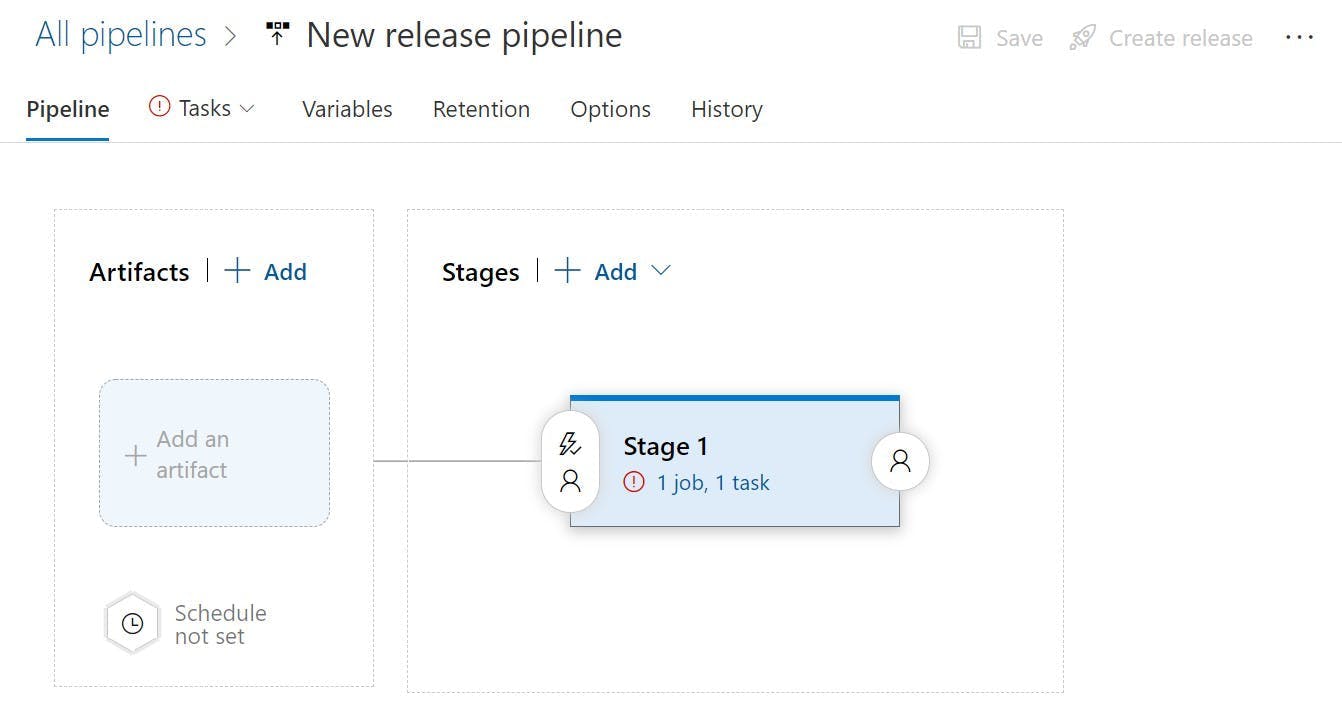
Click the Add an Artifact button and pick the artifact from your build. On the artifact you can now click a lightening bolt icon to set up continuous deployment triggers. From here you can set the release to run whenever there is a new build on your master / main branch.

The deployment stage will also need some details completing so click into that next.
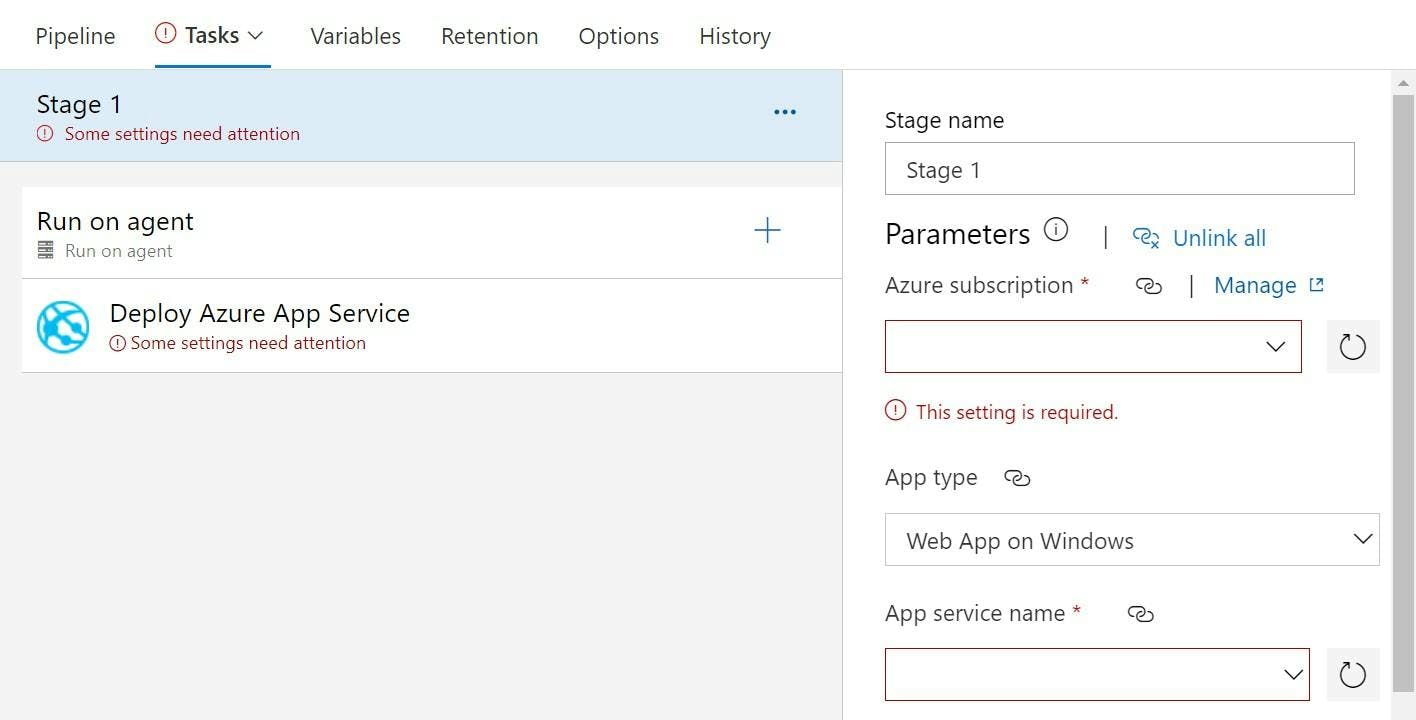
Now when you try to pick the Azure subscription for Sitecore Managed Cloud, you will likely get an error saying Failed to create an app in Azure Active Directory. Error: Insufficient privileges to complete the operation. Ensure that the user has permissions to create an Azure Active Directory Application.
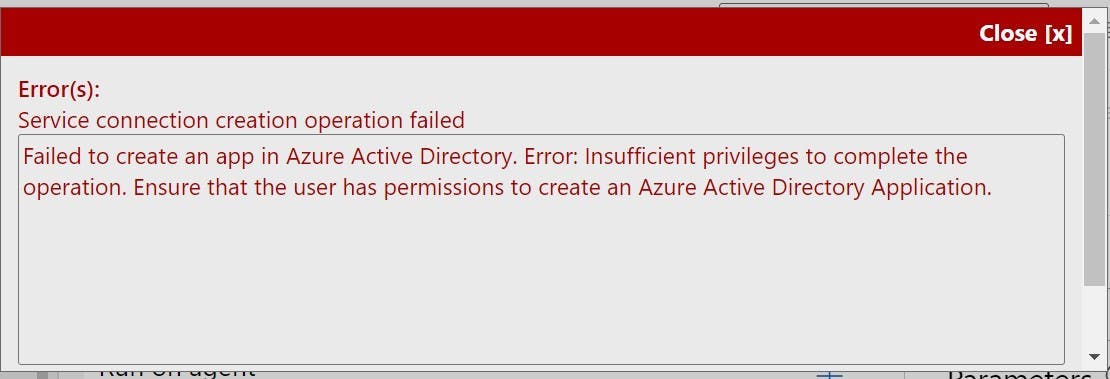
Don't worry, you can't solve this on your own, but Sitecore Support can fix it for you. To get Azure Devops connected to the azure subscription you need a service principal setup. They will know what you mean and send you a service principal id and key.

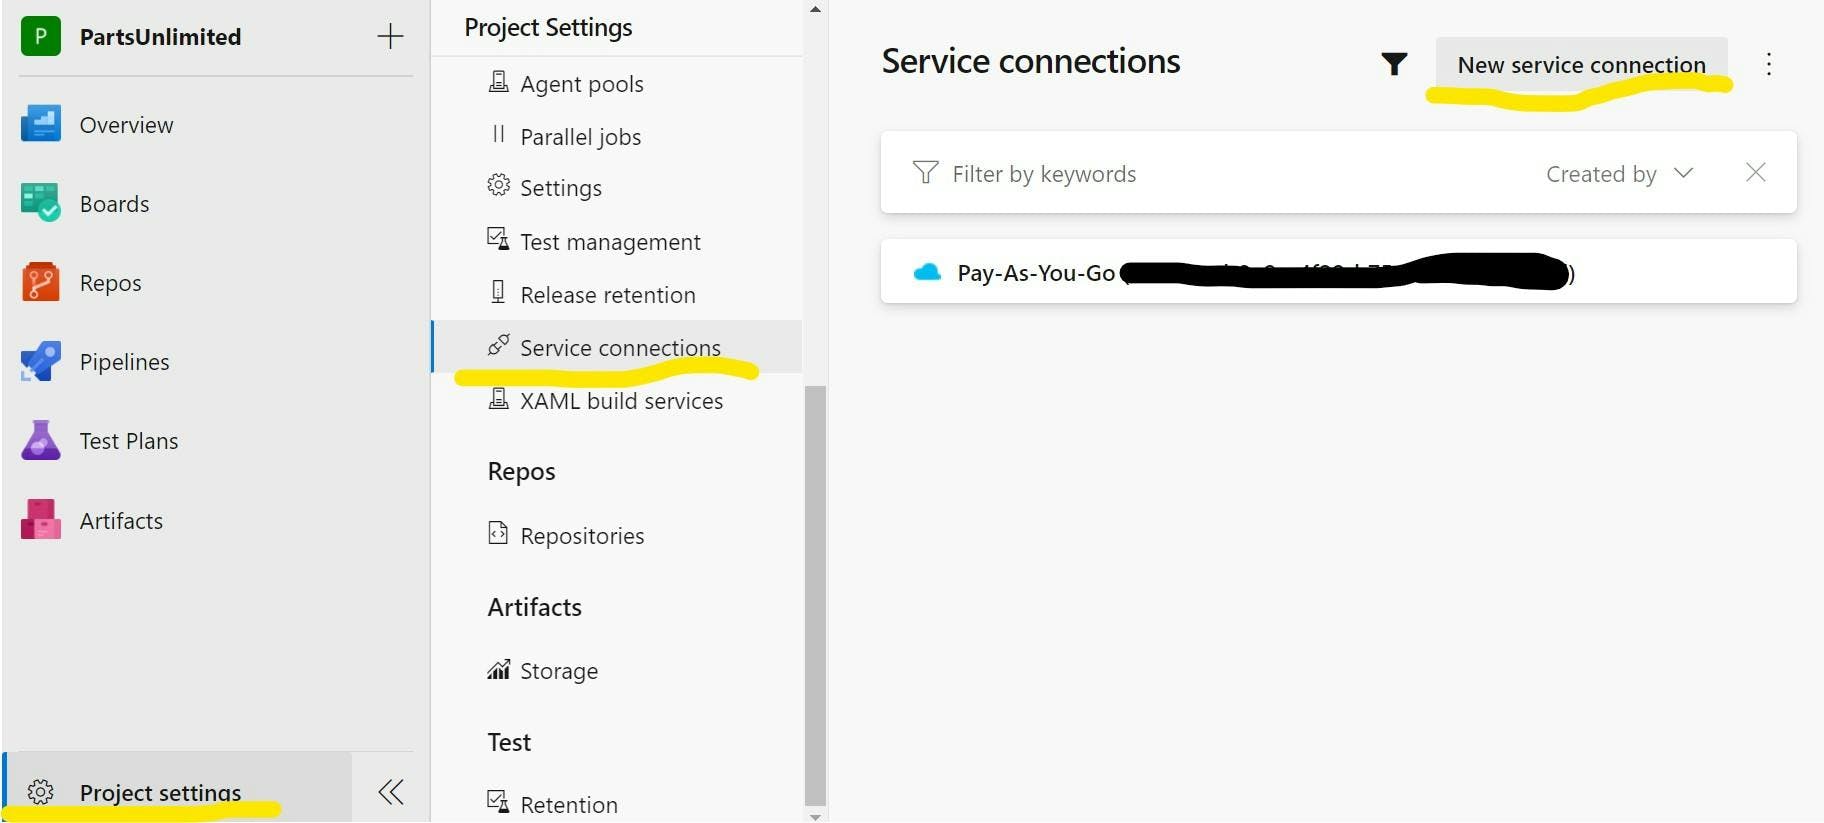
To setup the service principal go to, Project Settings > Service Connections > New Service Connection.
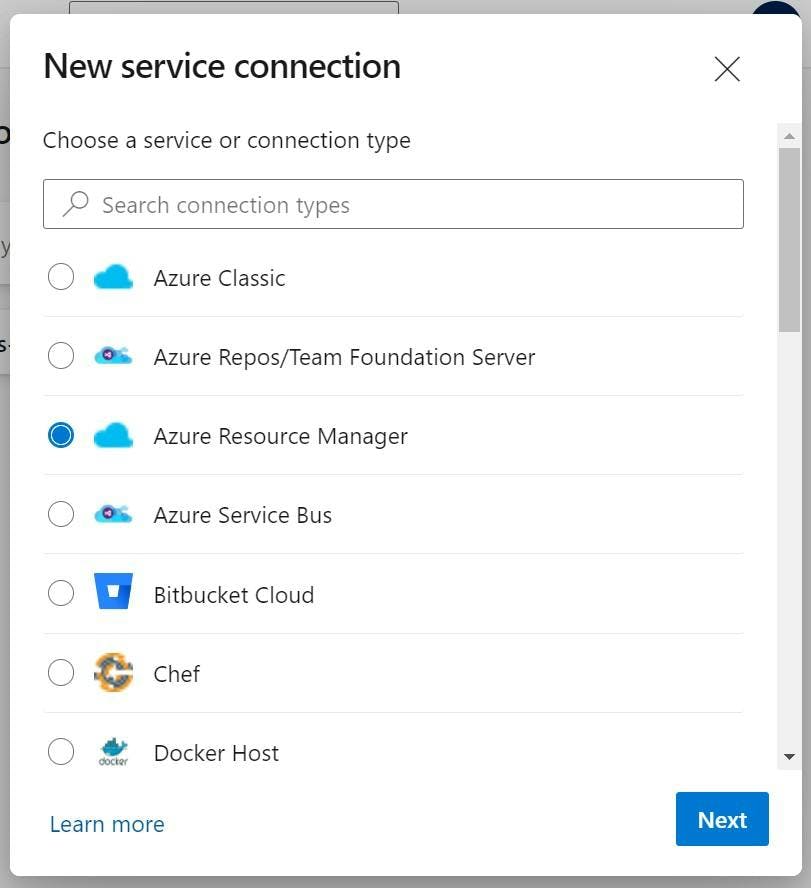
Pick Azure Resource Manager.
And Service Principal (manual).
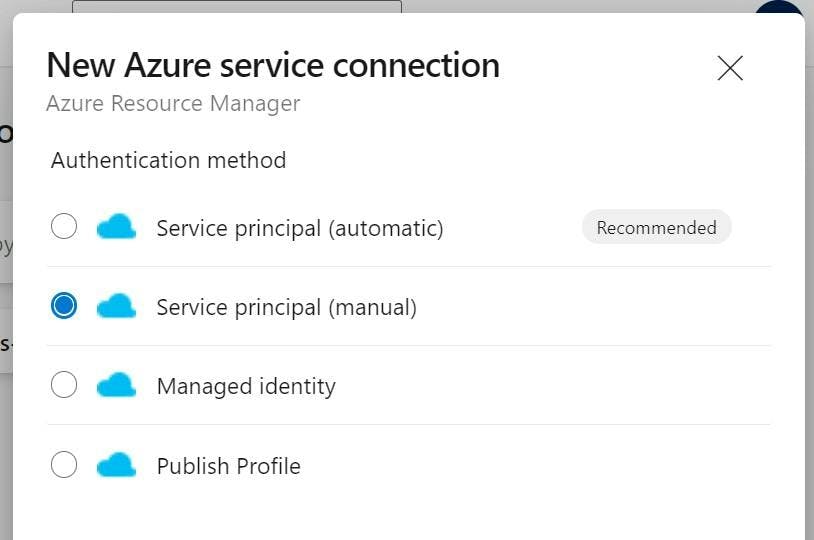
Enter the details and you'll have a connection into Sitecore Managed Cloud.

Back in the release pipeline you can now select the Azure subscription and App service name. Run the pipeline and your solution will deploy.

You now have a solution deploying to the Azure App Service. Some things to note:

1. This process does not delete any files already on the target machine. This is intentional as with managed cloud the files have a split responsibility. Sitecore installs Sitecore and manage the SSLs which include config file changes, none of which will be in your source control. You however are doing everything else.

2. Right now whenever you deploy the site will experience downtime as there no concept of green / blue deployments setup.

Blue / Green Deployments

One of the great things about using Azure App Services is all the infrastructure stuff like load balancers, multiple instances etc is done for you. If you want to scale horizontally and add instances, you just move a slider and all the deployments and load balancing is done for you.

If you want to do a blue / green deployment that can be done for you using slots.

Creating an App Service Deployment Slot

To create a slot navigate to the app service you are deploying to, and select Deployment Slots on the left nav.
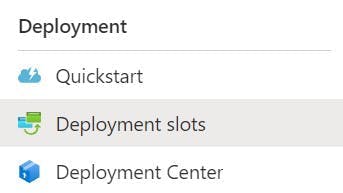
Click Add Slot, give it a name. e.g. staging and choose to clone the settings from the existing default slot.

You will now have a second slot that can be deployed to and then swapped to be the live one. When slots are swapped the application is warmed up first meaning no downtime when the slot happens.

However although you copied the settings from the original slot, your staging slot won't have an application on it yet and as your source control won't contain the whole of Sitecore, you will need to copy it from the existing slot.

Connecting to Deployment Slots with FTP

The easiest way to setup the slot with the base files is to copy them with FTP. To get the FTP details select one of the slots from the slots list and then select Deployment Center in the left nav.
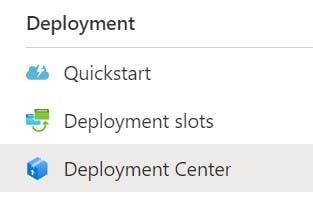
Now in the top nav, select Deployment Credentials.

A panel will now show giving you the FTP details.
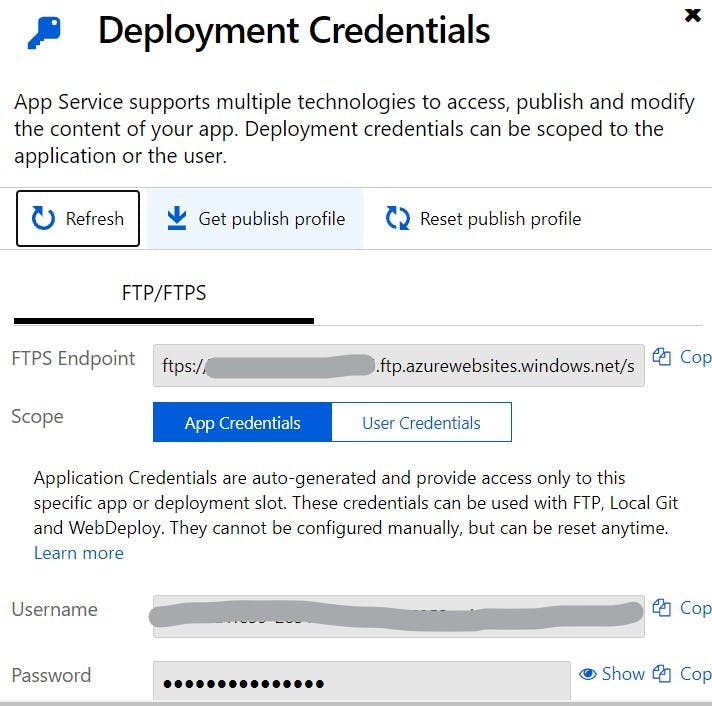
Repeat this with the other slot and you now have the details to be able to FTP to the different environments and copy the contents from one to the other.

Configuring Azure Pipelines to deploy to a slot

The last thing on our list is to start deploying to the slot and then swapping the slot to achieve no downtime.

Within Azure Devops navigate back to the release pipeline and edit the pipeline. Go into the job/task and select the Deploy Azure App Service task. Under the App Service Name setting you will see a checkbox to deploy to a slot. Select this and then complete the details for Resource Group and Slot.
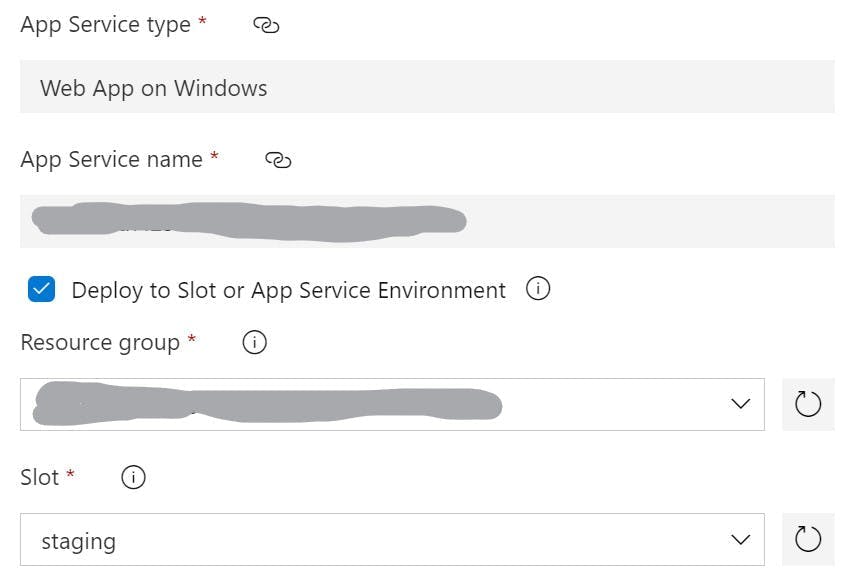
If you were to deploy now, your code would be deployed to the slot rather than the production instance. You could then preview the site running on the slot and manually swap the slots in the Deployment slots section of the portal.

Alternatively you can configure the release pipeline to swap the slots for you.

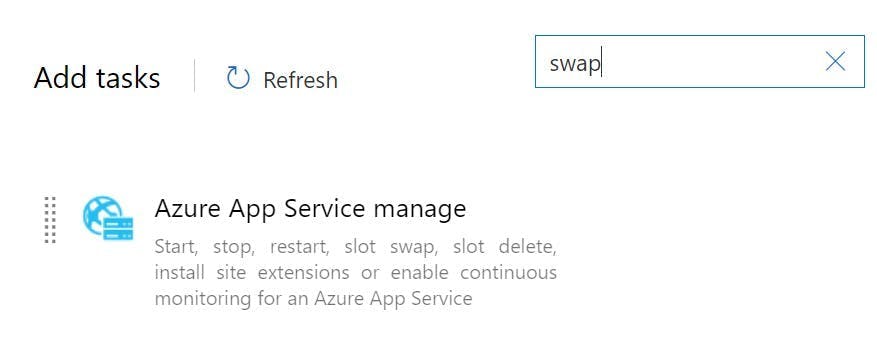
Add a new task to the pipeline job called Azure App Service Manage. This will come up if you search for swap.
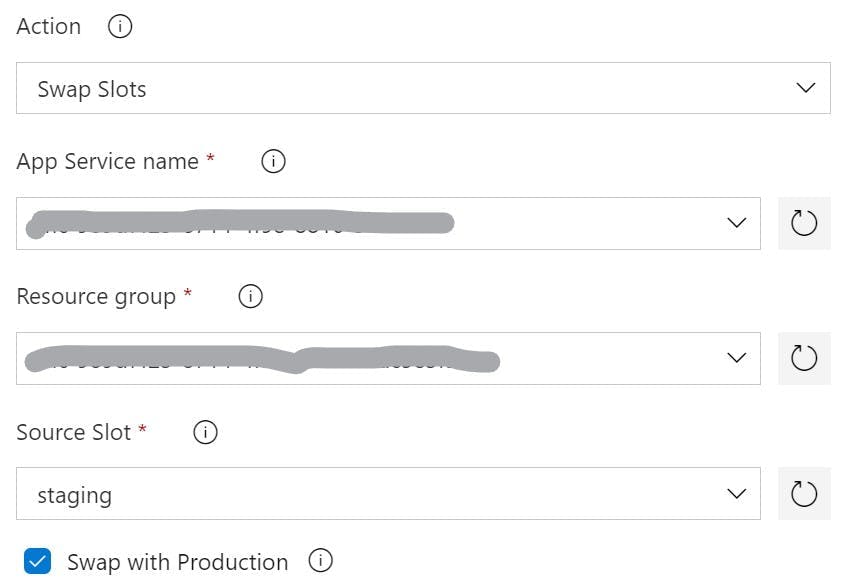
Complete the details for the task, setting Action to Swap Slots, and enter your App Service name, Resource group, and the Source Slot that it needs to swap with. Check the checkbox to Swap with Production.
With this all configured you can now run your pipeline and have an automated deployment with no downtime. The solution will first be deployed to the slot and then the slot swap action will swap the two over. When it does this the staging slot will be warmed up first meaning that when the swap completes there will be no downtime as Sitecore will have already started.

Deploying a SQL DB with Azure Pipelines

Deploying a SQL DB with Azure Pipelines

Normally when I work with SQL Azure I handle DB schema changes with Entity Framework migrations. However if you using Azure Functions rather than Web Jobs it seems there's a number of issues with this and I could not find a decent guide which resulted in a working solution.

Migrations isn't the only way to release a DB change though. SQL Server Database projects have existed for a long time and are a perfectly good way of automating a DB change. My preference to use EF Migrations really comes from a place of not wanting to have an EF model and a separate table scheme when they're essentially a duplicate of each other.

Trying to find out how to deploy this through Azure Devops Pipelines however was far harder than I expected (my expectation was about 5 mins). A lot of guides weren't very good and virtually all of them start with Click new pipeline, then select Use the classic editor. WAIT Classic Editor on an article written 3 months ago!?!?! Excuse me while I search for a solution slightly more up to date.

Creating a dacpac file

High level the solution solution is to have a SQL Server Database project, use an Azure Pipeline to compile that to a dacpac file. Then use a release pipeline to deploy that to the SQL Azure DB.

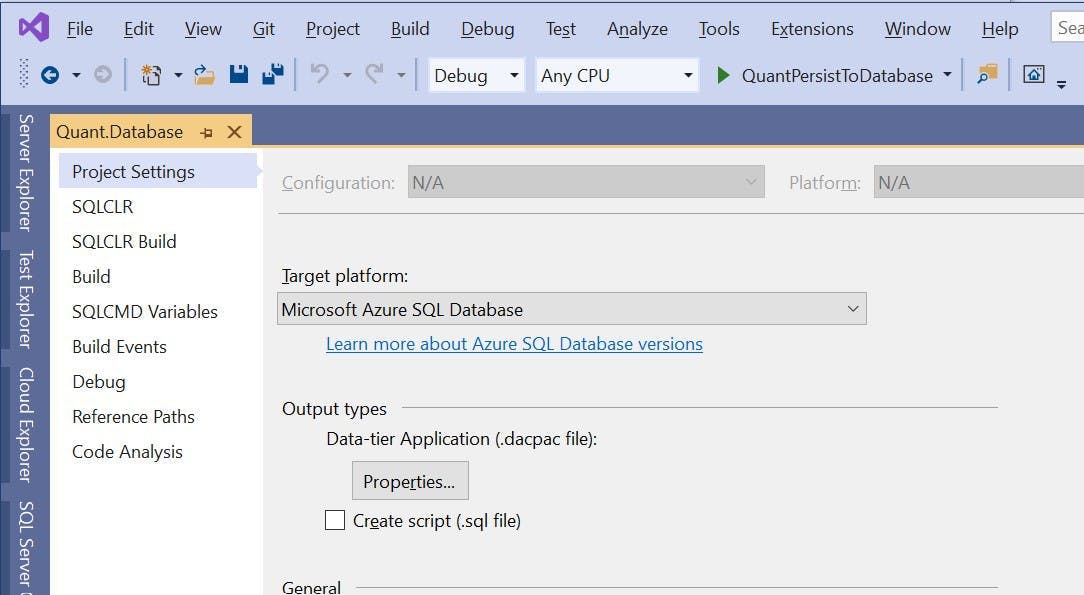
I'm not going to go into any details about how you create a SQL Server Database project, its relatively straightforward, but the one thing to be aware of is the project needs to have a target platform of Microsoft Azure SQL Database otherwise you'll get a compatibility error when you try to deploy.

Building a SQL Server Database project in Azure Devops

To build a dacpac file create a new pipeline in Azure Devops (the yaml kind), select your repo and get yourself a blank configuration file. Also at this point make sure your code is actually in the repo!

The configuration I used looks like this; I've included notes in the code to explain what's going on.

1# The branch you want to trigger a build
2trigger:
3- master
4
5pool:
6 vmImage: "windows-latest"
7
8variables:
9 configuration: release
10 platform: "any cpu"
11 solutionPath: # Add the path to your Visual Studio solution file here
12
13steps:
14 # Doing a Visual Studio build of your solution will trigger the dacpac file to be created
15 # if you have more projects in your solution (which you probably will) you may get an error here
16 # as we haven't restored any nuget packages etc. For just a SQL DB project, this should work
17 - task: VSBuild@1
18 displayName: Build solution
19 inputs:
20 solution: $(solutionPath)
21 platform: $(platform)
22 configuration: $(configuration)
23 clean: true
24
25 # When the dacpac is built it will be in the projects bin/configuation folder
26 # to get into an artifact (probably with some other things you want to publish like an Azure function)
27 # we need to move it somewhere else. This will move it to a folder called drop
28 - task: CopyFiles@2
29 displayName: Copy DACPAC
30 inputs:
31 SourceFolder: "$(Build.SourcesDirectory)/MyProject.Database/bin/$(configuration)"
32 Contents: "*.dacpac"
33 TargetFolder: "$(Build.ArtifactStagingDirectory)/drop"
34
35 # Published the contents of the drop folder into an artifact
36 - task: PublishBuildArtifacts@1
37 displayName: "Publish artifact"
38 inputs:
39 PathtoPublish: "$(Build.ArtifactStagingDirectory)/drop"
40 ArtifactName: # Artifact name goes here
41 publishLocation: container

Releasing to SQL Azure

Once the pipeline has run you should have an artifact coming out of it that contains the dacpac file.

To deploy the dacpac to SQL Azure you need to create a release pipeline. You can do this within the build pipeline, but personally I think builds and releases are different things and should therefore be kept separate. Particularly as releases should be promoted through environments.

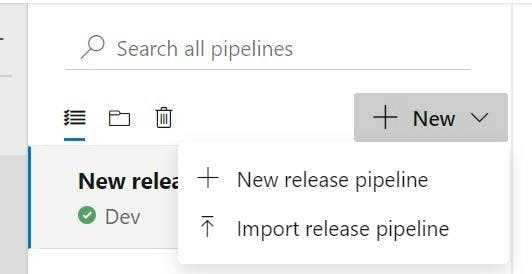
Go to the releases section in Azure Devops and click New and then New release pipeline.

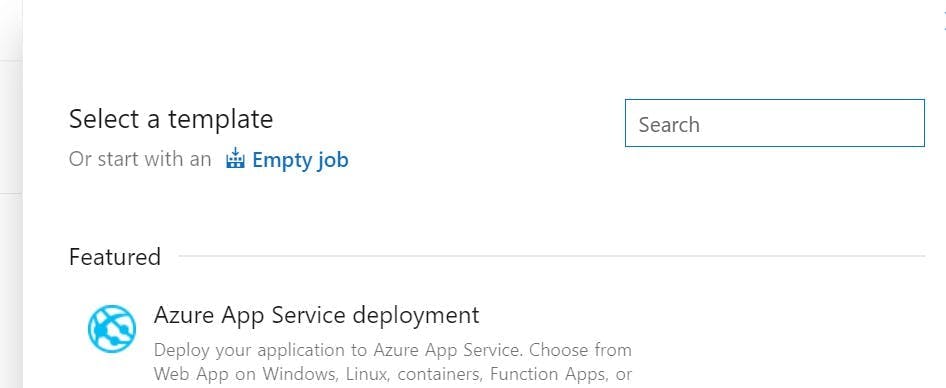
There is no template for this kind of release, so choose Empty job on the next screen that appears.

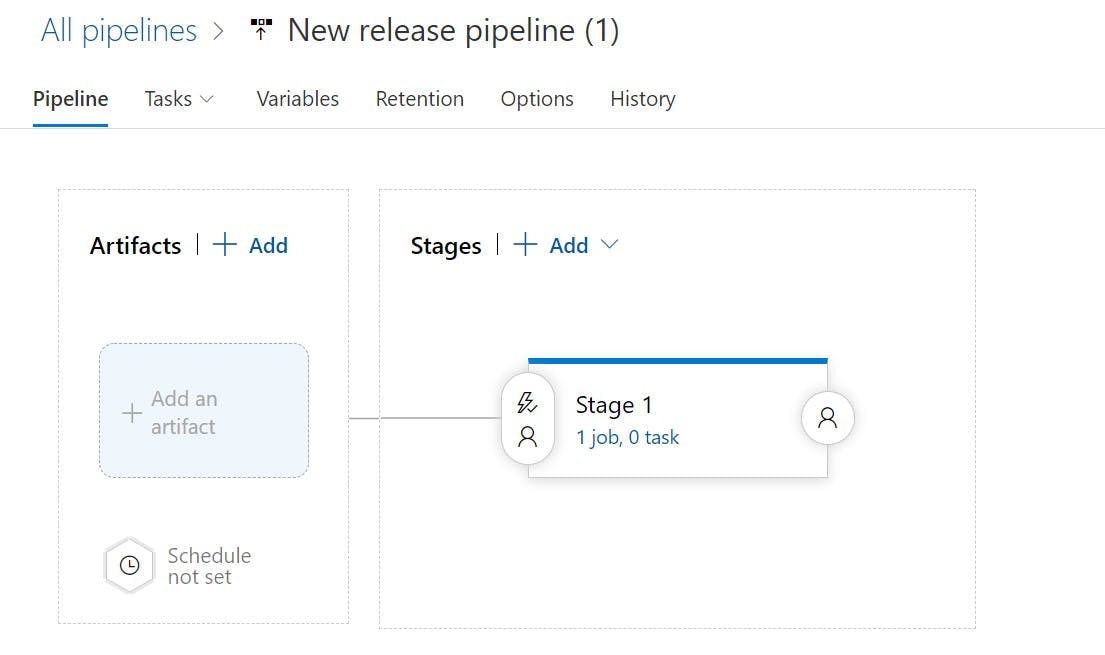
On the left you will be able to select the artifact getting built from your pipeline.

Then from the Tasks drop down select Stage 1. Stages can represent the different environments your build will be deployed to, so you may want to rename this something like Dev or Production.

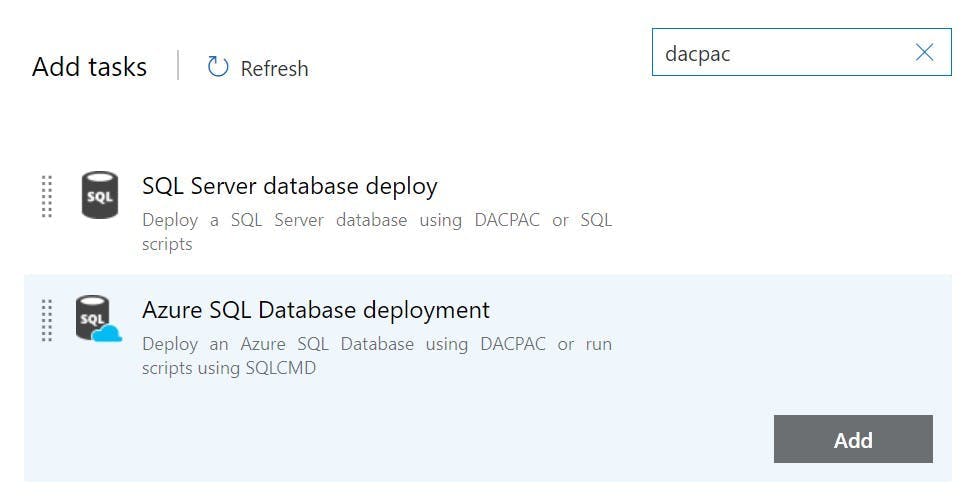
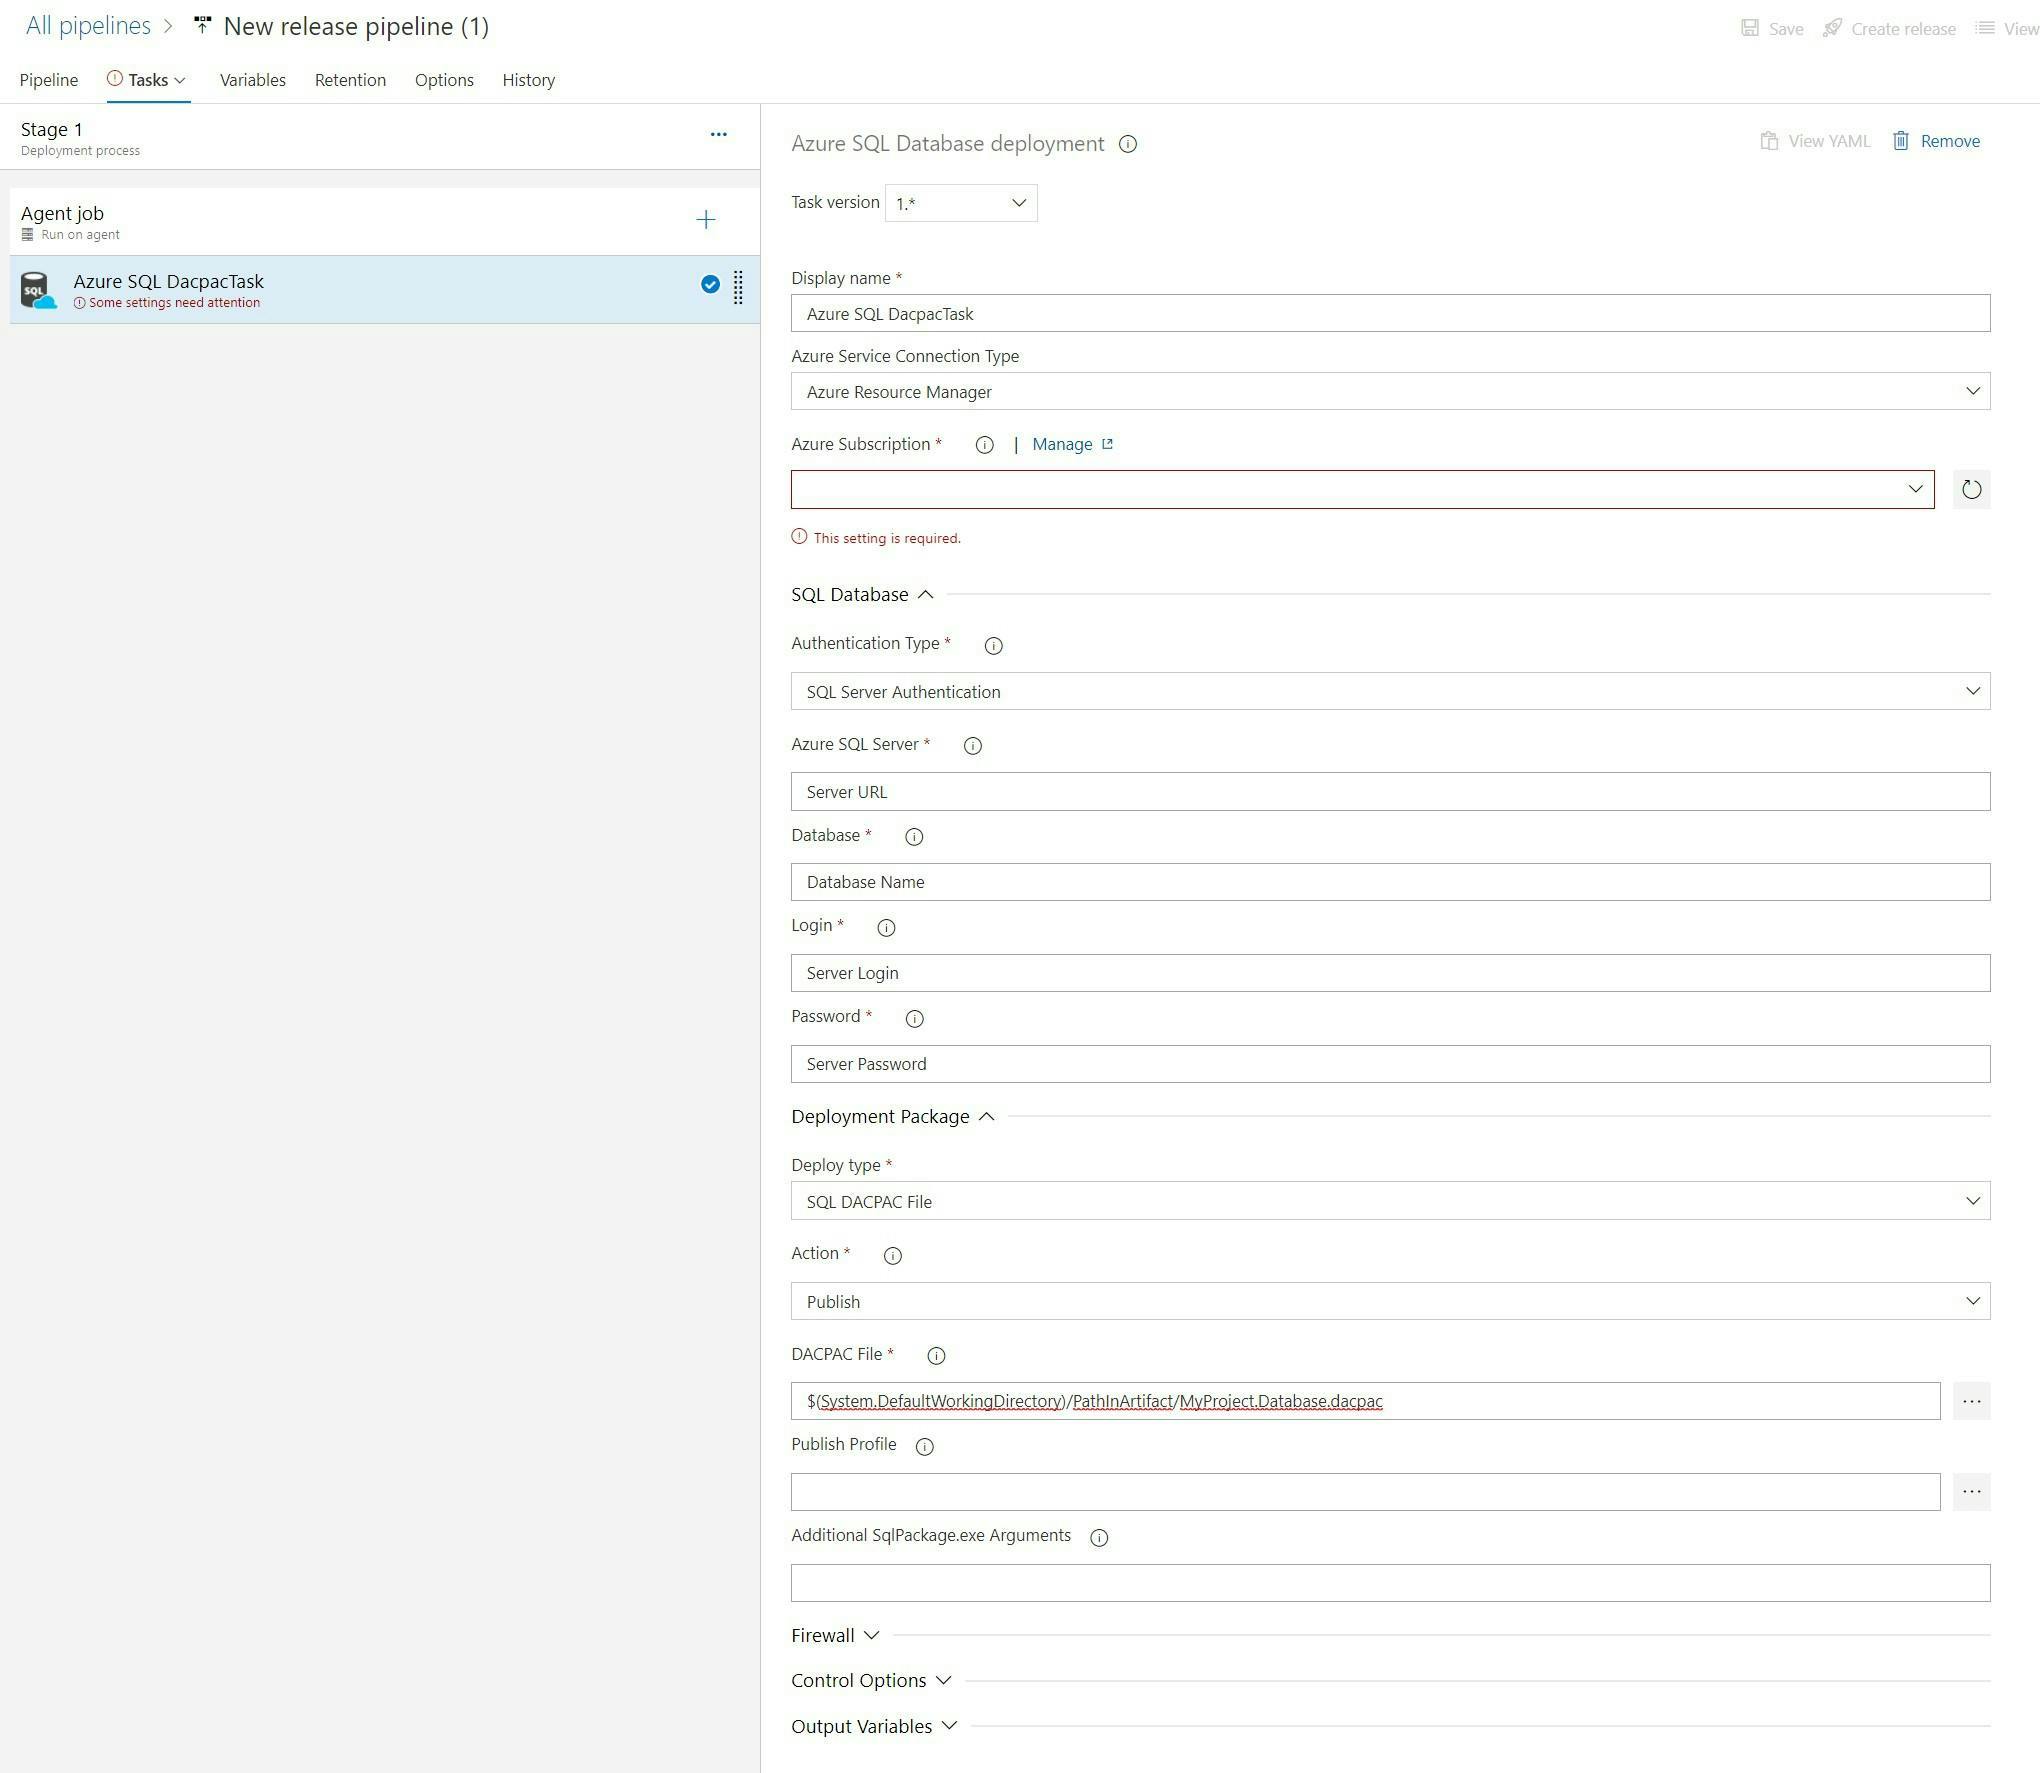
On Agent Job click the plus button to add a task to the agent job. Search for dacpac and click the Add button on Azure SQL Database deployment.

Complete the fields to configure which DB it will be deployed to (as shown in the picture but with your details).

And that's it. You can now run the pipelines and your SQL Project will be deployed to SQL Azure.

Some other tips

On the Azure SQL Database deployment task there is a property called Additional SqlPackage.exe Arguments this can be used to specify things like should loss of data be allows. You can find the list of these at this url https://docs.microsoft.com/en-us/sql/tools/sqlpackage/sqlpackage?view=sql-server-ver15#properties

If you are deploying to multiple environments you will want to use variables for the server details rather than having them on the actual task. This will make it easier to clone the stages and have all connections details configured in one place.

Equivalent of the Octopus Package Library for Azure Devops

Equivalent of the Octopus Package Library for Azure Devops

I’ve been using Team City and Octopus deploy in our CI setups for several years, but over the last 6 months have slowly been moving over to use Azure Devops. This is mostly to move away from needing to keep an application like Team City updated by switching to a SAAS service. Octopus is available as a SAAS service, but as Azure Devops is also capable of doing releases I opted to start with that rather than using Octopus again.

One of my first challenges was how you replace Octopus’s package library. The solutions I’m working on (which are generally Sitecore based), consist of the application we write and store in Source Control, and all the other pre-built parts of Sitecore which we don’t store in source control.

With Octopus deploy we would add these static parts to the Octopus package library and then release a combination of them and our application to a server, wiping what is there before we do. That then gives us the exact same deploy on every target.

With Azure Devops however, things are a bit different.

Azure Artifacts

The closest equivalent of the package library is Azure Artifacts. Rather than a primary purpose being to upload packages to be included in a deploy. The goal of Artifacts is more inline with the output of a pipeline being saved to an Artifact which can then be a package feed for things like NuGet or npm.

Unfortunately, there is also no UI to directly upload a NuGet package to an Artifact feed like there is with Octopus’s package library. However, it is possible to upload a pre-built NuGet package another way using NuGet.exe itself.

Manually uploading a NuGet package to Azure Artifacts

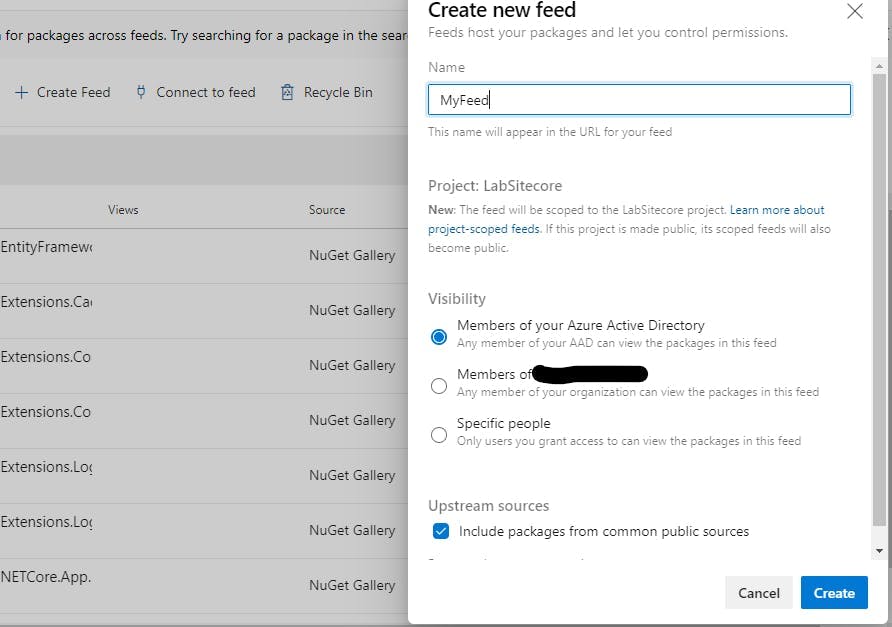
To start you need to create a feed for your package to uploaded to.

Login to Azure DevOps and got to Artifacts. Click Create feed and give it a name.

Click connect to feed and select NuGet.exe. You will see under the heading project setup a nuget.config file to add to your solution.

Create an empty solution in Visual Studio and add a nuget.config file to the root folder using the source from the website. It will look something like this;

1<?xml version="1.0" encoding="utf-8"?>
2<configuration>
3 <packageSources>
4 <clear />
5 <add key="MyFeed" value="https://pkgs.dev.azure.com/.../_packaging/MyFeed/nuget/v3/index.json" />
6 </packageSources>
7</configuration>

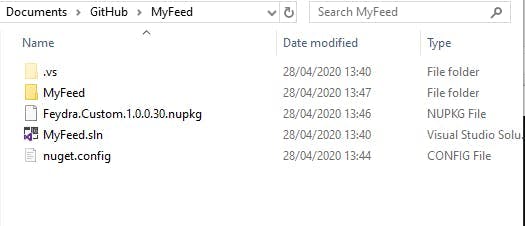
Copy the NuGet package you would like you publish into the root folder as well. I’m using a package we have created for a tool called Feydra. My folder now looks like this.

Before we can publish into our NuGet feed we need to setup a personal access token. This is done from within Azure Devops.

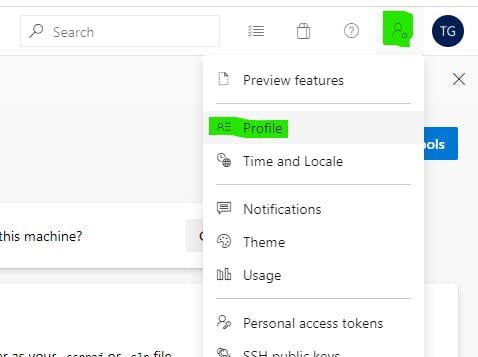
In the top right corner click the person icon and then select profile. On the profile screen you will see a section called Personal access tokens under Security.

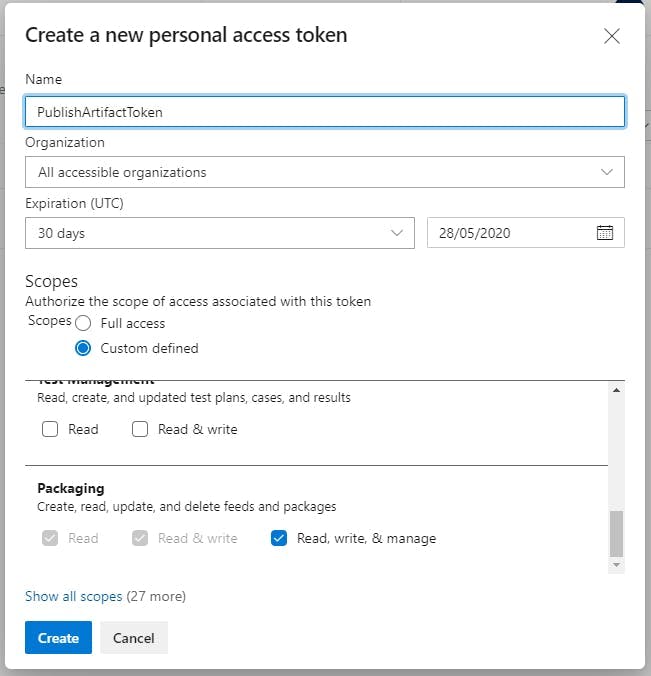
From here click New Token and give it the Read, write & manage permission for Packaging.

You will be given a token which you should save a copy of.

Now we are ready to publish are NuGet package to the Artifact feed.

Open a command prompt at the folder containing your solution file and run the following commands

1nuget push -Source <SourceName> -ApiKey az <PackagePath>

For me this is as follows:

1nuget push -Source MyFeed -ApiKey az .\Feydra.Custom.1.0.0.30.nupkg

You will then be prompted for a username and password which you should use the personal access token for both.

Refresh the feed on the website and you should see you package added to it, ready to be included in a release pipeline.

Using Sitecore TDS with Azure Pipelines

Using Sitecore TDS with Azure Pipelines

Sitecore TDS allows developers to serialize Sitecore items into a file format which enables them to be stored in source control. These items can then be turned into a Sitecore update package to be deployed into a Sitecore solution.

With tools like Team City it was possible to install the TDS application on the server, and MSBuild would pick it up in the same way that Visual Studio would when you create a build locally. However, with build tools like Azure Piplelines that are a SAAS service you do not have any access to install components on a server.

If your solution contains a TDS project and you run an Azure Pipeline, you will probably see this error saying that the target 'Build' does not exist in the project.

Fortunately, TDS can be added to a project as a NuGet package. The documentation I found on Hedgehogs site for TDS says the package is unlisted on NuGet.org but can be installed in the normal way if you know what it's called. When I tried this is didn't work, but the NuGet package is also available in the TDS download so we can do it a different way.

Firstly download TDS from Hedgehogs website. https://www.teamdevelopmentforsitecore.com/Download/TDS-Classic

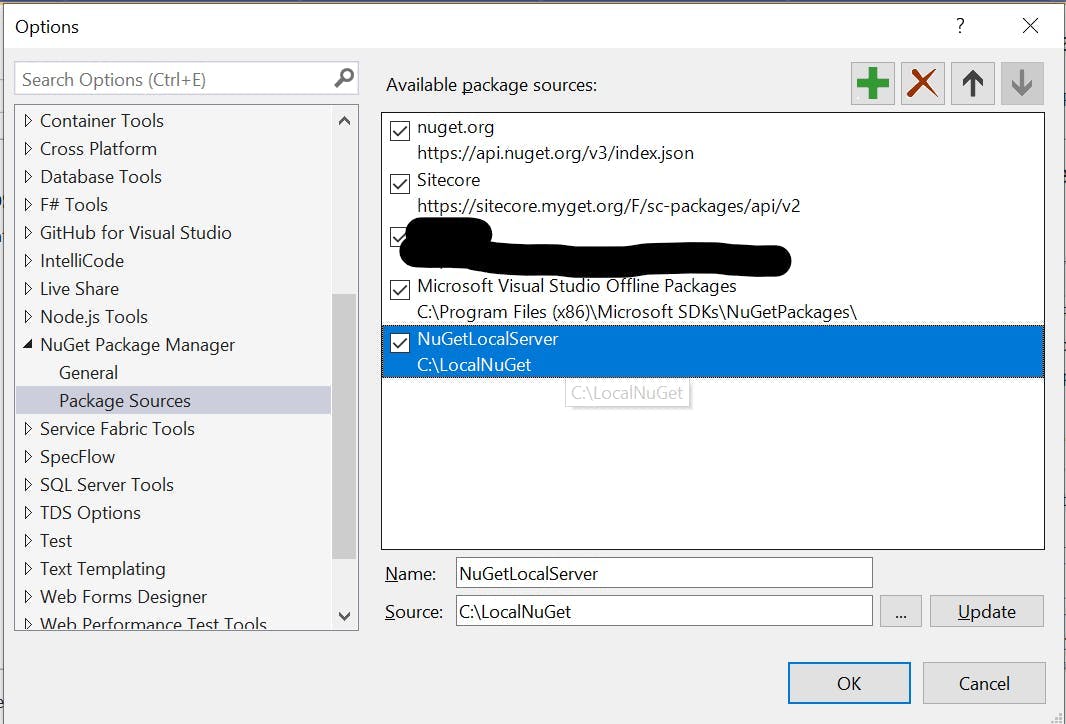
Next create a folder in the root of your drive called LocalNuGet and copy the nuget package from the download into this folder.

Within Visual Studio go to Tools > NuGet Package Manager > Package Manager Settings, and in the window that opens select Package Sources on the left.

Add a new package source and set it to your LocalNuGet folder.

From the package manager screen select your local nuget server as the package source and then add the TDS package to the relevant projects.

When you commit to source control make sure you add the hedgehog package in your projects packages folder. Normally this will be excluded as your build will try and restore the NuGet packages from a NuGet feed rather than containing them in the repo.

If you run your Azure Pipleine now you should get the following error:

This is a great first step as we can now see TDS is being used and we're getting an error from it.

If you're not getting this, then open the csproj file for your solution and check that there are no references to c:\program files (x86)\Hedgehog Development\ you should have something like this:

1<Target Name="EnsureNuGetPackageBuildImports" BeforeTargets="PrepareForBuild">
2 <PropertyGroup>
3 <ErrorText>This project references NuGet package(s) that are missing on this computer. Use NuGet Package Restore to download them. For more information, see http://go.microsoft.com/fwlink/?LinkID=322105. The missing file is {0}.</ErrorText>
4 </PropertyGroup>
5 <Error Condition="!Exists('..\packages\HedgehogDevelopment.TDS.6.0.0.10\build\HedgehogDevelopment.TDS.targets')" Text="$([System.String]::Format('$(ErrorText)', '..\packages\HedgehogDevelopment.TDS.6.0.0.10\build\HedgehogDevelopment.TDS.targets'))" />
6 </Target>
7 <Import Project="..\packages\HedgehogDevelopment.TDS.6.0.0.10\build\HedgehogDevelopment.TDS.targets" Condition="Exists('..\packages\HedgehogDevelopment.TDS.6.0.0.10\build\HedgehogDevelopment.TDS.targets')" />

To fix the product key error we need to add our license details.

Edit your pipeline and then click on the variables button in the top right. Add two new variables:

  • TDS_Key - Which should be set to your license key
  • TDS_Owner - Which should be set to the company name the key is linked to

Now run your pipleline again and the build should succeed

Azure devops and custom NuGet feeds

Azure devops and custom NuGet feeds

If your setting up a CI pipleline on Azure Devops for a site which uses a NuGet feed from a source that isn't on nuget.org you may see the error:

"The nuget command failed with exit code(1) and error(Errors in packages.config projects Unable to find version..."

On your local dev machine you will have added extra an extra NuGet feed source through visual studio which will update a global file on you machine. However as Azure Pipelines is a serverless solution you don't have the same global file to update to include the sources.

Instead of this you need to add a NuGet.config file to the root of your repository.

Here is an example of one set to include Sitecores NuGet package feed.

1<?xml version="1.0" encoding="utf-8"?>
2<configuration>
3 <packageSources>
4 <add key="nuget.org" value="https://www.nuget.org/api/v2/" />
5 <add key="Sitecore NuGet v2 Feed" value="https://sitecore.myget.org/F/sc-packages/" />
6 </packageSources>
7</configuration>

Next you will need to update your pipeline to tell the NuGet step to use this config file

1- task: NuGetCommand@2
2 inputs:
3 restoreSolution: '$(solution)'
4 feedsToUse: 'config'
5 nugetConfigPath: 'NuGet.config'

And that's it. As long as all the sources are correct the NuGet command should now find your packages.

Config file transforms with Azure Devops

Config file transforms with Azure Devops

For a long time now our primary CI setup has been based around Team City and Octopus deploy, but as reliable as it is there are things I don't like about it:

  1. It's not a SASS setup meaning there's a VM to occassionaly think about and updates to install. While Octopus is now availiable as a SASS option, Team City is not and moving Octopus will only solve half the problem.
  2. That VM they both sit on every so often gets and issue with it's hard disk being full.
  3. It's complicated to recommend the same setup to clients. You end up having to go through multiple things they need to buy which then require some installation and ongoing maintenance. Ideally we would have a setup thats easy for them to replicate and own themselves with minimal maintenance.

So when we took over a site recently that typically came with no existing CI setup in place, I decided to take a look at using Azure Devops instead. You can use Azure Devops with Octopus Deploy but as it claims to be able to manage releases as well as builds we went for doing the whole thing just in Azure Devops.

Getting a build set up was relatively straight forward so I'm going to skip past that bit, but in short we ended up with a build that will create a web deploy package and publish it as an artifact. Typical msbuild type stuff.

File transforms and variable substitution

The first real tricky point came with replacing variables in config files during a release to each envrionment. We were using the IIS Web App Deploy task to deploy the application to IIS on a VM (no new Azure Web App Services in this setup :( as I said we took over the site and this was just to get automated deploys of what they already have). A simple starting point with this is some built in functionality for XML Variable Substituion in the IIS Web App Deploy task.

Quite simply you can add all your varibles to the variable list, set the scope for which envrionment you want it to apply to and the during the deploy they are replaced in your config. Unlike some tag replacement tools I've used in the past this one actually uses the name of the connecting string or app setting you need to set, so if you need to set a connection string named web, the variable name will be web.

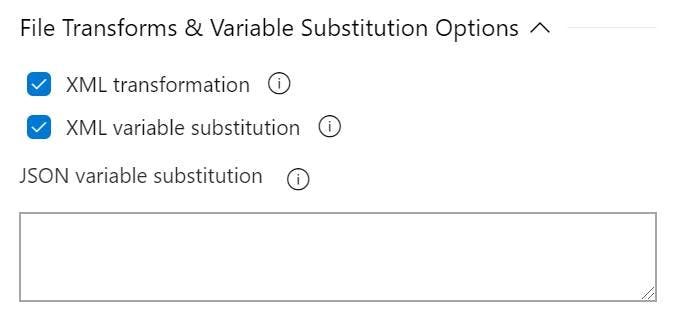
This is also where my problem stated. The description for what XML variable substitution does is:

This was a Sitecore solution and for Sitecore most of your config settings are in Sitecores own Sitecore section of the config file. So in other words the connection string will get updated but the rest won't.

Parameter and SetParameter XML files

My next issue was trying to find a solution is actually quite hard. Searching for this problem either gave me a lot of results for setups using ARM templates (as I said, this was a solution we took over and that kind of change is not on the agenda), or you just get the easy bit above. Searching for Sitecore and Azure Devops also leads you to a lot of results on a cloud infrastructure setup (again not what we're doing here, at least in the short term). Everything that was coming up felt far more complicated than the solution should be.

However the documentation on the XML variable substitution did have one interesting sentance.

A parameters.xml file isn't something I've used before which makes this sentance a bit cryptic. The first half says I can do what I want with an xml file, but the second half says I'll need something else to actually do it.

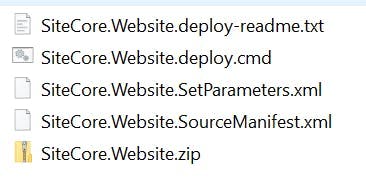
After a bit of research this all comes back to web deploy. When you do a build that outputs a web deploy package, you get 5 files.

A zip file containing the actual site, a command file which has the script to do the deploy and a set parameters file which is used to set config variables during the deploy. The others aren't so imporant.

To have different config set on different envrionments you just need to edit the set parameters file. But first you need to have the parameter in the set parameters file so that you can actually change it and this is where the parameters.xml file comes in.

Creating the parameter files

Add a file called parameters.xml file to the root of your project and then add parameters as follows.

1<?xml version="1.0" encoding="utf-8" ?>
2<parameters>
3 <parameter name="DataFolderLocation" defaultvalue="#{dataFolder}">
4 <parameterEntry kind="XmlFile" scope="App_Config\\Include\\Z.Project\\DataFolder\.config$" match="/configuration/sitecore/sc.variable[@name='dataFolder']/patch:attribute/text()" />
5 </parameter>
6</parameters>

Some important parts:

default value - The value that the config setting will get set to

scope - The path to the file containing the setting

match - An XPath expression for find the part of the config file to update

Once you have this the build will start producing a SetParameters.xml file containing the extra parameters.

1<?xml version="1.0" encoding="utf-8"?>
2<parameters>
3 <setParameter name="IIS Web Application Name" value="Default Web Site/SiteCore.Website_deploy" />
4 <setParameter name="DataFolderLocation" value="#{dataFolder}" />
5</parameters>

Note: I've set the value to be something I intend to replace in the release process.

Replacing the tokens

With our SetParameters.xml file now contining all the config we need to update, we need a step in the release process that will replace all the tokens with the correct values.

To do this I used a replaced tokens task https://marketplace.visualstudio.com/items?itemName=qetza.replacetokens

Config options need to be set for:

Root Directory - Path to the folder containing the SetParameters.xml file

Target files - A list of files to have replacements done in. In our case this was SiteCore.Website.SetParameters.xml

Token prefix - The prefix on tokens to be search for. Ours was #{

Token suffix - The suffix to denote the end of a token. Ours was }

Lastly in the IIS Web App Deploy step the SetParameters file needed to be selected and the new variables added to the variable list in Azure Devops. The variable names need to be called the bit between your prefix and suffix. i.e. #{datafolder} would be called datafolder.

If you don't set the variables then the log's will show warning for each one it couldn't find.

12019-09-24T17:17:21.6950466Z ##[section]Starting: Replace tokens in SiteCore.Website.SetParameters.xml
22019-09-24T17:17:23.9831695Z ==============================================================================
32019-09-24T17:17:23.9831783Z Task : Replace Tokens
42019-09-24T17:17:23.9831816Z Description : Replace tokens in files
52019-09-24T17:17:23.9831861Z Version : 3.2.1
62019-09-24T17:17:23.9831891Z Author : Guillaume Rouchon
72019-09-24T17:17:23.9831921Z Help : v3.2.1 - [More Information](https://github.com/qetza/vsts-replacetokens-task#readme)
82019-09-24T17:17:23.9831952Z ==============================================================================
92019-09-24T17:17:27.2703037Z replacing tokens in: C:\azagent\A1\_work\r1\a\PublishBuildArtifacts\SiteCore.Website.SetParameters.xml
102019-09-24T17:17:27.3133832Z ##[warning]variable not found: dataFolder
112019-09-24T17:17:27.3179775Z ##[section]Finishing: Replace tokens in SiteCore.Website.SetParameters.xml

With all this set our config has it's variables configured within Azure Devops for each environment,