Tag: Sitecore
Sitecore 9 installation tips

Sitecore 9 installation tips

Sitecore 9 released this week and with it comes a whole new installation process. Gone are the days you could just download the web root and restore some dbs or just run the installation gui and enter a db connection string. Sitecore 9 has some fairly fundamental architectural changes with multiple IIS entries and and some windows services to go with it. Server roles are now also being properly configured rather than updating config files to match what it says in an excel doc.

Along with these changes, the installation process has moved to be based on powershell scripts, which on one hand has made things a bit harder, but it also brings great positives that the process can now be customized with scripts that are repeatable without the risk of mistakes.

Here's my tips for a smooth local installation (production installs are different to a local install).

Tip #1 - Check the Prerequisites and Requirements

It sounds obvious but when presented with a new toy you want to play with it as fast as possible, and with a 49 page document the urge is there to skip to the installation and hope for the best.

Skipping however is likely to result in install failures as the installer relies on modules such as Web Deploy and the right version of SQL Server which were not needed for the version you may already have installed.

Tip #2 - Make sure you have the right versions

You may have SQL and Solr but are they the right version?

SQL Express 2016

Sitecore 9 supports SQL Server 2014 SP2 and SQL Server 2016. Now that SQL Server 2017 is out, actually finding the link for 2016 express has become a challenge, but here it is.

Download SQL Server 2016 Express

Solr 6.6.1

Sirecore 9 supports Solr version 6.6.1. I typically use Bitnami Solr as it's a lot easier to install than doing Solr on it's own. Like SQL though the latest version is newer than what Sitecore supports and finding the link to the older one can be a bit of a challenge.

Download Bitnami Solr 6.6.1

Tip #3 - Solr requires SSL

By default Solr does not install with SSL turned on, but without it your install will fail. More specifically it will fail trying to start an xConnect service.

Enabling SSL for Solr

To create a self-signed certificate for Solr we can use the JDK Keytool which if you've installed Solr you should already have installed.

Note: These instructions are based on this guide from Apache and this blog post from Jason St-Cyr.

  1. Open command prompt
  2. Change to the Solr ‘etc’ directory
1cd "{SOLR_HOME}\server\etc"

3. Execute the keygentool command

1"{JAVA_HOME}\bin\keytool.exe" -genkeypair -alias solr-ssl -keyalg RSA -keysize 2048 -keypass secret -storepass secret -validity 9999 -keystore solr-ssl.keystore.jks -ext SAN=DNS:localhost,IP:127.0.0.1 -dname "CN=localhost, OU=Organizational Unit, O=Organization, L=Location, ST=State, C=Country"

This will generate the keystore with a password of ‘secret’ as valid for localhost and 127.0.0.1. You can add other DNS and IPs as desired, or skip hostname verification.

4. Convert generated JKS to PKCS12

1 "{JAVA_HOME}\bin\keytool.exe" -importkeystore -srckeystore solr-ssl.keystore.jks -destkeystore solr-ssl.keystore.p12 -srcstoretype jks -deststoretype pkcs12

5. Enter password when prompted. The password ‘secret’ was used in the previous step. Remember to use your password instead if you changed it in the keygen command parameters.

6. Open Windows Explorer and navigate to the ‘etc’ directory (“{SOLR_HOME}\server\etc”)

7. Double-click on the generated ‘p12’ file (solr-ssl.keystore.p12 if you used the default parameters from the previous steps)

8. In the wizard, specify the following values (there will be some extras you can ignore):

Store Location: Local Machine

File name: Leave as provided

Password: secret

Certificate Store: Trusted Root Certification Authorities

Remember to use your password instead if you changed it during the previous steps.

9. Open the solr.in.cmd file for editing (e.g. {SOLR_HOME}\bin\solr.in.cmd)

10. Un-comment the SSL settings:

1set SOLR_SSL_KEY_STORE=etc/solr-ssl.keystore.jks
2set SOLR_SSL_KEY_STORE_PASSWORD=secret
3set SOLR_SSL_TRUST_STORE=etc/solr-ssl.keystore.jks
4set SOLR_SSL_TRUST_STORE_PASSWORD=secret
5set SOLR_SSL_NEED_CLIENT_AUTH=false
6set SOLR_SSL_WANT_CLIENT_AUTH=false

11. Restart SOLR to pick up the changes.

Tip #4 - Close management studio

I'm not sure if this was a one off thing, but with management studio open my installation failed with a single user access issue.

Tip #5 - Check the logs

The installation script will output logs to the folder it runs in. If your installation fails it will reference a log file. To find out why the installation failed or get some more info go and check the log referenced.

Tracking downloads in Sitecore Experience Analytics

Tracking downloads in Sitecore Experience Analytics

This blog is generally aimed at developers whereas the contents of this post could be categorized as a topic for marketers, but I've decided to include it as its likely something a Sitecore dev could get asked about and its also quite useful to know about.

Out the box Sitecore's Experience Analytics comes with a set of pre-configured reports to give insights into the sites visitors. Previously I blogged about Populating the internal search report in Sitecore which unless done will probably lead to someone asking why it's blank. Another report which initially won't show any data is downloads.

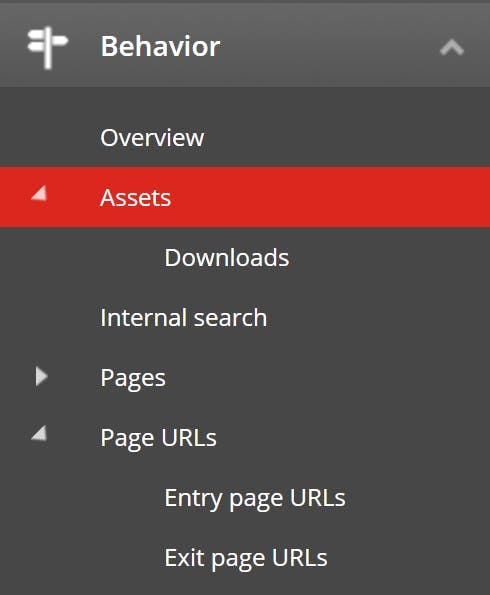
Located under behavior there is actually now two reports relating to downloads. The Assets report and the Downloads report.

Assets, in Sitecores words - "Describes your marketing assets or content used to attract contacts to your website and increase their engagement with your organization."

Downloads - "Describes your specific assets, their download activity, and their value."

These reports are populated by assigning a download event to a piece of media and organizing it as a marketing asset.

Adding a download event to an item

Sitecore doesn't know which items you think are important to track as downloads so content editors need to mark them manually.

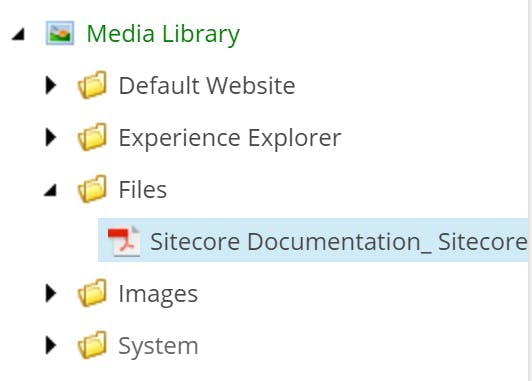
Go to the Media Library

Select the item you want to track as a download

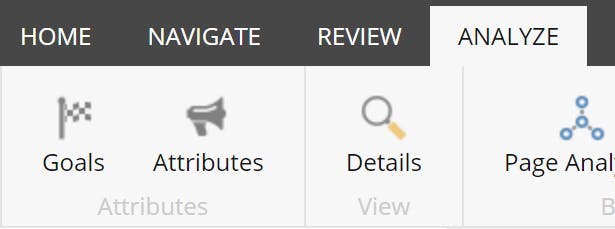
From the ribbon select the Analyze tab and click Attributes

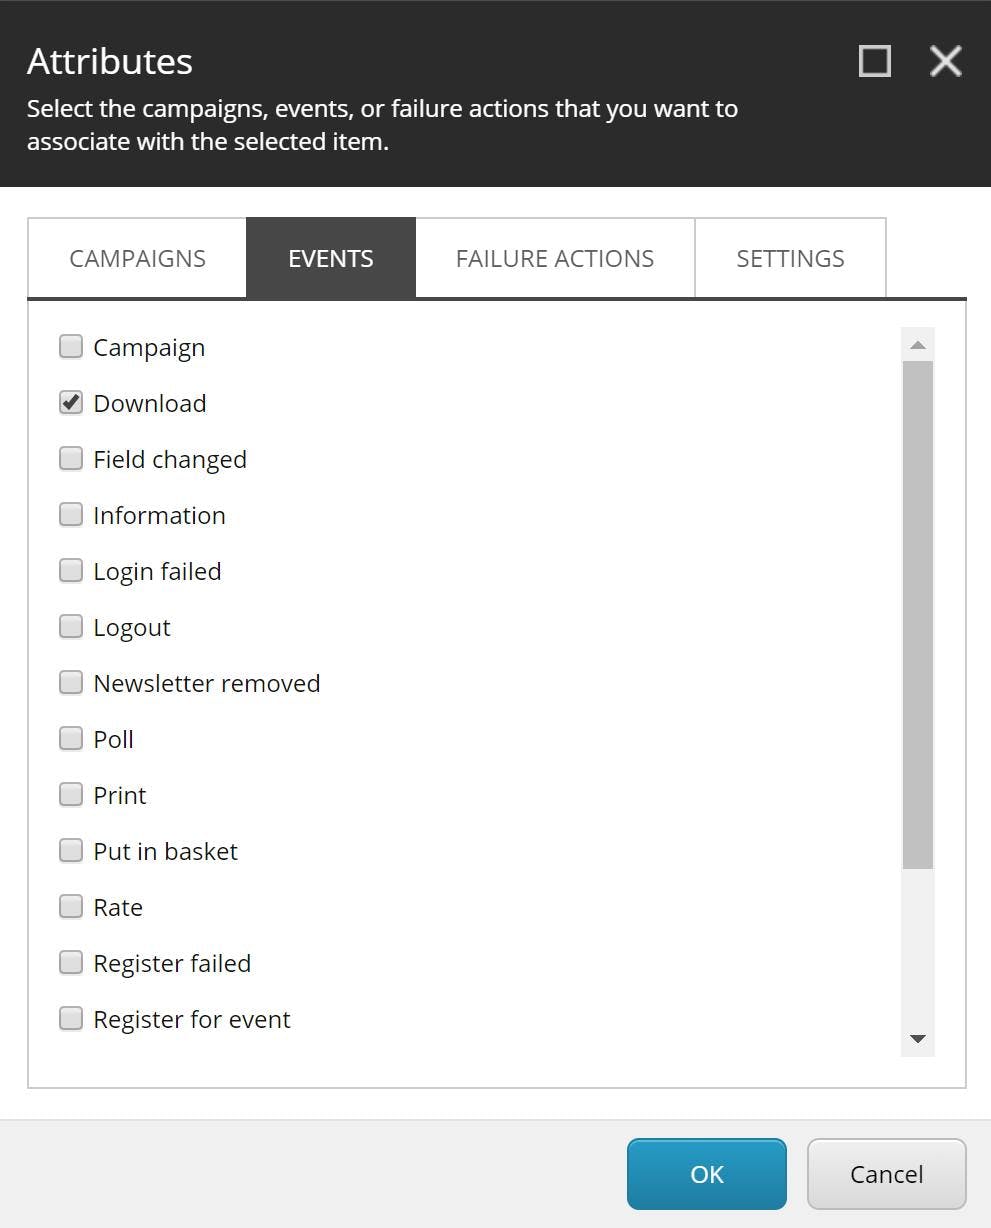
Select download form the list of events

Remember to publish your changes.

Categorizing an Asset

By assigning a marketing asset type to your items they can be grouped for analysis. Such as grouping downloads into categories like white paper and product brochure.

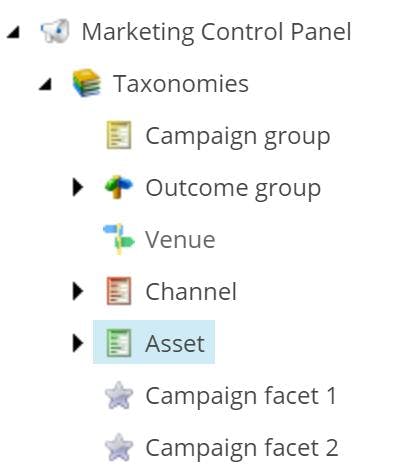
Before you assign a marketing asset to an item you will first need to create your assets. On the Sitecore Launchpad, open the Marketing Control Panel.

Go to Assets which is located under Taxonomies.

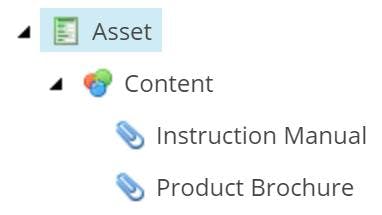
Create your set of Asset Groups and Assets within each. In this example I've created a group called Content and Assets called Instruction Manual and Product Brochure.

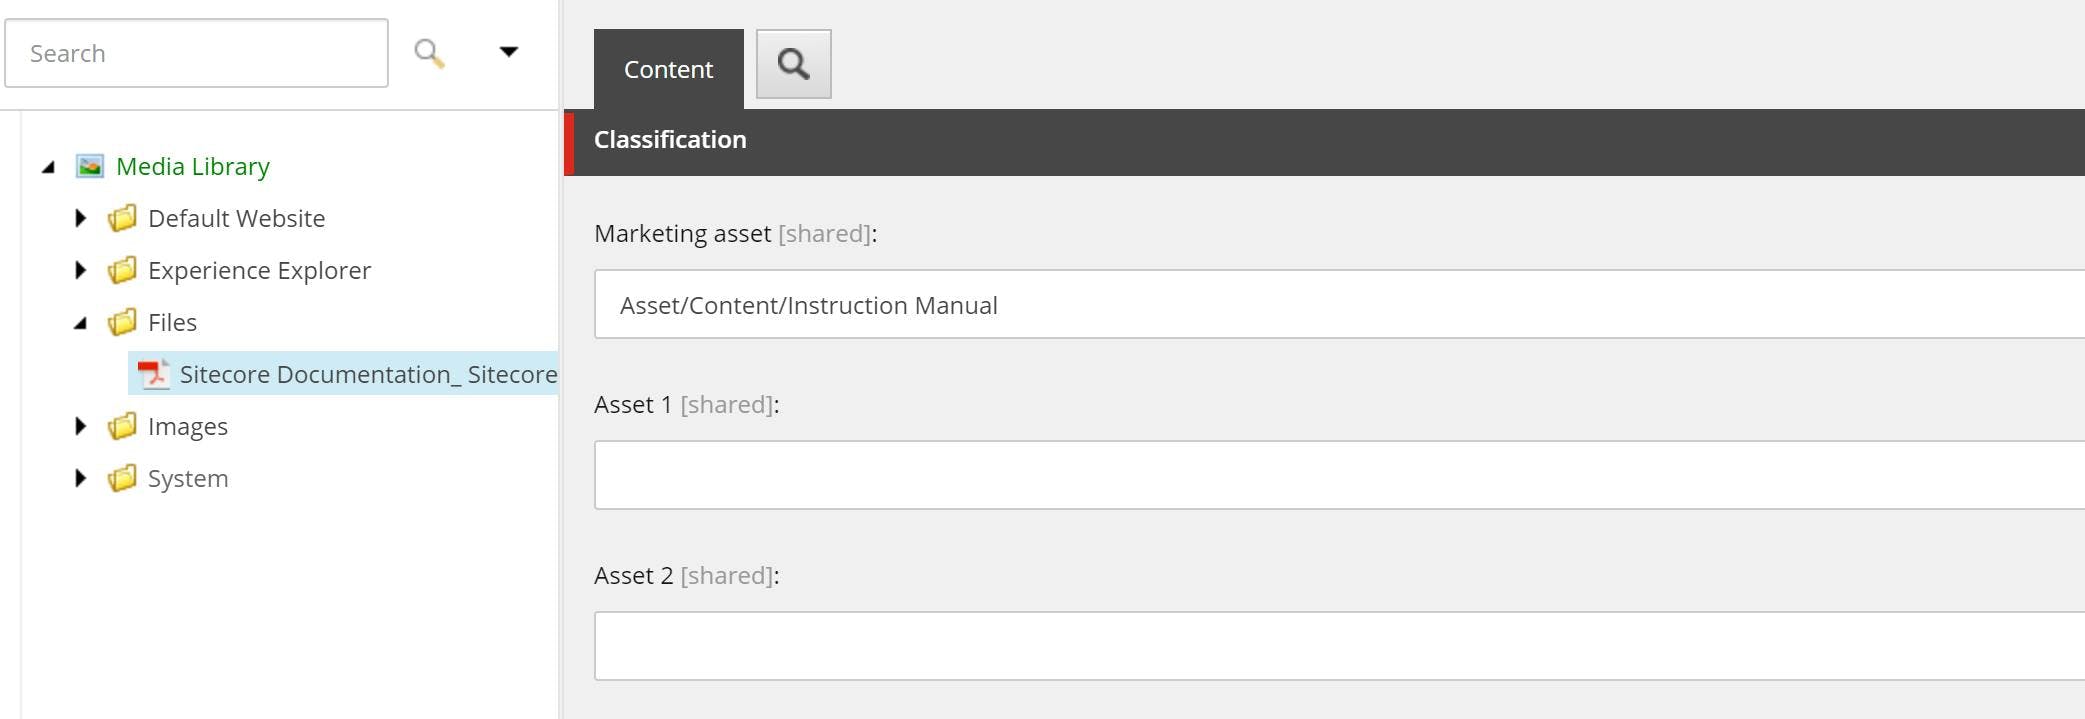
Navigate to the item you want to assign the asset to and select the relevant asset in the marketing asset field.

Publish all your changes.

The result

Now you've set a download event and a marketing asset, the assets and downloads reports will start populating.

Going Further

The concept of having to tag every download as a download may seem a little tedious and also prone to being missed in the future. If all your downloads are PDF's and you want to track all PDF's as a download, one way to make life easier is to update the standard values on the PDF template item (/sitecore/templates/System/Media/Unversioned/Pdf) so that it always has the attribute of download. The content authors will still need to do the marketing asset categorization, but at least this gives them 1 less thing to do.

Populating the internal search report in Sitecore

Populating the internal search report in Sitecore

Out the box Sitecore ships with a number of reports pre-configured. Some of these will show data without you doing anything. e.g. The pages report will automatically start showing the top entry and exit pages as a page view is something Sitecore can track.
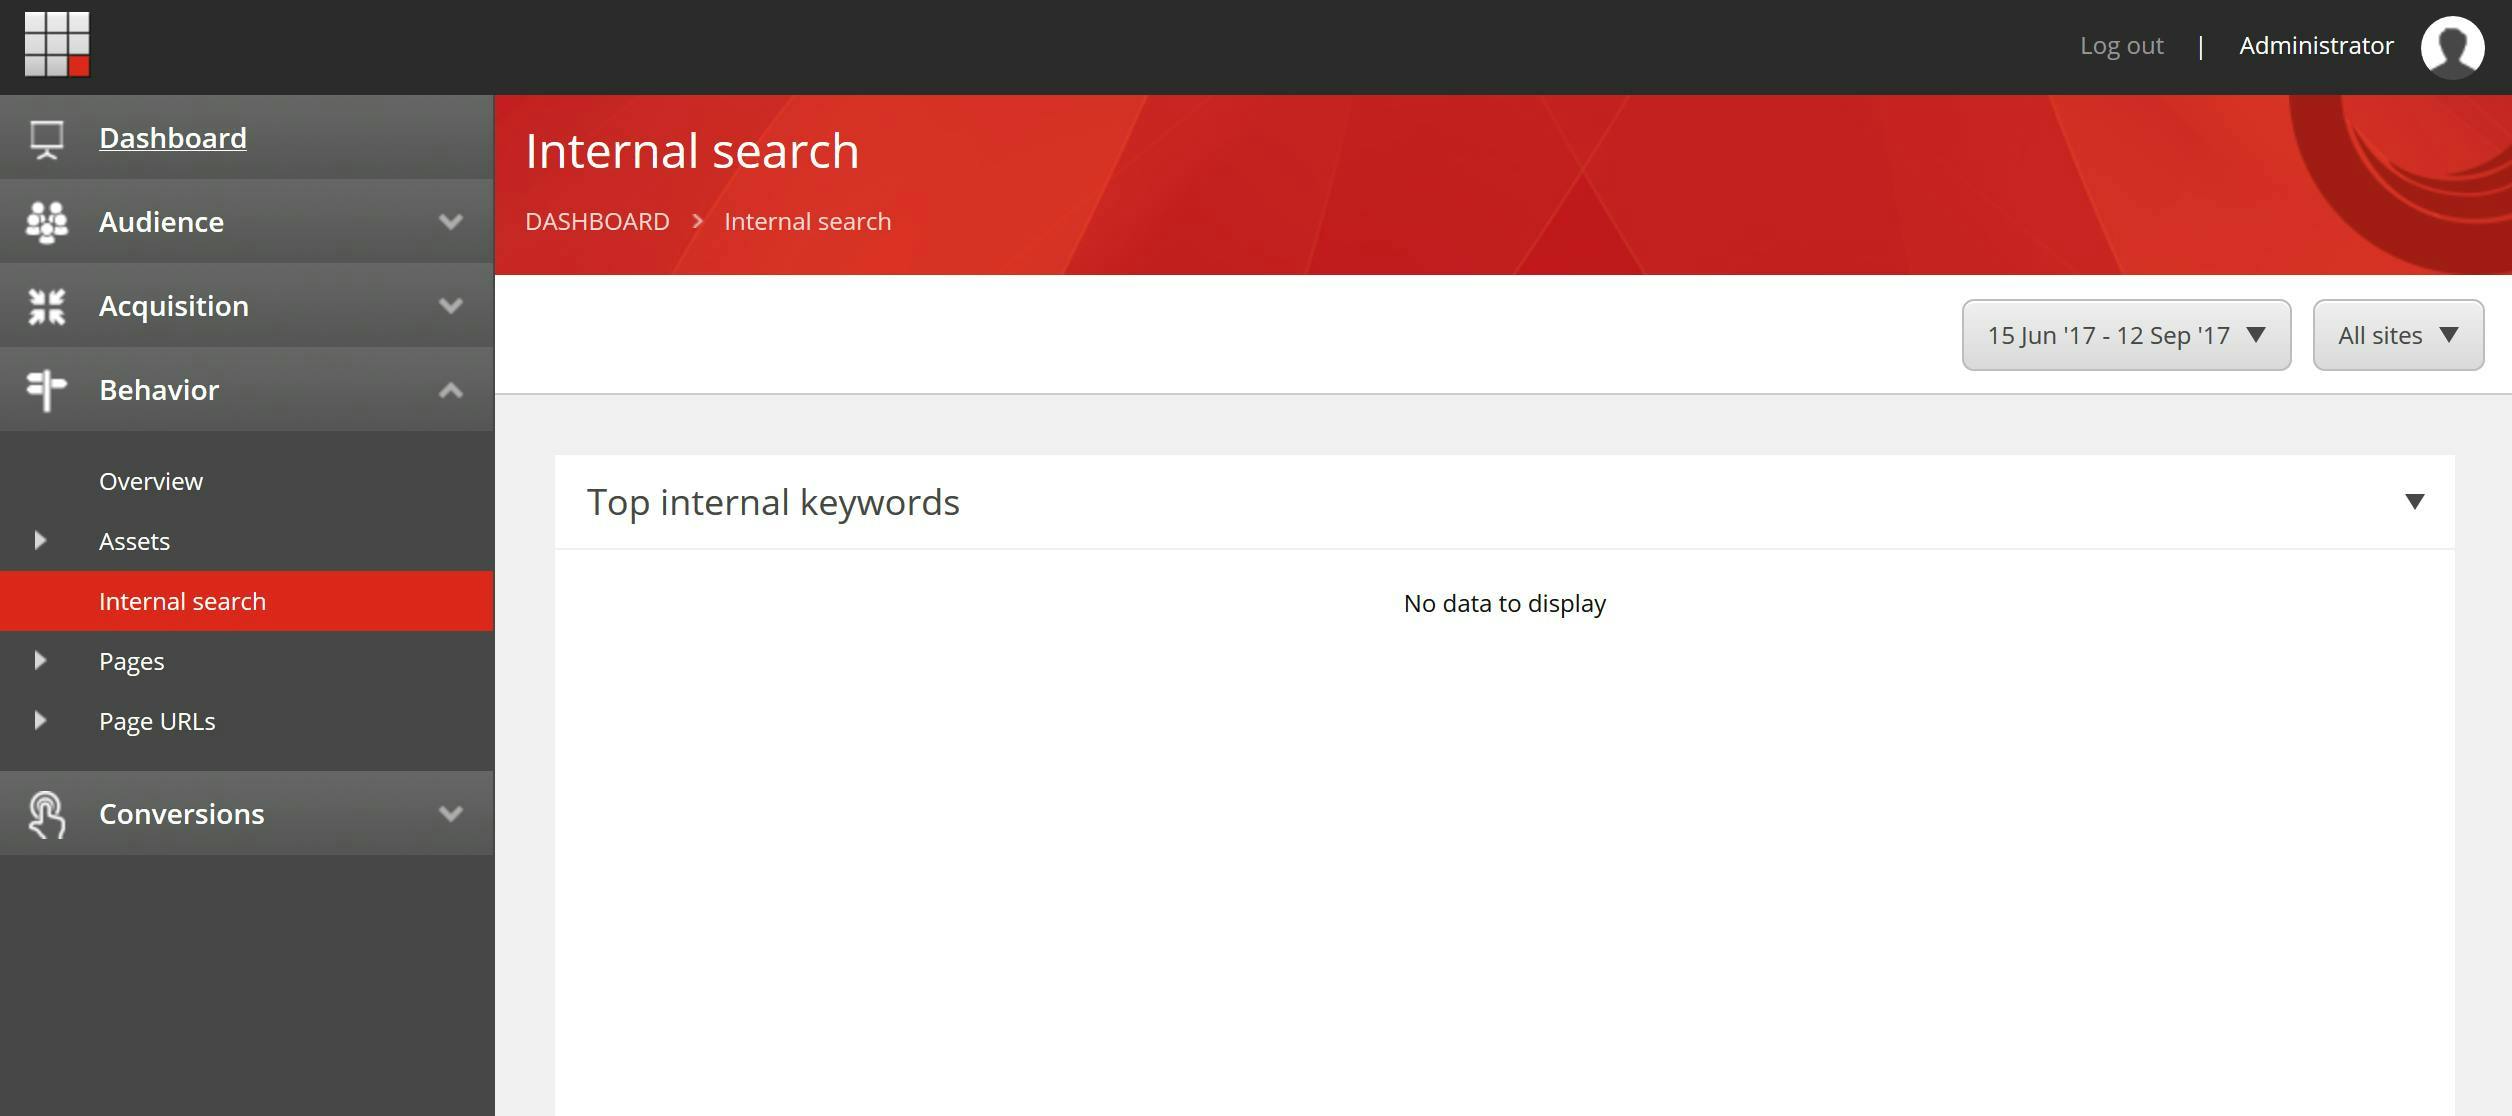
Other's like the internal search report will just show a message of no data to display, which can be confusing/frustrating for your users. Particularly when they've just spent money on a license fee to get great analytics data only to see a blank report.

The reason it doesn't show any information is relatively straight forward. Sitecore doesn't know how your site search is going to work and therefore it can't do the data capture part of the process. That part of the process however is actually quite simple to do.
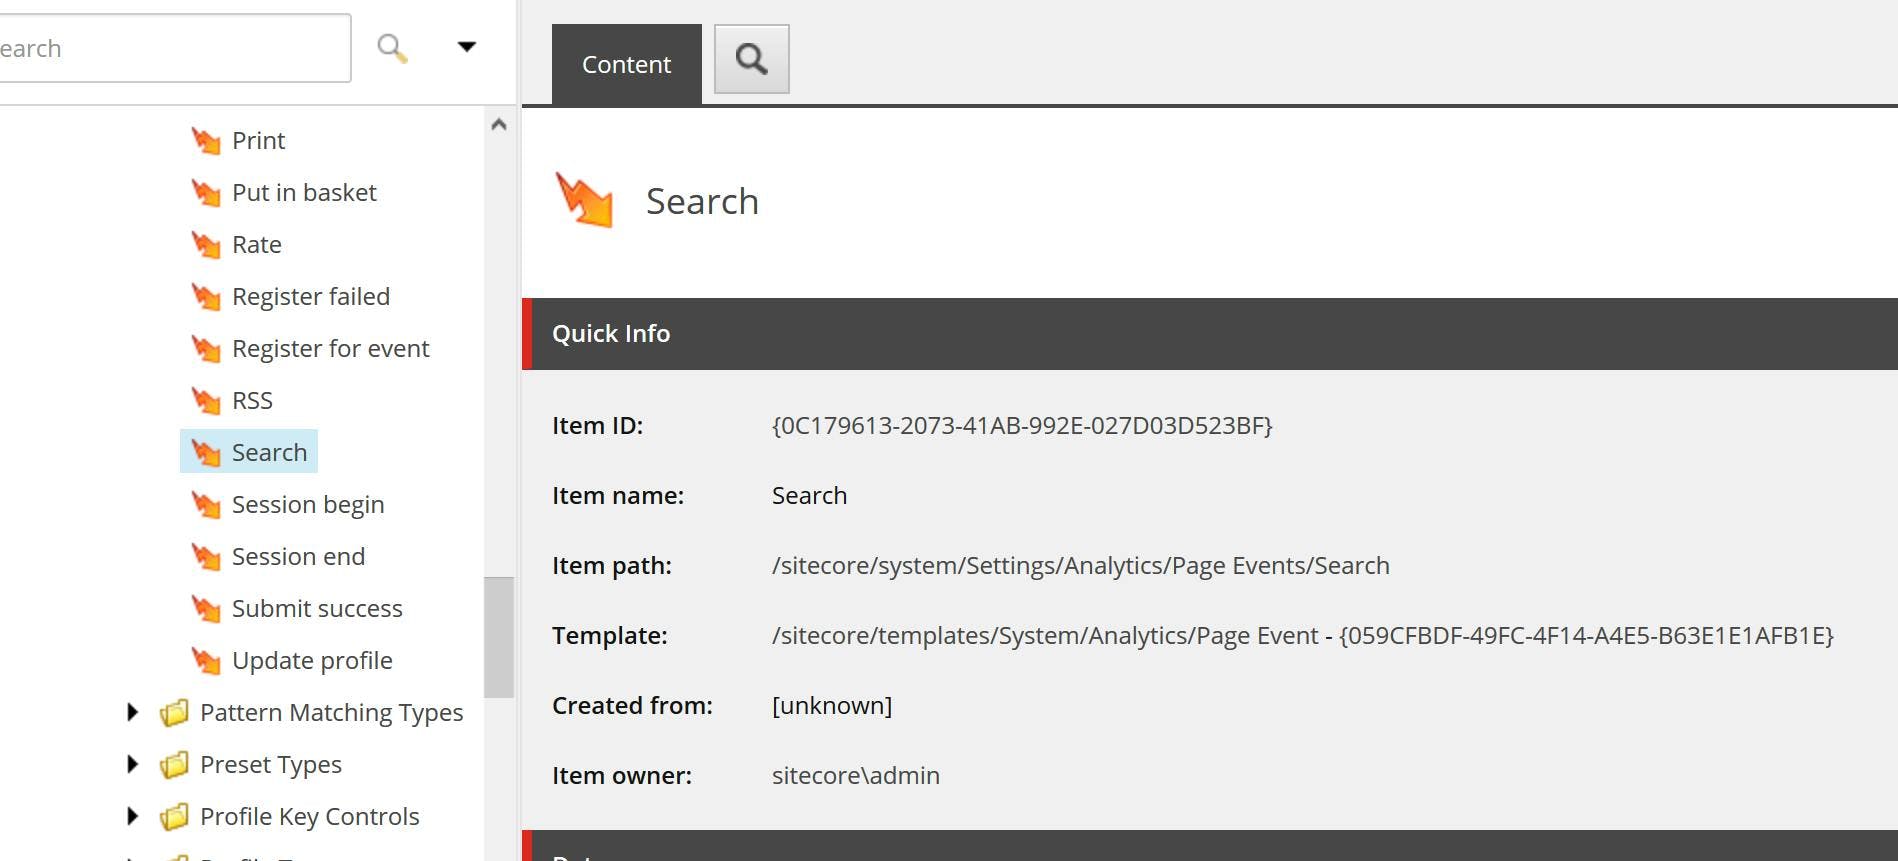
Sitecore has a set of page events that can be registered in the analytics tracker. Some of these like Page Visited will be handled by Sitecore. In this instance the one we are interested in is Search and will we have to register it manually.

To register the search event use some code like this (note, there is a constant that references the item id of the search event). The query parameter should be populated with the search term the user entered.

1using Sitecore.Analytics;
2using Sitecore.Analytics.Data;
3using Sitecore.Data.Items;
4using Sitecore.Diagnostics;
5using SitecoreItemIds;
6
7namespace SitecoreServices
8{
9 public class SiteSearch
10 {
11 public static void TrackSiteSearch(Item pageEventItem, string query)
12 {
13 Assert.ArgumentNotNull(pageEventItem, nameof(pageEventItem));
14 Assert.IsNotNull(pageEventItem, $"Cannot find page event: {pageEventItem}");
15
16 if (Tracker.IsActive)
17 {
18 var pageEventData = new PageEventData("Search", ContentItemIds.Search)
19 {
20 ItemId = pageEventItem.ID.ToGuid(),
21 Data = query,
22 DataKey = query,
23 Text = query
24 };
25 var interaction = Tracker.Current.Session.Interaction;
26 if (interaction != null)
27 {
28 interaction.CurrentPage.Register(pageEventData);
29 }
30 }
31 }
32 }
33}

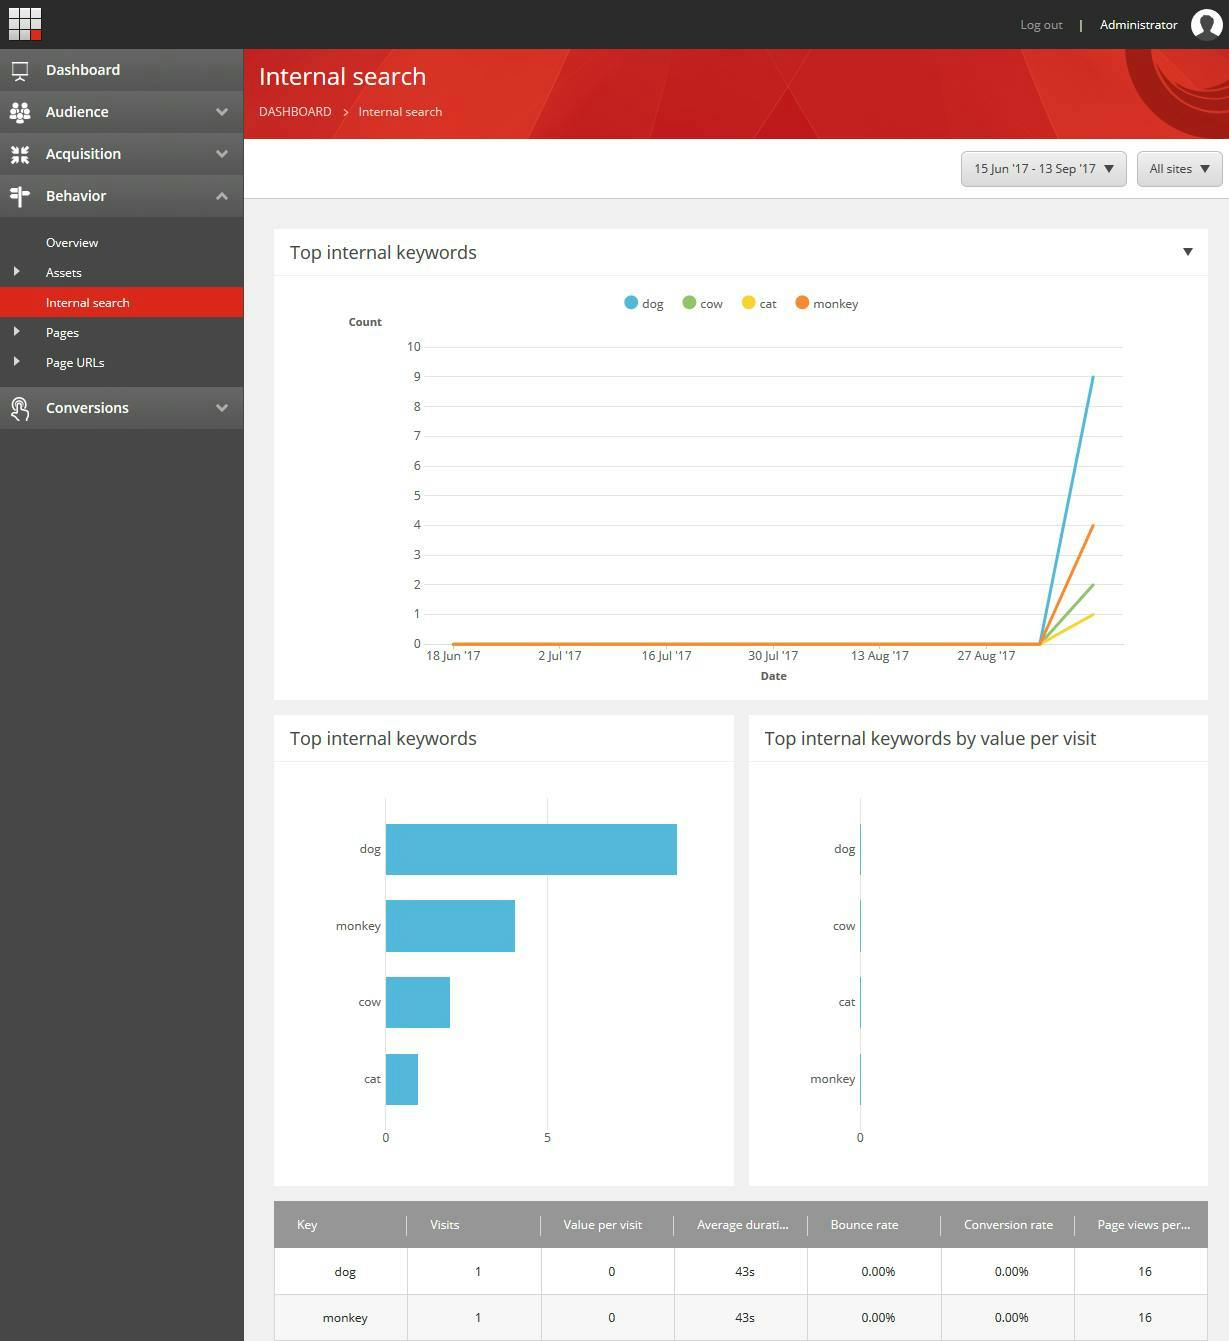
Now after triggering the code to be called a few times, your internal search report should start to be populated like this.

Optimize the Rich Text Editor in Sitecore

Optimize the Rich Text Editor in Sitecore

When it comes to building a Sitecore site your first thought probably isn't that you are going to need to make any setting updates or customization's to the rich text editor. After all when you learn about building a site its mostly focused around creating components to add and remove from pages, but there are a couple of things that will greatly enhance your content editors experience.

Configure the toolbars

Out the box Sitecore ships with 4 toolbar configurations. These are defined in the core db here:

  • /sitecore/system/Settings/Html Editor Profiles/Rich Text Default
  • /sitecore/system/Settings/Html Editor Profiles/Rich Text Full
  • /sitecore/system/Settings/Html Editor Profiles/Rich Text IDE
  • /sitecore/system/Settings/Html Editor Profiles/Rich Text Medium

The "Rich Text Default" toolbar

The "Rich Text Full" toolbar

The "Rich Text IDE" toolbar

The "Rich Text Medium" toolbar

As the name suggests, by default your content editors will see the default toolbar that contains a very limited number of options. This may in-fact be to limited and you need to offer the content editors one of the toolbar's with more options. Equally, the full toolbar may give to many options such as font's and you would want to offer a more restricted set of options.

Setting a toolbar on a field

You can set a toolbar on each individual field by specifying the path in the template fields source field. This is particularly useful when a field needs specific options, such as a text area that should allow a user to configure bold, italics and links but shouldn't ever contain an image.

Updating the default toolbar for a rich text field

When you want to change the toolbar for all rich text fields, a better option is to update which toolbar is used by default. You can do this with a patch config file.

1<?xml version="1.0" encoding="utf-8" ?>
2<configuration xmlns:patch="http://www.sitecore.net/xmlconfig/">
3 <sitecore>
4 <settings>
5 <setting name="HtmlEditor.DefaultProfile" value="/sitecore/system/Settings/Html Editor Profiles/Rich Text Full" />
6 </settings>
7 </sitecore>
8</configuration>

Updating the rich text editor CSS

A second way of customizing the rich text editor that you should consider is to make changes to the CSS file that the editor uses. By default this will use a CSS file called default.css that you will find in the root of the site. You can see this being referenced form a config setting if you look at the showconfig.aspx page.

1<!-- WEB SITE STYLESHEET
2 CSS file for HTML content of Sitecore database.
3 The file pointed to by WebStylesheet setting is automatically included in Html and Rich Text fields.
4 By using it, you can make the content of HTML fields look the same as the actual Web Site
5-->
6<setting name="WebStylesheet" value="/default.css" />

You can change this to use a different CSS file using a patch config file as follows:

1<configuration xmlns:patch="http://www.sitecore.net/xmlconfig/">
2 <sitecore>
3 <settings>
4 <setting name="WebStylesheet">
5 <patch:attribute name="value">/rich-text-editor.css</patch:attribute>
6 </setting>
7 </settings>
8 </sitecore>
9</configuration>

Now you may be wondering why you would want to do this, after all Sitecore offers an experience editor mode that will show the entire webpage as it will appear to visitors and also offers inline editing. However some aspects of a page can be better achieved using CSS styles rather than new components or new fields and content editor will need both an easy was to apply these style and a visual way to see that they have been applied, irrespective of if they are using the experience editor or the content editor.

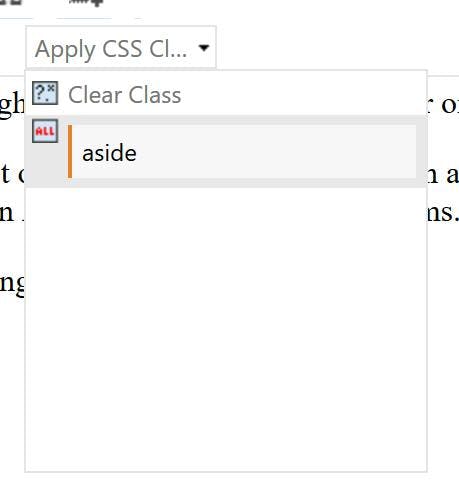
For example, in this section of a blog post from Scott Hanselman he has highlighted some text as an aside which can easily be achieved in a rich text editor by applying a CSS class.

The first step to enabling this in Sitecore is to make sure you're using a toolbar that allows the user to select CSS classes (that's any but the default).

Next by creating a stylesheet that just contains the relevant style to be applied, the content editor can now select this in the CSS drop down;

1.aside {
2 border-left: 2px solid #e2842c;
3 background-color: #f7f7f7;
4 padding: 5px;
5 margin: 5px;
6 display: block;
7}
Sitecore Rendering Datasource Restrictions

Sitecore Rendering Datasource Restrictions

Datasources on Sitecore Renderings are the basis for content authors to combine a variety of components to form a page, without the need for all the fields to exist in the context item. They also form the underpinnings of switching out content based on personalization rules.

To make life easier for content authors there are two properties which should always be set; Datasource Template and Datasource Location.

Datasource Template

The datasource template field is fairly straightforward to understand. It specifies what type of template is compatible with a rendering.

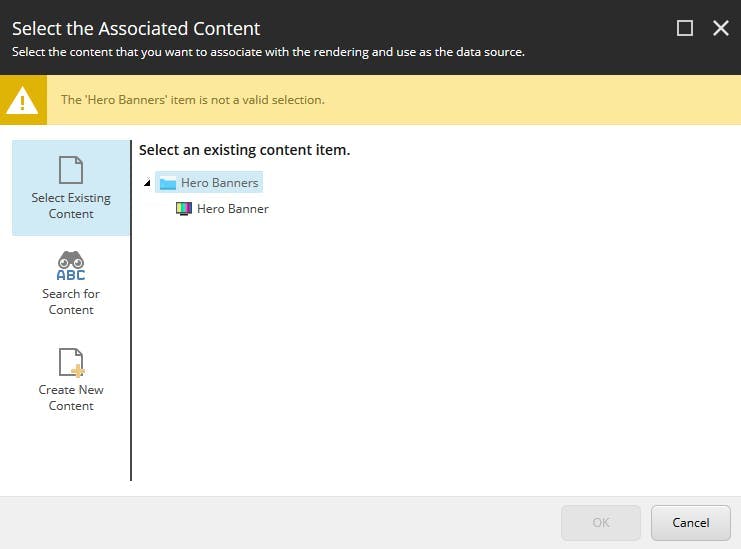
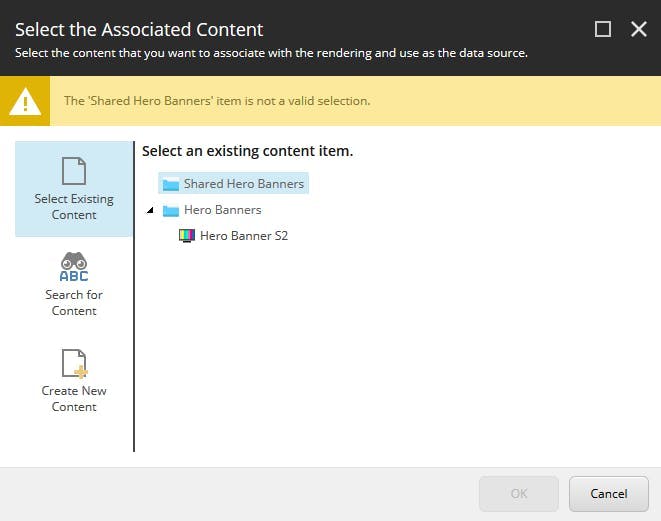
If the content editor try's to select an incorrect template they will see an error message like this and the ok button will be disabled:

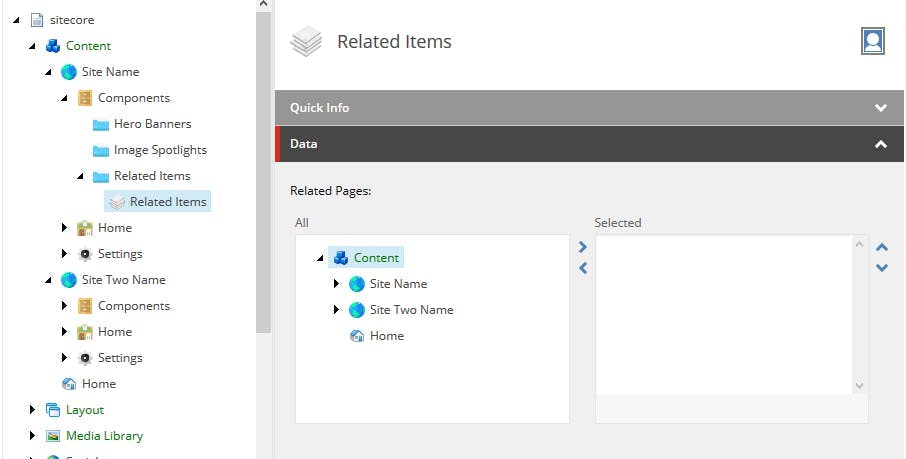
The template reference can point to either the final template that an instance of which will be created, or a template that had been inherited. So if you structure your templates using base template like I describe in my article on How I structure Sitecore Templates then you can reference the base template and anything including it will become available.

However there is a fundamental flaw in linking to a base template. As well as restricting the template that can be selected, specifying the template type also enables the ability to create new content, which will create it as the form of the template specified. So only link to the templates you want your editors to create.

Datasource Location

The datasource location property (as the name suggest) enables you to restrict where in the content tree items can be selected from (or new content created).

Simply specify the folder the content should be placed in and the rest of the content tree will now be hidden from content authors.

Multi-site solutions

If your solution contains more than one website this may cause a problem as you likely want to be able to restrict certain content to certain sites and may additionally have a global content folder.

The first solution to this is to add multiple path's separated by a pipe.

This will enable multiple folders to be shown to the user, but it wont enable any sort of restriction.

The second option is to add an xpath query find the relevant folder. This can also be used in conjunction with the static path by being pipe separated as in the last example.

A query like this:

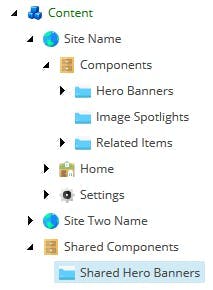
1/sitecore/content/Shared Components/Shared Hero Banners|query:./ancestor-or-self::*[@@templatename='Site']/Components/*[@@templatename='Hero Banners']

Will produce the desired output like this:

Here you can see the shared hero banners folder is available as is the specific hero banner folder for the current site, but not the hero banner folder from the other site.

Using template source restrictions in Sitecore

Using template source restrictions in Sitecore

The source field on a template definition is a great and easy way to enhance your content editors experience.

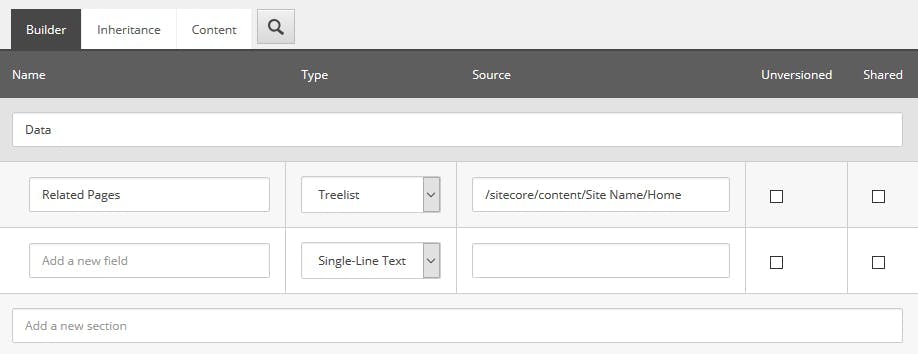
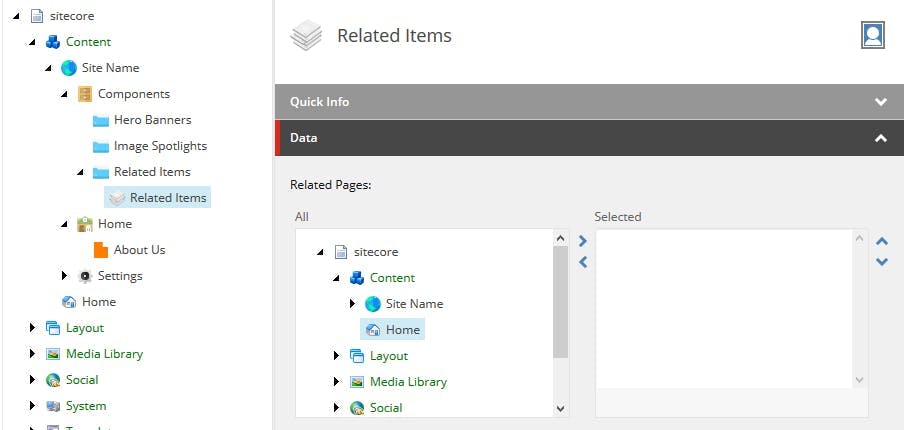
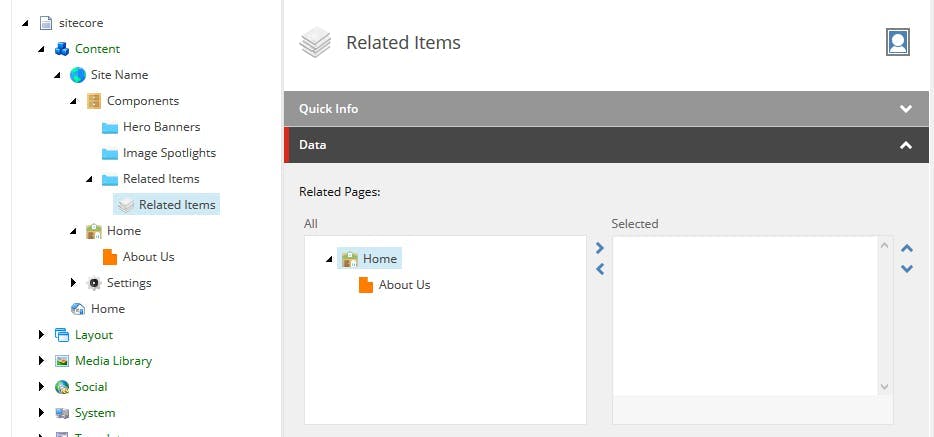
With fields types such as a tree list, this can be used to restrict the content tree to the section that is relevant. e.g.

Adding a source property like this:

Will change how a tree list displays from this:

To this:

Multi-Site Solutions

The source field however is far more powerful than just pasting in a fixed path to an item. Rather than a static path you can use xpath to make the results based on a query, such as restricting options on a droplink by template type.

In a multi-site solution this is particularly useful, by restricting the options to the site that your content item is on.

With a fixed path the best we could do in the above example would be to set the restriction to the nearest folder that could access both, resulting in a restriction like this:

While this makes some improvement for the user, but not hugely and they can still select content from the wrong site.

By using an xpath query that utilizes the ancestor-or-self function with a template name, the restriction will dynamically be based on navigating up the content tree from the current item until the template is found and then showing items from it or in this example going back down to the home item.

1query:ancestor-or-self::*[@@templatename='Site']/Home

Resulting in an output like the original example, but dynamically changing to be the correct items for where the current content item is located:

Creating a WFFM Save action with Field Mappings

Creating a WFFM Save action with Field Mappings

The Sitecore Web Form for Marketers module offers content editors a flexible way to create data capture forms and then trigger certain actions to occur on submission. There's a whole host of save action options out the box, such as sending an email, enrolling the user in an engagement plan or updating some user details.

However one save action that is often required is the ability to send the data onto a CRM system so that it can get to the people that need to act on it, rather than staying in Sitecore with the content editors. To do this your best option is to create a custom save action that can send on the information.

Creating a Save Action in Sitecore

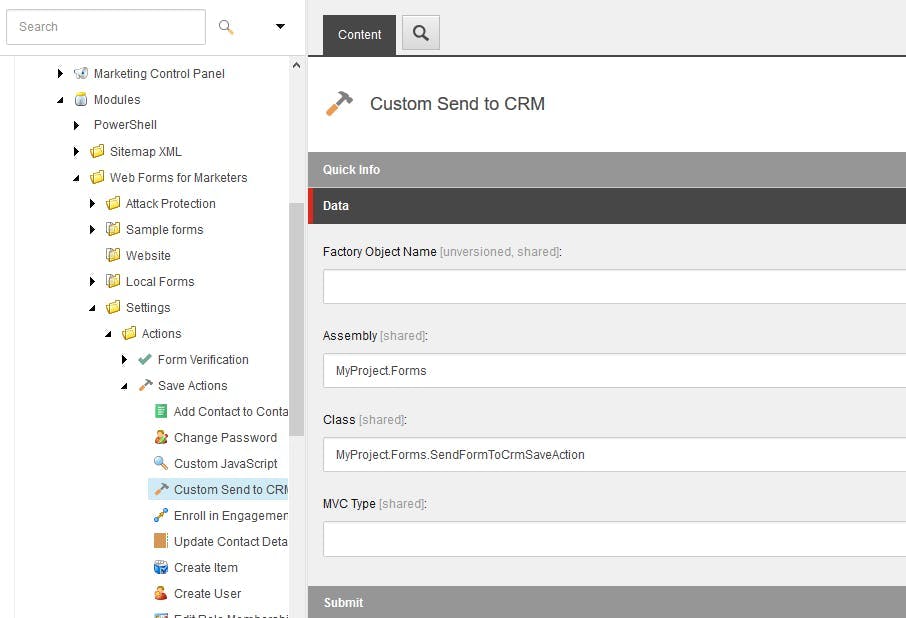
Save actions in Sitecore are configured under /sitecore/system/Modules/Web Forms for Marketers/Settings/Actions/Save Actions. Here you can see all the standard ones that come out the box and add your own.

Right click Save Actions and insert a new Save Action. You will need to fill out the Assembly and Class fields so that Sitecore knows which bit of code to execute (details on creating this bit below).

Adding Field Mappings

To really make your save action usable you will want to allow the content editor to map the fields on their form with the ones in the CRM, rather than relying on them both having the same name and hard coding the expected WFFM field names in your save action logic.

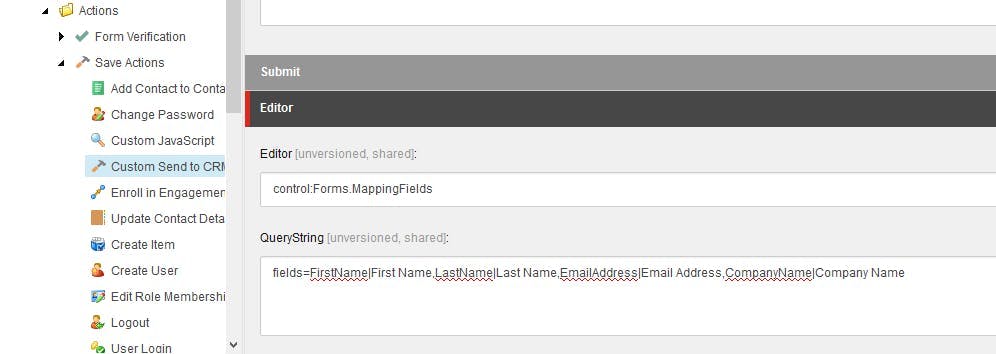
On your Save Action Item in Sitecore their are 2 fields to fill out to enable the editor in WFFM (Editor and QueryString). Luckily Sitecore provide a mapping editor out the box so there's very little effort involved here.

Within the Editor filed add the value:

1control:Forms.MappingFields

And within the querystring field, add your list of fields in the format fields=FieldName|FieldDisplayText

1fields=FirstName|First Name,LastName|Last Name,EmailAddress|Email Address,CompanyName|Company Name

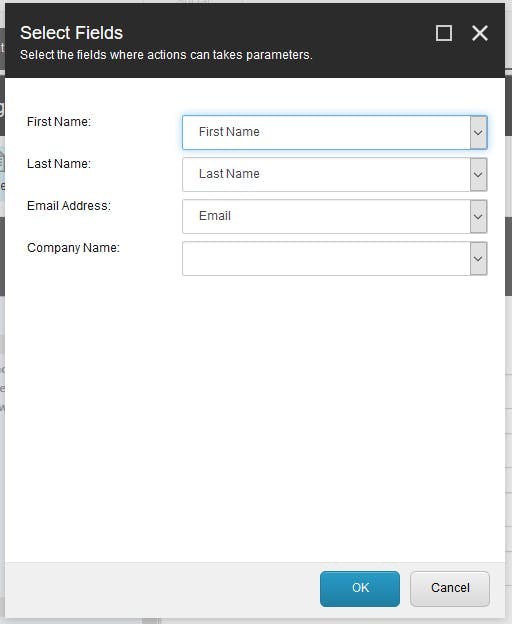
When the content editor now adds the save action to their form they will now be able to select a form field for each of these fields.

Creating the Save Action in code

To create the save action you will need a class that inherits from either ISaveAction or WffmSaveAction. I've used WffmSaveAction as it already has some of the interface implemented for you.

The field list you added to the Querystring property of the save action in Sitecore will need to be added as public properties to your class. Sitecore will then populate each of these with the ID the field gets mapped to or null if it has no mapping.

Then all that's left is to add an Execute method to populate your CRM's model with the data coming in through the adaptedFields parameter and send it onto your CRM.

1using Sitecore.Data;
2using Sitecore.WFFM.Abstractions.Actions;
3using Sitecore.WFFM.Actions.Base;
4using System;
5
6namespace MyProject.Forms
7{
8 public class SendFormToCrmSaveAction : WffmSaveAction
9 {
10 public string EmailAddress { get; set; }
11 public string FirstName { get; set; }
12 public string LastName { get; set; }
13 public string CompanyName { get; set; }
14
15 public override void Execute(ID formId, AdaptedResultList adaptedFields, ActionCallContext actionCallContext = null, params object[] data)
16 {
17 // Map values from adapted fields into enquiry model
18 IEnquiry enquiry = new Enquiry();
19
20 enquiry.Email = GetValue(this.EmailAddress, adaptedFields);
21 enquiry.FirstName = GetValue(this.FirstName, adaptedFields);
22 enquiry.LastName = GetValue(this.LastName, adaptedFields);
23 enquiry.CompanyName = GetValue(this.CompanyName, adaptedFields);
24
25 // Add logic to send data for CRM here
26 }
27
28 /// <summary>
29 /// Get Value from field list data for a given form field id, or return null if not found
30 /// </summary>
31
32 /// <param name="formFieldId"></param>
33 /// <param name="fields"></param>
34 /// <returns></returns>
35 private string GetValue(string formFieldId, AdaptedResultList fields)
36 {
37 if (string.IsNullOrWhiteSpace(formFieldId))
38 {
39 return null;
40 }
41 if (fields == null || fields.GetEntryByID(formFieldId) == null)
42 {
43 return null;
44 }
45 return fields.GetValueByFieldID(formFieldId);
46 }
47 }
48 }
49}
How I structure Sitecore Templates

How I structure Sitecore Templates

Templates are the building blocks for a Sitecore installation, they're amazingly flexible and with capabilities such as inheritance you can produce an elegant architecture, or alternatively a complete mess. Here's how I like to structure things:

Base Templates

First off I have a folder of base templates. These are the building blocks for all the fields that will end up in a component data source or an actual page via inheritance. By setting them up as a base template we can re-use the same field definition for things like headings, but more importantly it keeps them focused on a specific purpose rather including details of the entire eventual item.

One additional rule I have for base templates is that they should only contain one data section within them. This in turn helps keep them focused on a specific purpose.

Page Templates

Next we have pages. You guessed it, a page template is what a content editor will create an instance of when they make a page. It's responsibility is to bring together default presentation details, the set of fields on the page and insert options for the pages beneath it.

All fields are inherited from base templates and standard values are used to define the defaults for the page.

Additionally to make the CMS experience as easy as possible for the content editors an icon should be set so that a page type can be visually identifiable.

Component Templates

A component template is the equivalent of a page template but for data sources.

Like page templates all the fields are inherited from base templates and standard values are used to define the defaults for the page. An icon should also be set to make content types easily identifiable by content editors.

Folder Templates

Folder templates are often overlooked but they are an essential part of creating a decent user experience.

Folder templates are created to define the insert options for components and site settings rather than having them set on the site content tree.

Where relevant a folder template should also include itself as one of the insert options so that content editors can organise their content into sub-folders.

Parameter Templates

When a component needs some config to customise its look and feel that is not content, it can be better to use Rendering Parameters rather than a data source.

Site Setting Templates

A Site configuration template is useful to contain various global settings for a site. This could include things such as the Site Logo, Google Analytics account details etc. Settings should be segmented into logical sections that have been defined in Base Templates and then inherited.

It can also be useful to separate some settings into their own template item depending on the scenario of what the setting is for.

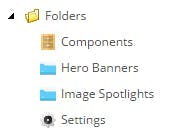
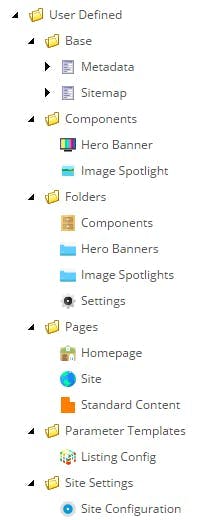
Group Into Folders

With each these template types created, you'll end up with a tree structure that looks something like this.

Pipelines - remember the big picture

Pipelines - remember the big picture

Sitecore pipelines are great. With them you can relatively easily add and remove functionality as you wish. Pipelines like httpRequestBegin, httpRequestProcessed and mvc.beginRequest are also really useful if you need some logic to run on a page load that shouldn't really be part of a rendering. This could be anything from login checks to updating the way 404 pages are returned. However you do need to remember the big picture of what you are changing.

Pipelines don't just effect the processes of the website your building, Sitecore uses them too. That means when you add a new processor to the httpRequestBegin pipeline, that's going to effect every request in the admin CMS too. Just checking the context item also isn't enough as some things. e.g. opening a node in a tree view, will have the context of the node you clicked on!

Adding this snippet of code to the beginning of your process should keep you safe though.

1using Sitecore.Diagnostics;
2using Sitecore.Pipelines.HttpRequest;
3using Sitecore;
4using Sitecore.SecurityModel;
5
6namespace CustomPiplelineNamespace
7{
8 public class CustomPipeline : HttpRequestProcessor
9 {
10 public override void Process(HttpRequestArgs args)
11 {
12 //Check args isn't null
13 Assert.ArgumentNotNull(args, "args");
14 //Check we have a site
15 if (Context.Site == null)
16 return;
17 //Check the sites domain isn't one for sitecore
18 if (Context.Site.Domain != DomainManager.GetDomain("sitecore"))
19 return;
20 //Check that we're not in a redirect
21 if (args.Url.FilePathWithQueryString.ToUpperInvariant().Contains("redirected=true".ToUpperInvariant()))
22 return;
23 //Check that we're not in the page editor
24 if (Context.PageMode.IsPageEditor)
25 return;
26
27 // DO CODE
28 }
29 }
30}
Sitecore xDB - How to get count of interactions

Sitecore xDB - How to get count of interactions

If you need to rebuild your Path Analyzer maps, Sitecore have a knowledge base article on how to do it here - https://kb.sitecore.net/articles/766858

In the FAQ section it gives some info on how long you should expect it to take

What it doesn't tell you though is how you find out how many interactions your site has to process. The data is stored in analytics collection in your Mongo DB, so go there an then run...

1db.getCollection('Interactions').find({}).count()