Tag: Sitecore
Sitecore SXA example site

Sitecore SXA example site

Recently I've been looking into building sites using Sitecore Experience Accelerator (SXA). If you haven't heard of it, in short SXA cut's the amount of dev effort by building sites through pre-built re-usable components and then adding some styling. For a brochure type site this can (in some cases) remove virtually all the back end dev. You can read more about it here https://www.sitecore.com/en-gb/products/sitecore-experience-platform/wcm/experience-accelerators

Getting your head around SXA however can be a slight challenge. There is a getting started guide from Sitecore, which covers grid layouts, choosing features etc, but being able to understand how a site should actually be constructed and how the editor will use it can become confusing.

What would really help which Sitecore don't provide is an example site. However Cognifide have and you can download it from Github here: https://github.com/Cognifide/Sitecore.XA.Showcase

To get started with it:

  1. Install a clean copy of Sitecore with SXA
  2. Download the code from github
  3. Restore the NuGet packages
  4. In the App_Config you will see a config file named Sitecore.XA.Project.Showcase.User.config. This includes one setting that needs updating to point to the folder you downloaded the solution to. This is then going to be used by unicorn to synchronize the items.
  5. Publish the solution into your Sitecore install
  6. Login as an admin and go to http://<yourinstancename>/unicorn.aspx
  7. Click the sync button, to synchronize the items
  8. Publish the site

You will now be able to see the showcase site in the admin and have a click through it on the published version.

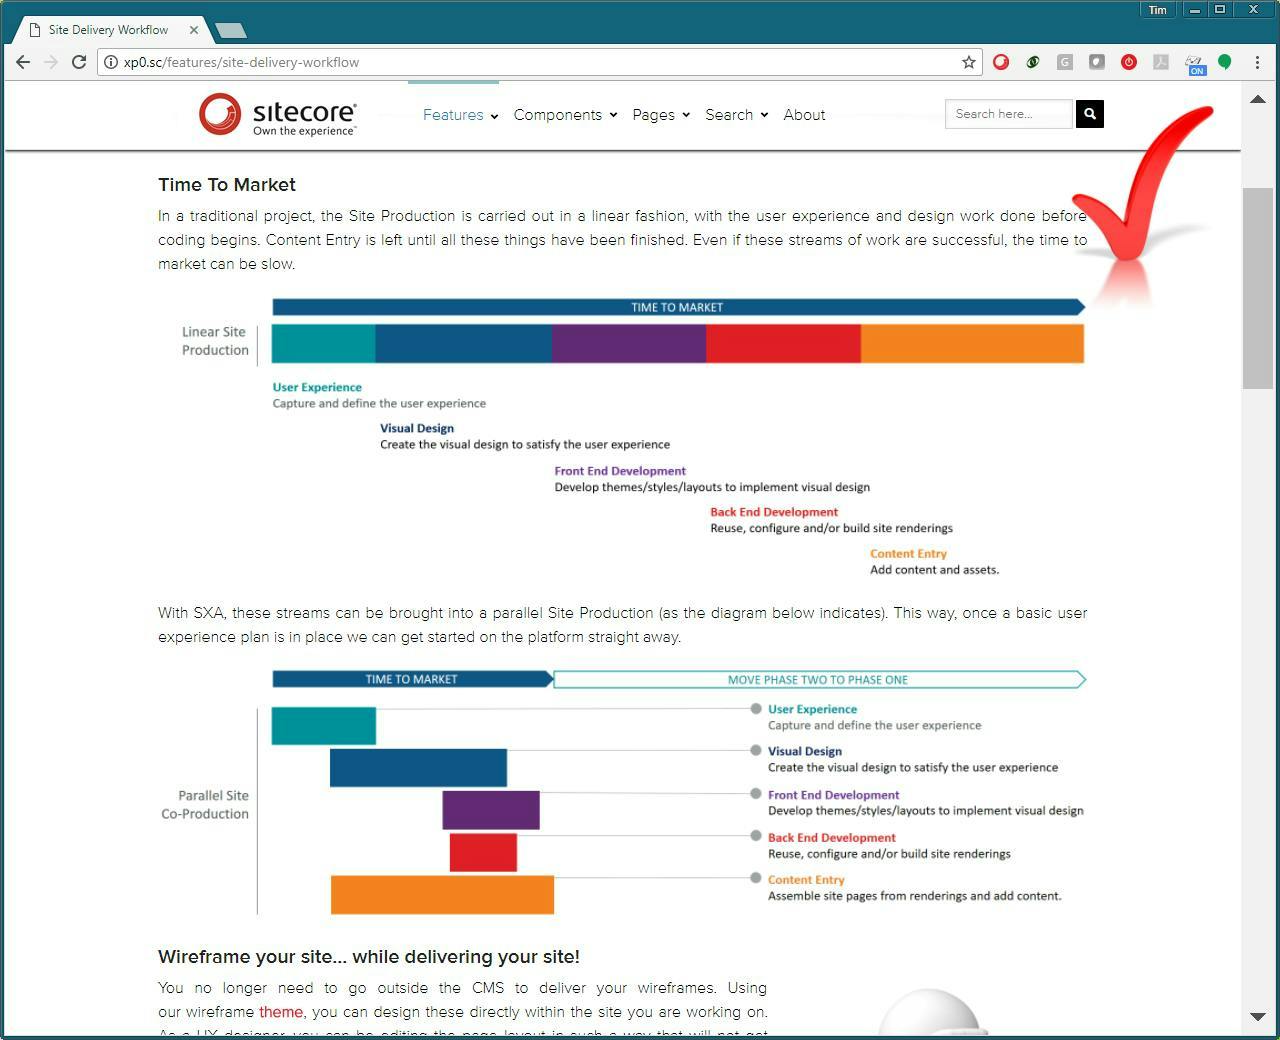
What's really great about the SXA showcase site is it's a site all about SXA with loads of useful information on how you build an SXA site as well as actually be being built in SXA.

Sitecore - Creating an admin menu item

Sitecore - Creating an admin menu item

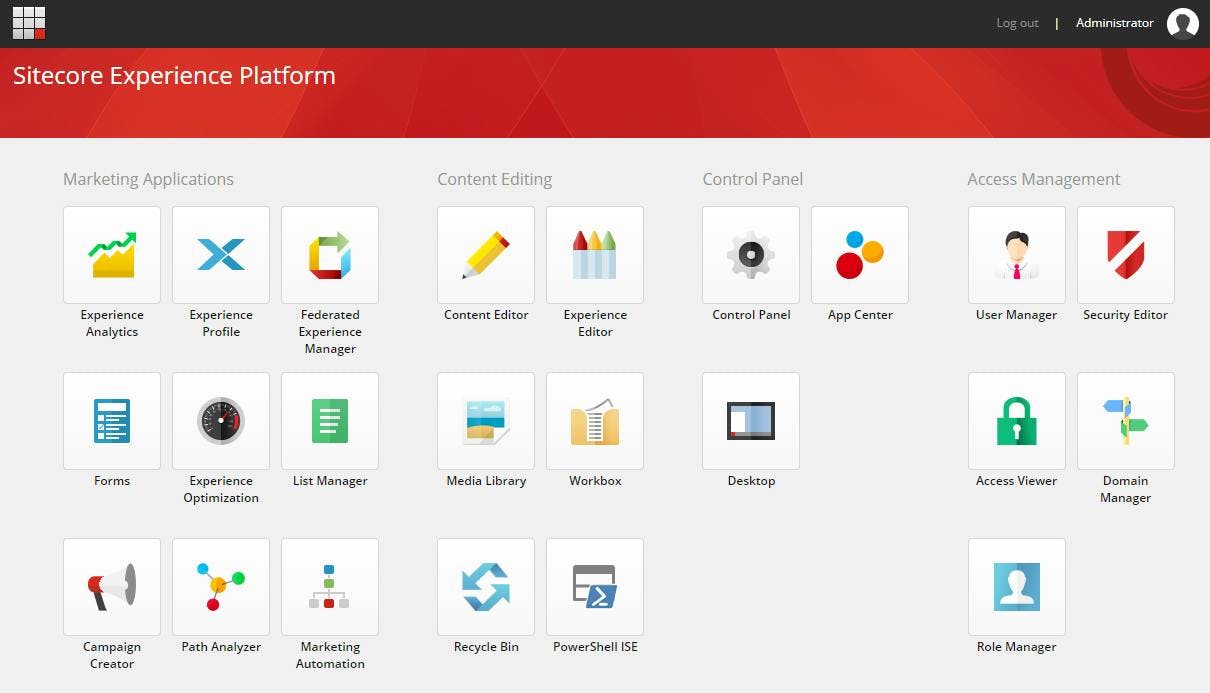
If your building a Sitecore admin application, your going to need to link to them from the Sitecore start screen/launch pad.

To create a menu item on Sitecores start screen:

  • Log into Sitecore and switch to the core db
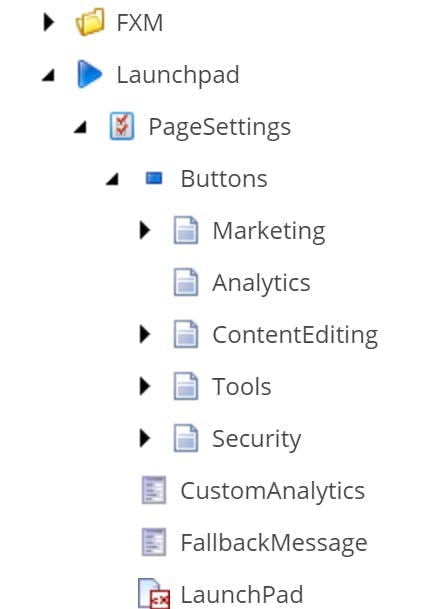
  • Open content editor and navigate to /sitecore/client/Applications/Launch Pad/PageSettings/Buttons
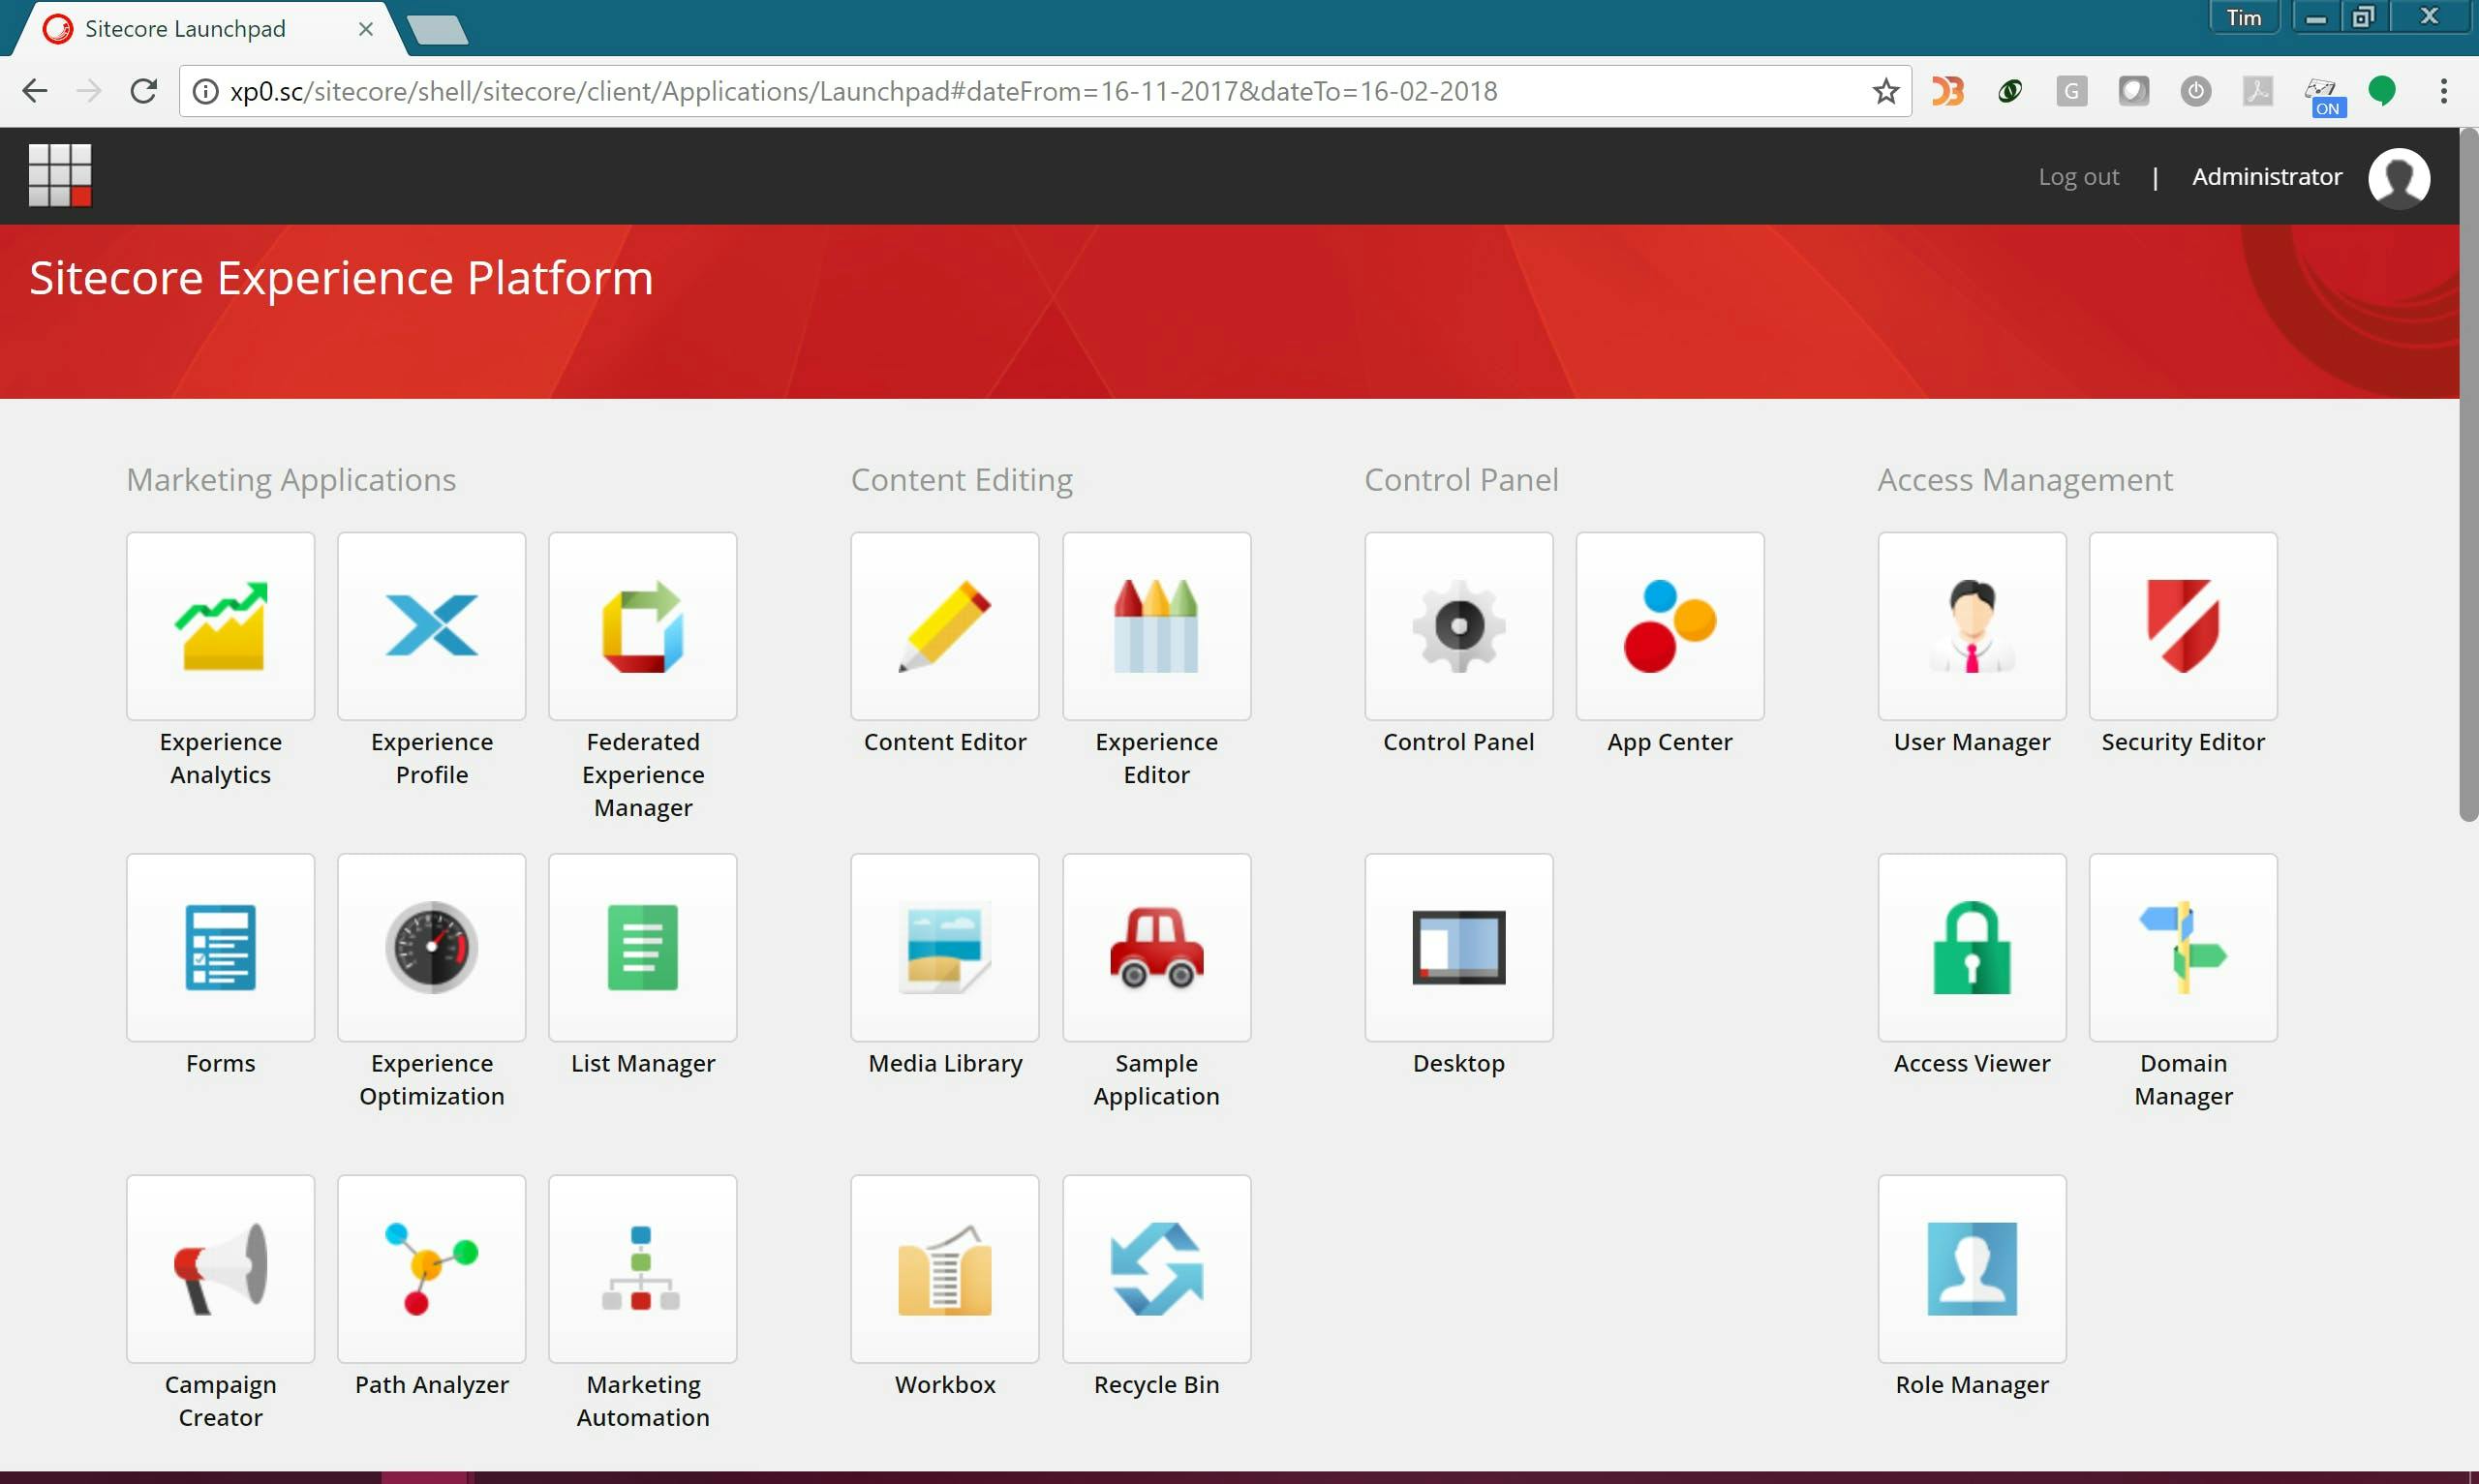
  • You will see groupings for each of the sections that appears on the start screen/launch pad
  • Add a new Launch Pad-Button item to the section you want it to appear in
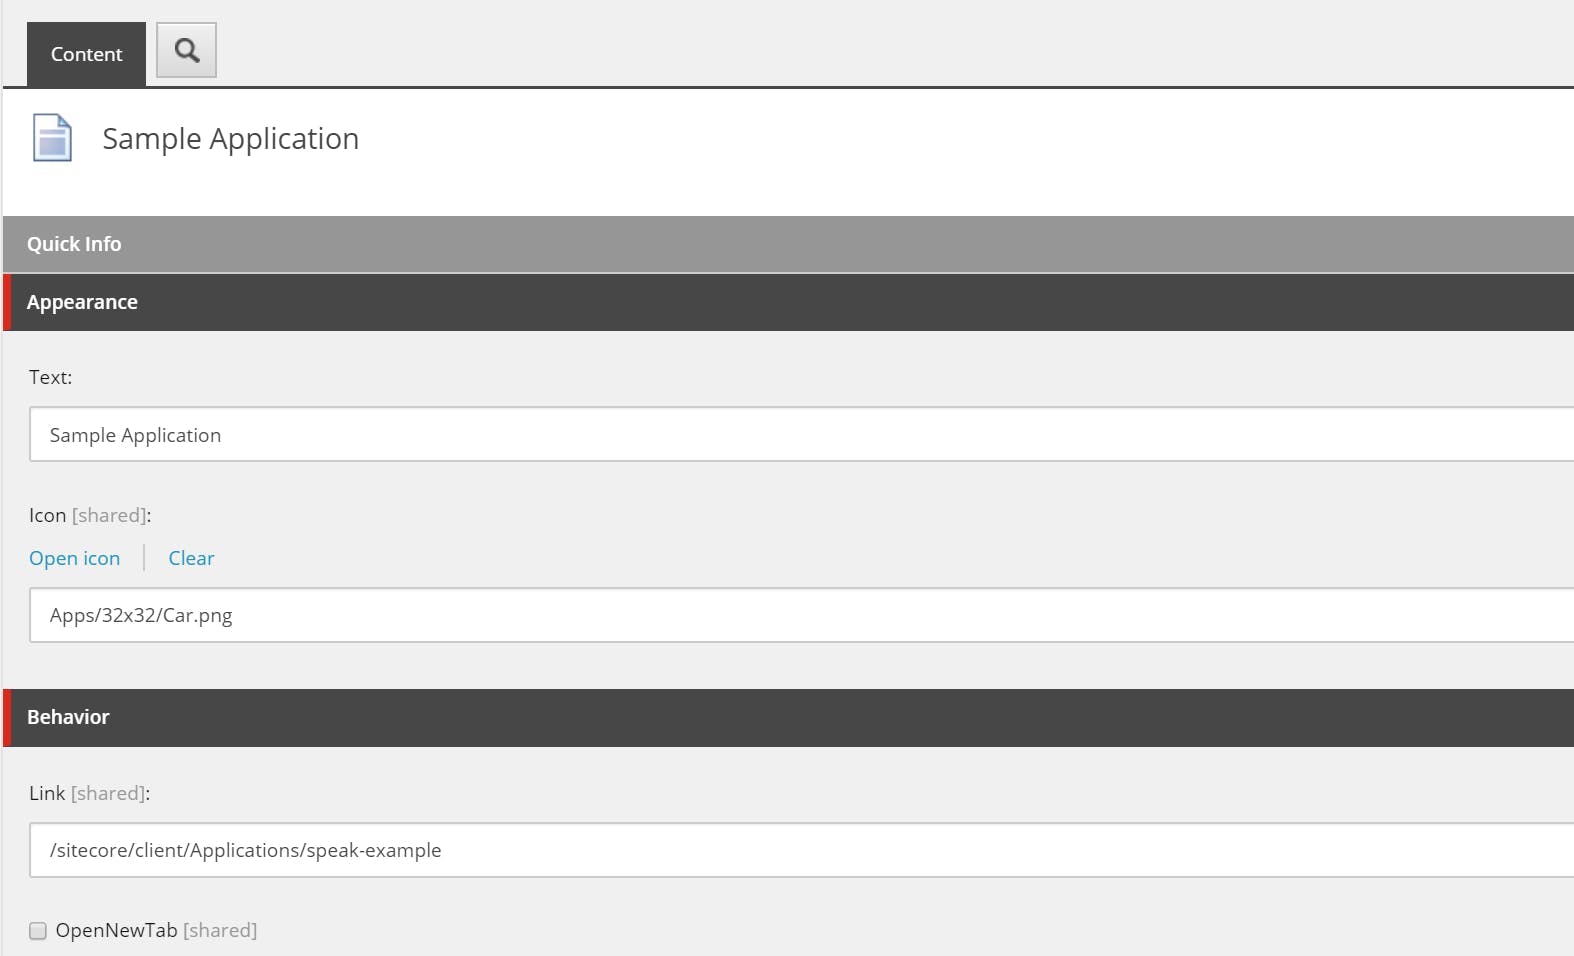
  • Give it a name, icon and link
  • Your button now appears on the start screen
Sitecore SPEAK 3 - Creating an application

Sitecore SPEAK 3 - Creating an application

At the end of last year I wrote a post on A first look at Sitecore SPEAK 3 which gave an overview of what Speak is, and the large architecture change that has happened between Speak 1/2 to 3.

In this post I'm going to share my experience on how to set up a Speak 3 application with Angular.

Step 1 - Creating the Angular project

To start your going to need a few things installed:

  • An IDE - I'm using VS Code
  • NodeJs - This is to get access to node package manager and to run your application in debug mode
  • Angular

If you don't already have Node and Angular installed, I suggest going through Angular's quick start guide. If your also new to Angular I suggest going through their Tour of Heroes tutorial first. This will give you a good understanding of how Angular applications are built and some knowledge around a few key files.

One you've got everything installed, create a new angular project from the command line.

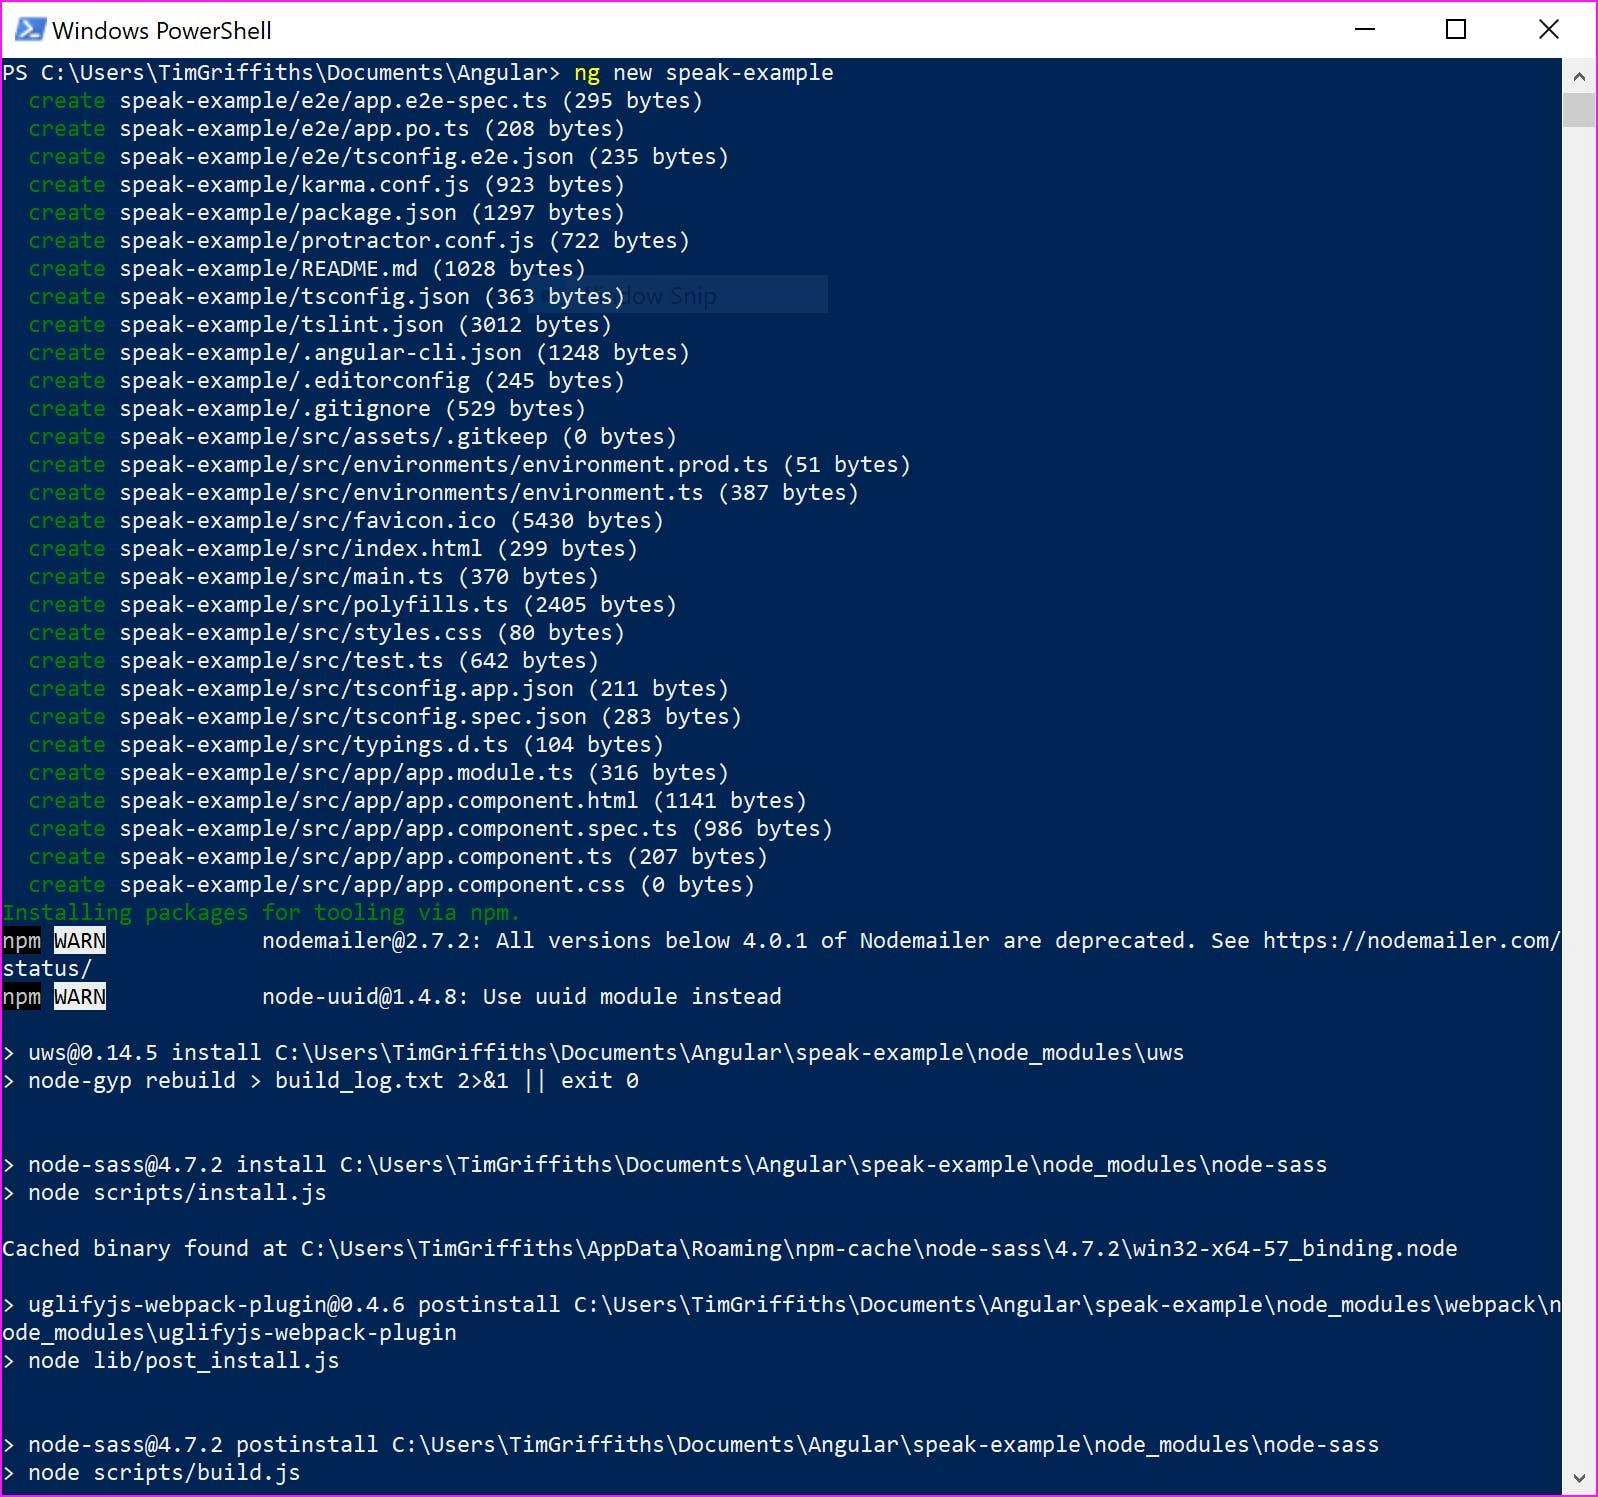
1ng new app-name

At this point you could try manually installing the various modules Sitecore provide, covering things like common components, logout functionality etc. However I personally found this a bit awkward. Unless you know what your doing your probably going to run into issues such as compatibility between the latest version of Angular and the Sitecore components (at time of writing Angular is on version 5 but Speak 3 only supports Angular 4).

Instead I would recommend downloading the sample application from https://dev.sitecore.net/Downloads/Sitecore_SPEAK/3/Sitecore_SPEAK_3.aspx and then copy over the .npmrc and package.json file to your solution.

By including these files, the .npmrc file will add a reference to Sitecores package repository and the package.json file will make sure the right packages and versions will be installed. Use npm to install the packages.

1npm install

Next we need to update a couple of files in the application to reference some Sitecore specific bits. This is explained in Sitecores documentation, in my examples though I've also included referencing some modules that you are likely to use.

app.module.ts

The app module file defines the modules that are going to be used in the application. Here we need to add the references to the Sitecore modules.

1import { BrowserModule } from '@angular/platform-browser'; import { NgModule } from '@angular/core'; import { ScAccountInformationModule } from '@speak/ng-bcl/account-information'; import { ScActionBarModule } from '@speak/ng-bcl/action-bar'; import { ScApplicationHeaderModule } from '@speak/ng-bcl/application-header'; import { ScButtonModule } from '@speak/ng-bcl/button'; import { ScGlobalHeaderModule } from '@speak/ng-bcl/global-header'; import { ScGlobalLogoModule } from '@speak/ng-bcl/global-logo'; import { ScIconModule } from '@speak/ng-bcl/icon'; import { ScMenuCategory, ScMenuItem, ScMenuItemLink, ScMenuModule } from '@speak/ng-bcl/menu'; import { ScTableModule } from '@speak/ng-bcl/table'; import { ScPageModule } from '@speak/ng-bcl/page'; import { CONTEXT, DICTIONARY } from '@speak/ng-bcl'; import { NgScModule } from '@speak/ng-sc'; import { AppComponent } from './app.component'; @NgModule({ declarations: [ AppComponent ], imports: [ BrowserModule, ScAccountInformationModule, ScActionBarModule, ScApplicationHeaderModule, ScButtonModule, ScGlobalHeaderModule, ScGlobalLogoModule, ScIconModule, ScPageModule, ScMenuModule, ScTableModule, NgScModule.forRoot({ contextToken: CONTEXT, // Provide Sitecore context for SPEAK 3 Components (optional) dictionaryToken: DICTIONARY, // Provide translations for SPEAK 3 Components (optional) translateItemId: '0C979B7C-077E-4E99-9B15-B49592405891', // ItemId where your application stores translation items (optional) authItemId: '1BC79B7C-012E-4E9C-9B15-B4959B123653' // ItemId where your application stores user access authorization (optional) }) ], providers: [], bootstrap: [AppComponent] }) export class AppModule { }

app.component.ts

The component file needs updating to call init on the ngScService.

1import { Component, OnInit } from '@angular/core'; import { NgScService } from '@speak/ng-sc'; @Component({ selector: 'app-root', templateUrl: './app.component.html', styleUrls: ['./app.component.css'] }) export class AppComponent implements OnInit { constructor( private ngScService: NgScService ) {} ngOnInit() { this.ngScService.init(); } }

.angular-cli.json

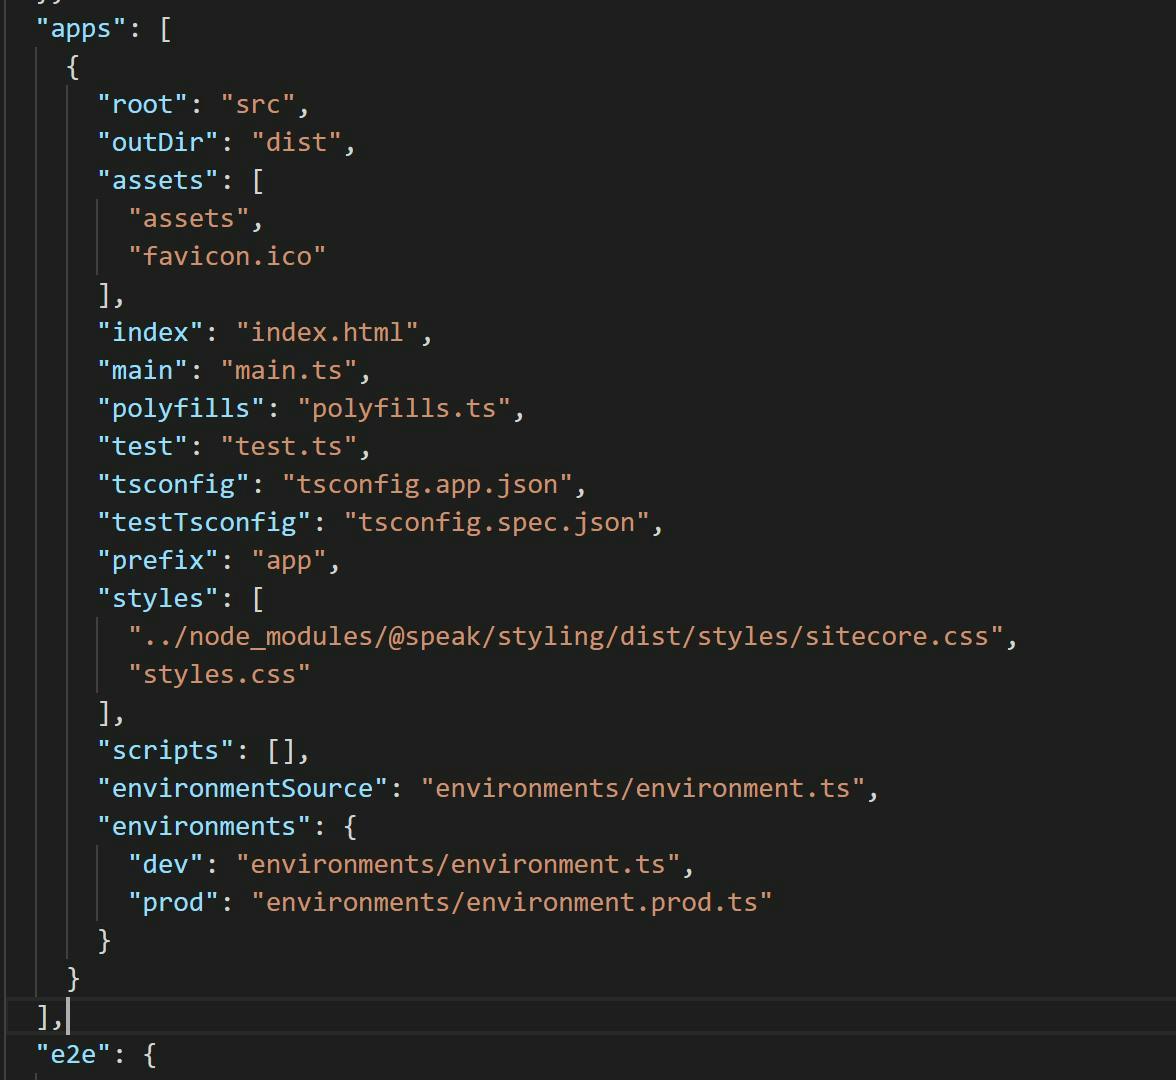
In the angular-cli.json file you will see a styles section which references the main css file in the solution. Here you will need to add an additional reference to Sitecores css file.

1../node_modules/@speak/styling/dist/styles/sitecore.css

Launch

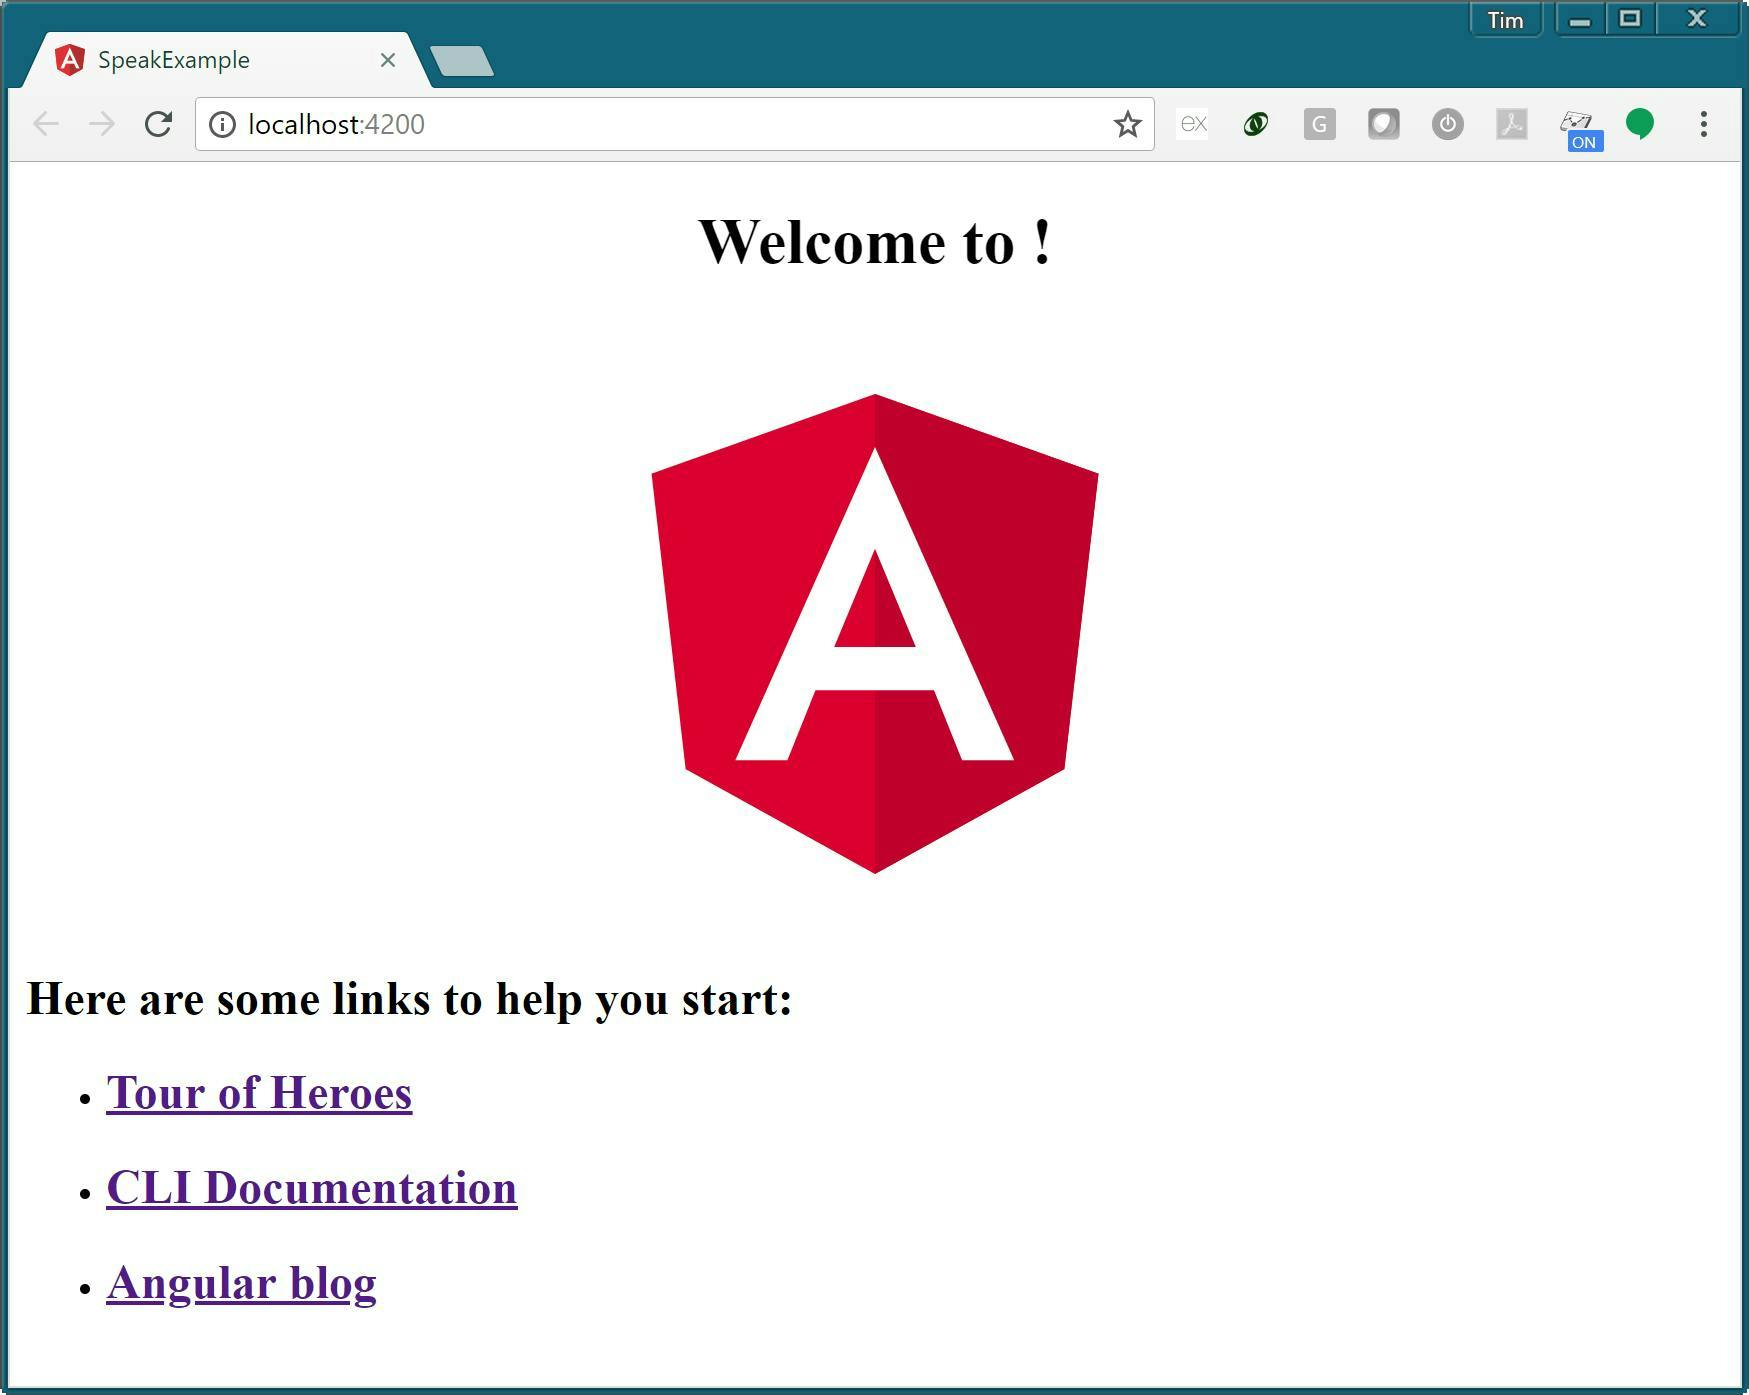
You can now launch your application from the command line and see the default start screen.

1ng serve --open

Step 2 - Building your application

It's not time to start building your application. If you don't know Angular I suggest going through a couple of tutorials, and go from there. I'm not going to go into any details about how Angular apps are and should be written, but I am going to go through a few of the Sitecore controls needed to make an application that fit's the Sitecore admin.

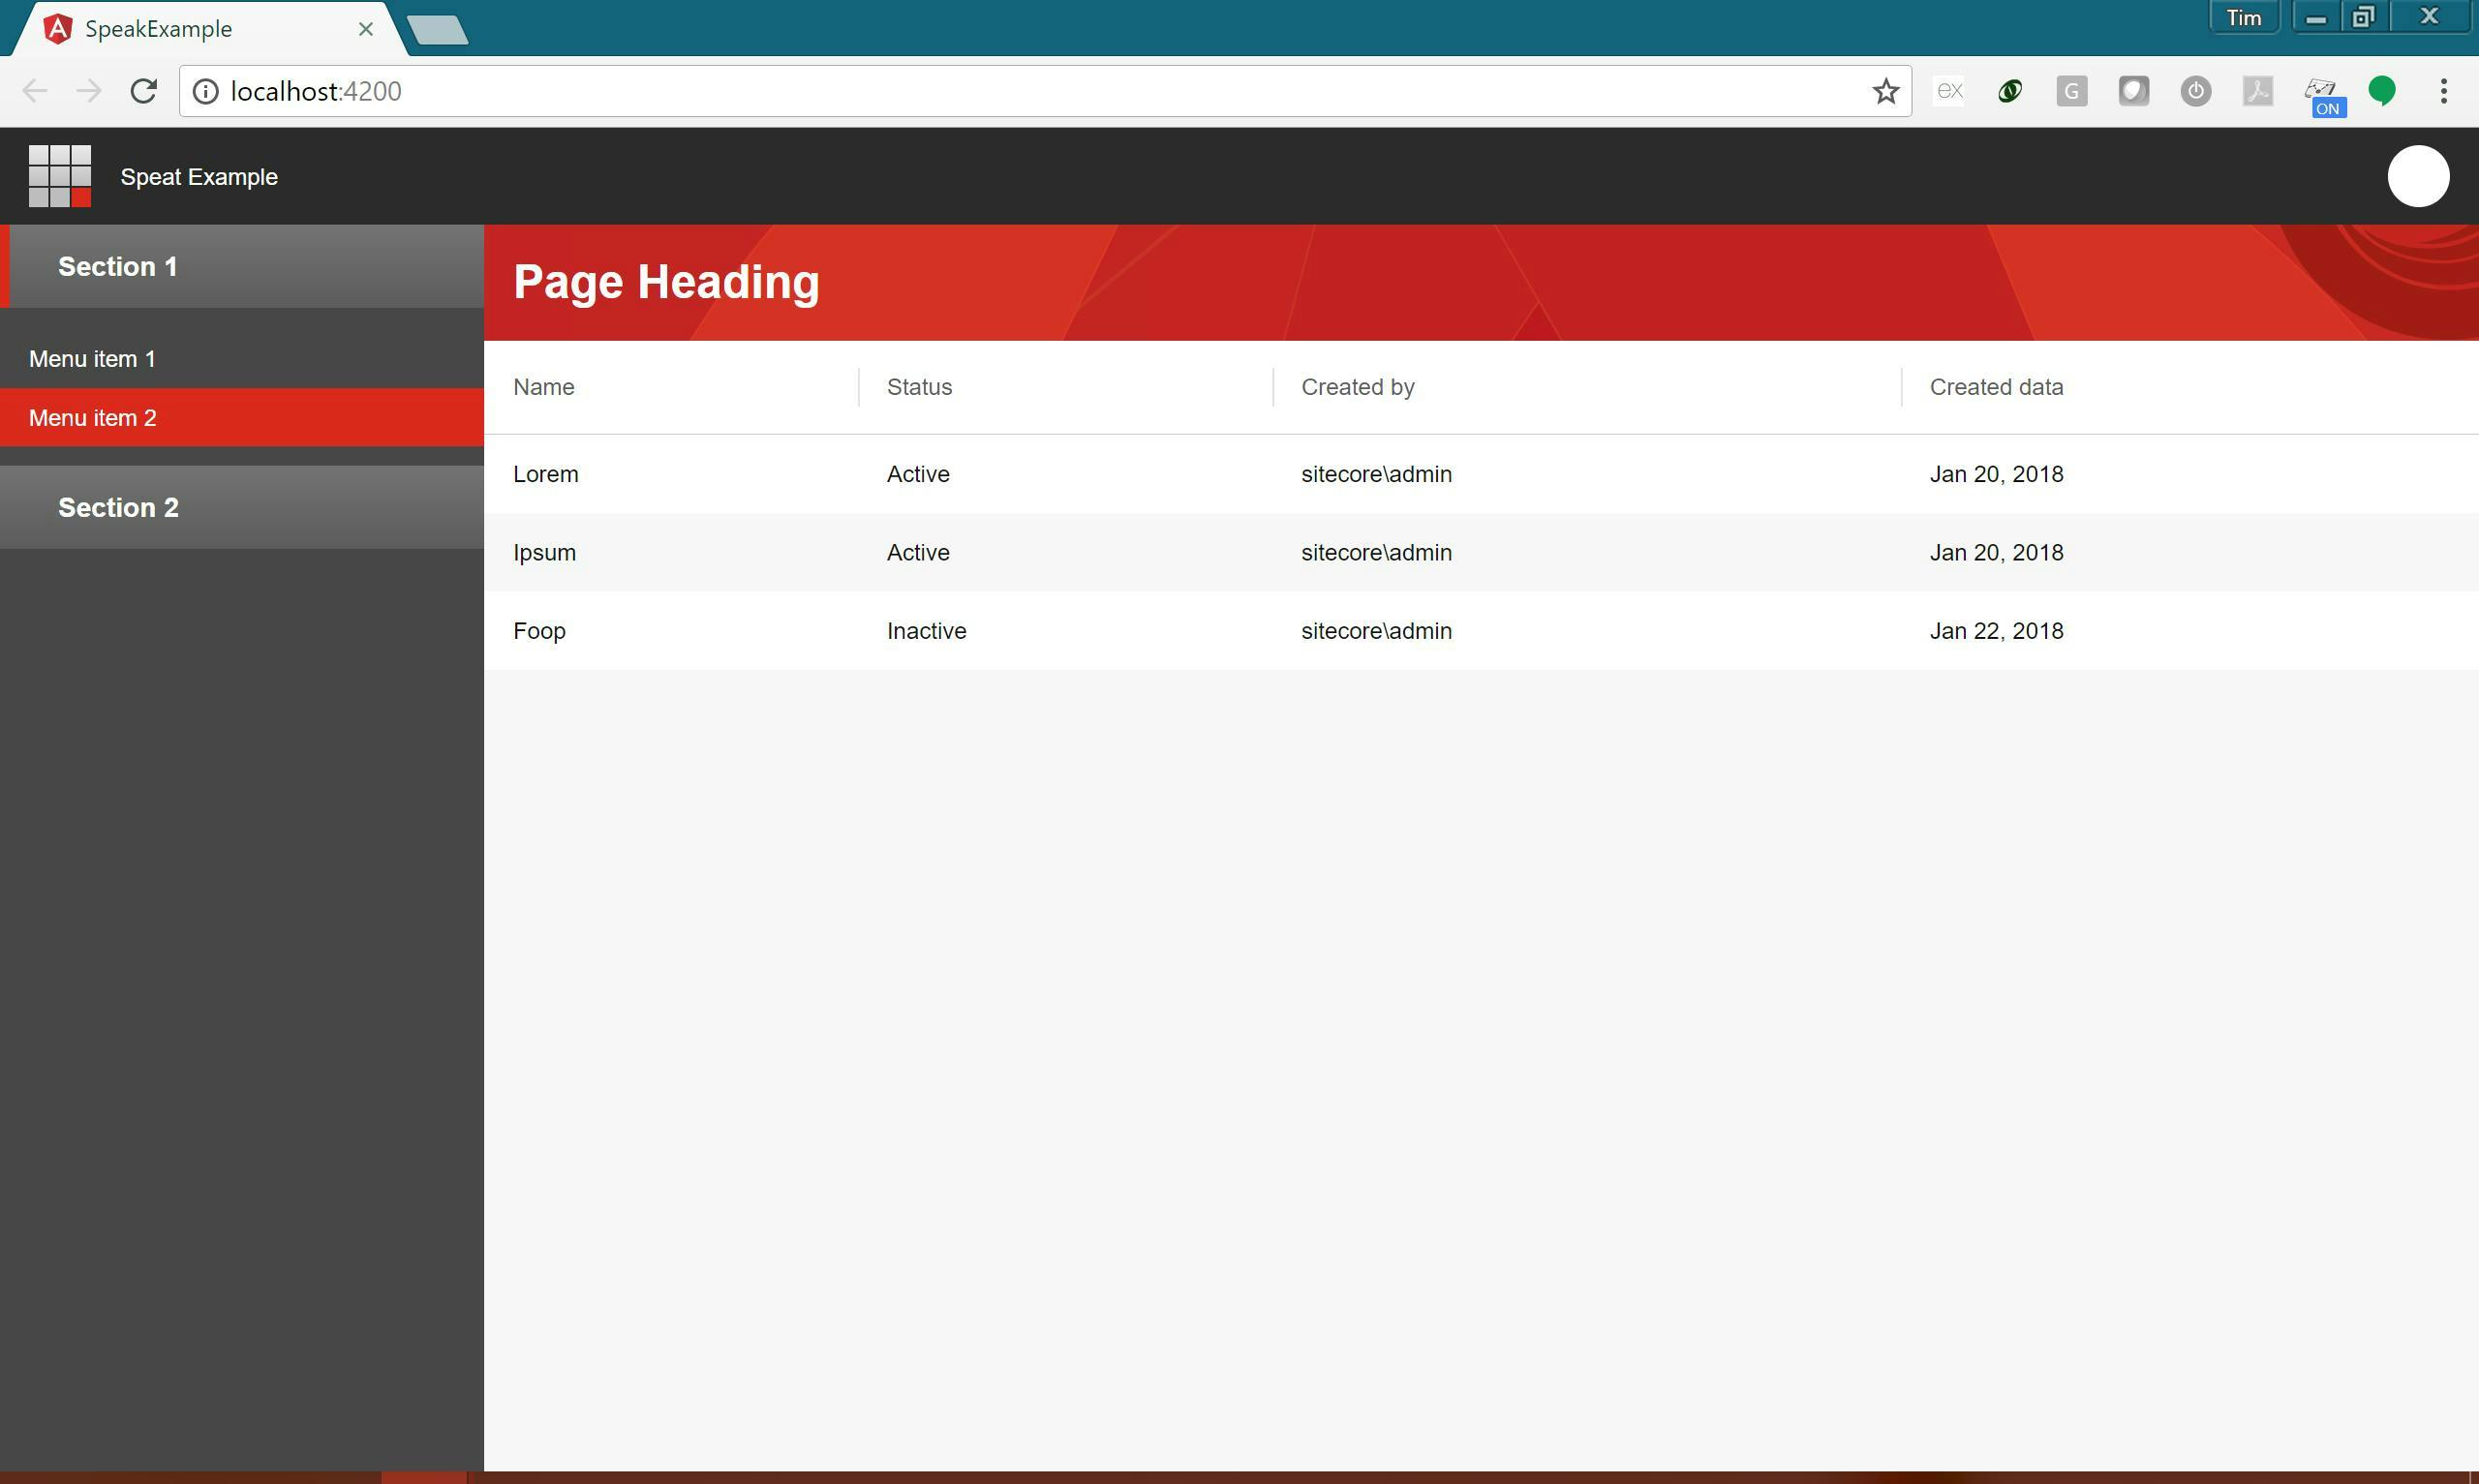
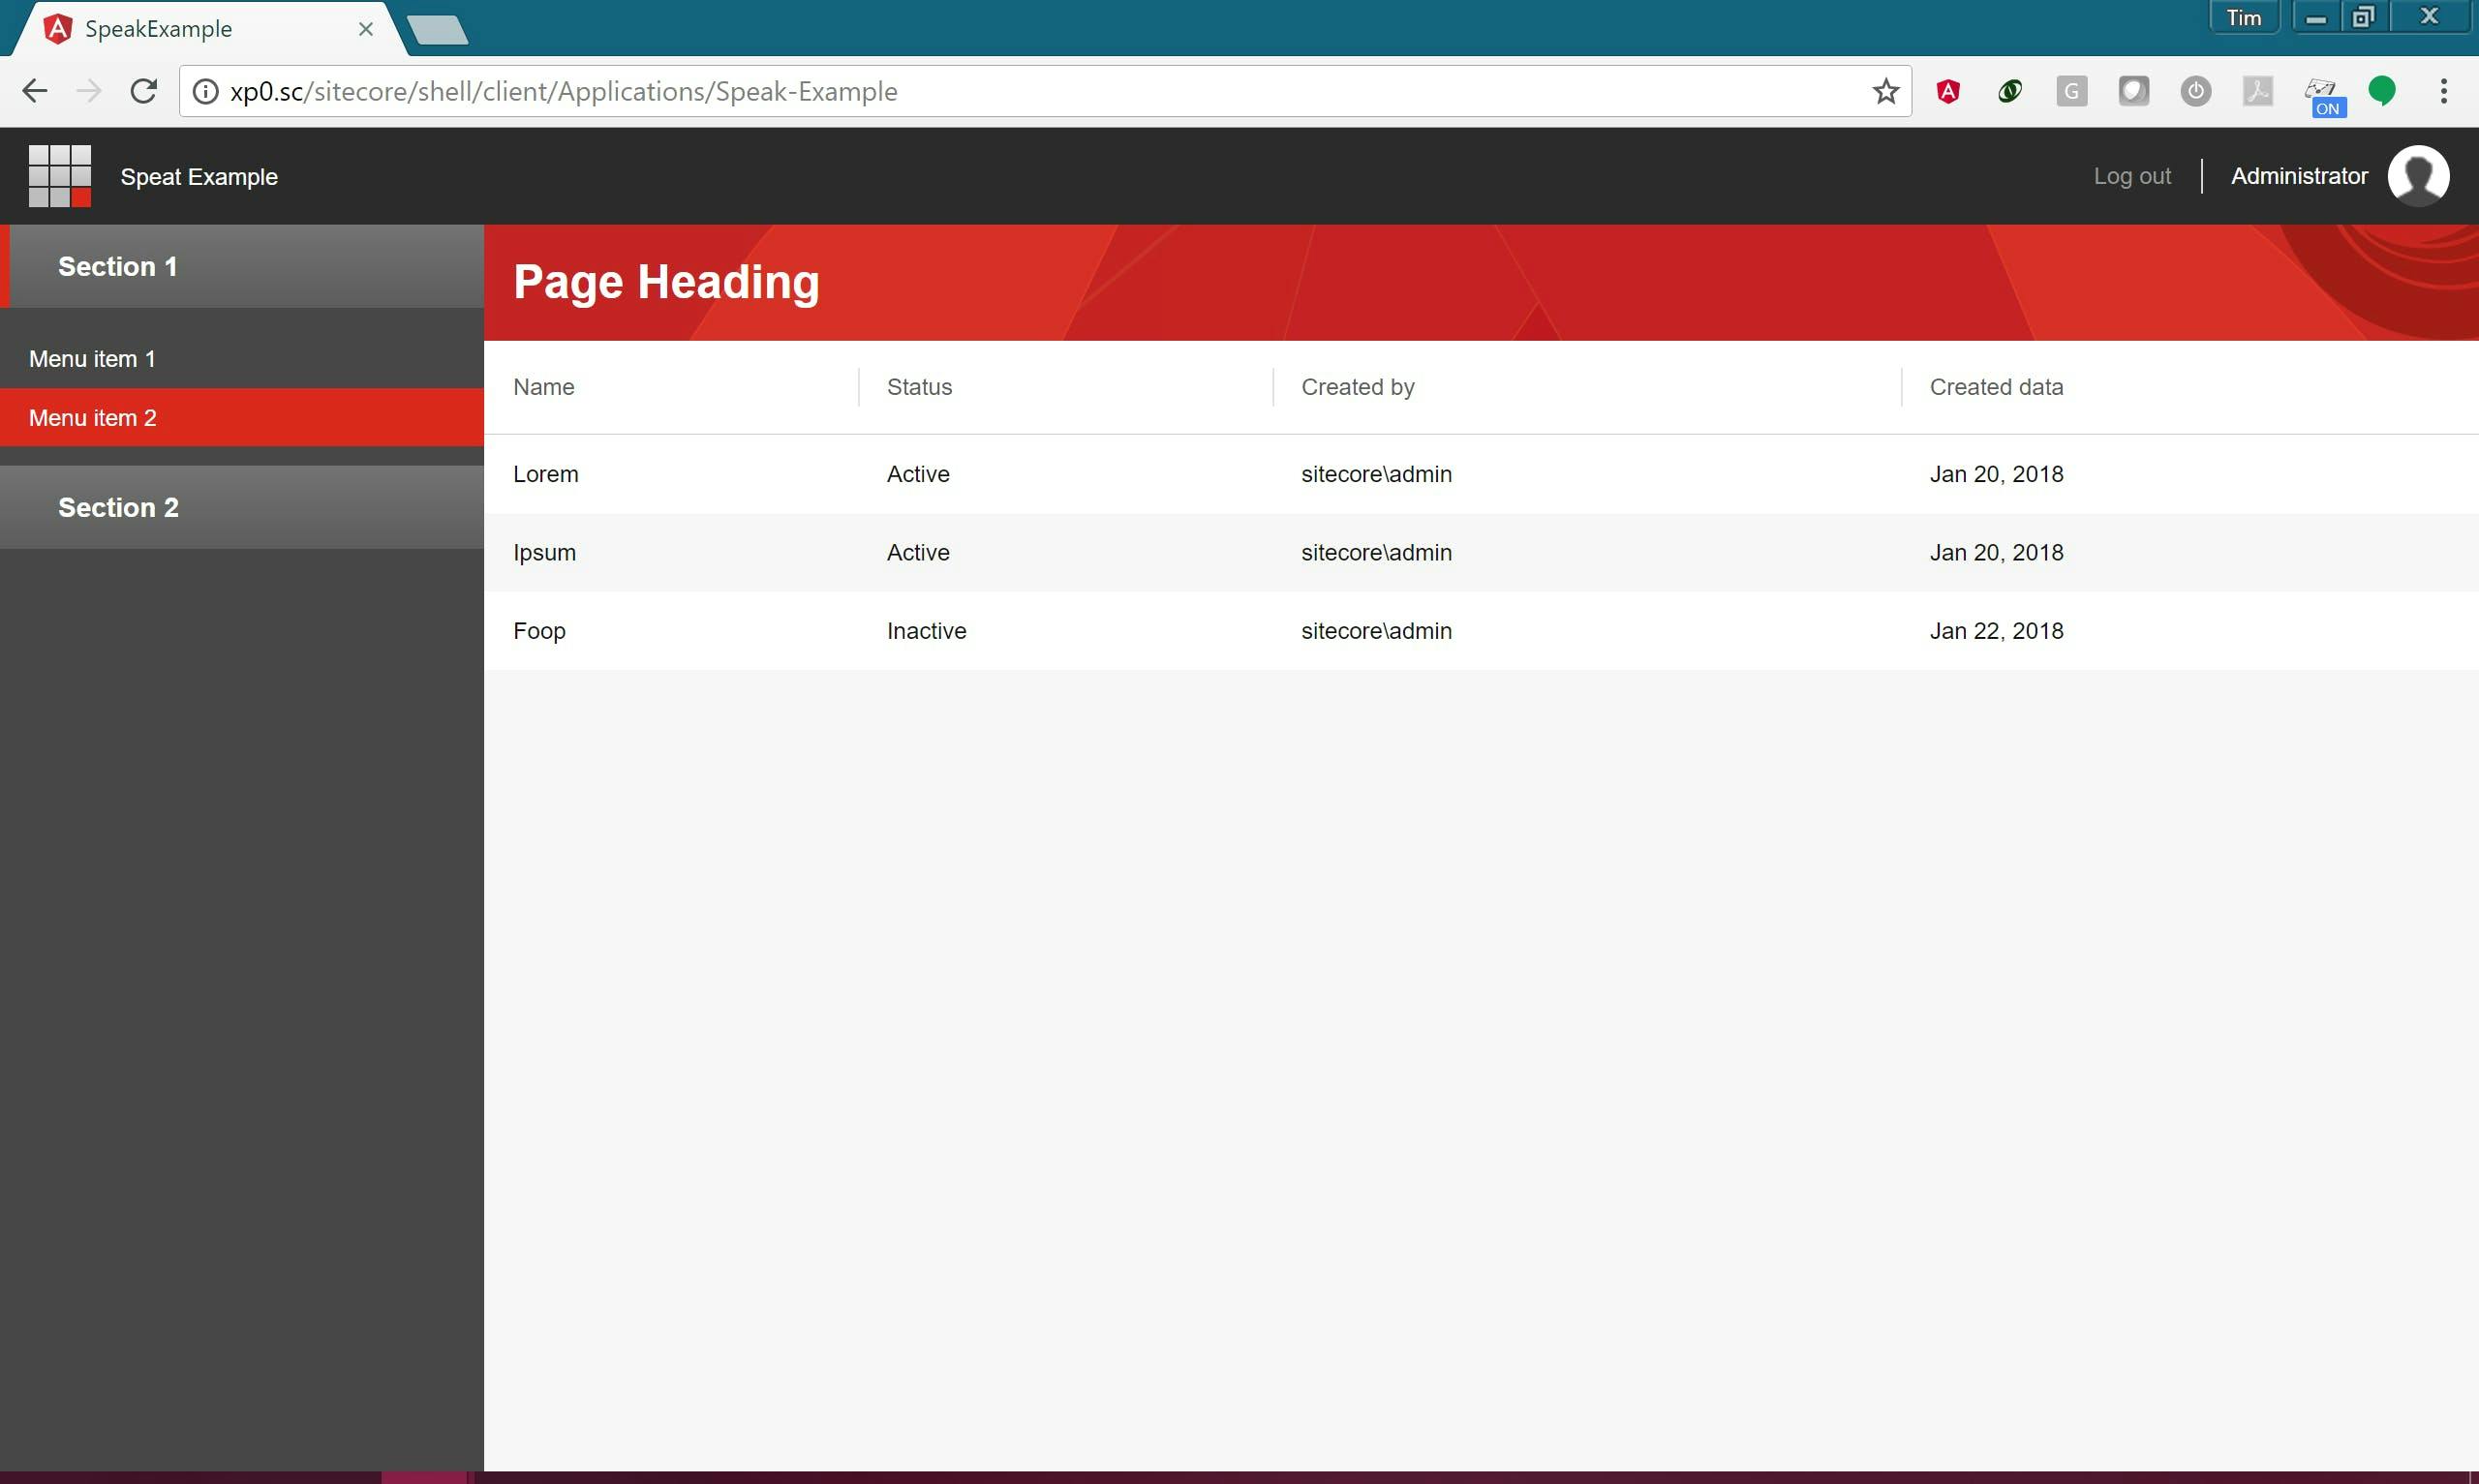
Example Page

To make this page first I cleared out everything from app.component.html and started adding some Sitecore components. Normally you would start generating your own components to represent things like pages, but for the purposes of the example I placing everything in the one file.

To start I have a sc-page containing a header. This comes out of Sitecores demo application and will give you the standard bar that sites at the top of the Sitecore admin, informing users where they are.

1<div> <a href="#"></a> <!-- AccountInformation gets accountName and accountImageUrl automatically from Sitecore context which is configured in AppModule --> </div>

To create the menu I'm using an sc-menu. Notice how some items are marked as active.

1<aside> <a>Menu item 1</a> <a>Menu item 2</a> <a>Menu item 3</a> <a>Menu item 4</a> </aside>

Lastly to create the main content of the page I'm using a scPageAppHeader, scPageContent and an scTable for the table.

1<div> </div> <article> <table> <thead> <tr> <th>Name</th> <th>Status</th> <th>Created by</th> <th>Created data</th> </tr> </thead> <tbody> <tr> <td>Lorem</td> <td>Active</td> <td>sitecore\admin</td> <td>Jan 20, 2018</td> </tr> <tr> <td>Ipsum</td> <td>Active</td> <td>sitecore\admin</td> <td>Jan 20, 2018</td> </tr> <tr> <td>Foop</td> <td>Inactive</td> <td>sitecore\admin</td> <td>Jan 22, 2018</td> </tr> </tbody> </table> </article>

The complete code looks like this:

1<div> <a href="#"></a> <!-- AccountInformation gets accountName and accountImageUrl automatically from Sitecore context which is configured in AppModule --> </div> <aside> <a>Menu item 1</a> <a>Menu item 2</a> <a>Menu item 3</a> <a>Menu item 4</a> </aside> <div> </div> <article> <table> <thead> <tr> <th>Name</th> <th>Status</th> <th>Created by</th> <th>Created data</th> </tr> </thead> <tbody> <tr> <td>Lorem</td> <td>Active</td> <td>sitecore\admin</td> <td>Jan 20, 2018</td> </tr> <tr> <td>Ipsum</td> <td>Active</td> <td>sitecore\admin</td> <td>Jan 20, 2018</td> </tr> <tr> <td>Foop</td> <td>Inactive</td> <td>sitecore\admin</td> <td>Jan 22, 2018</td> </tr> </tbody> </table> </article>

To avoid some build errors later on we also need to update the app.components.ts file (think of this as a code behind file), to have an additional property and service.

1import { Component, OnInit } from '@angular/core'; import { NgScService } from '@speak/ng-sc'; import { SciLogoutService } from '@speak/ng-sc/logout'; @Component({ selector: 'app-root', templateUrl: './app.component.html', styleUrls: ['./app.component.css'] }) export class AppComponent implements OnInit { isNavigationShown = false; constructor( private ngScService: NgScService, public logoutService: SciLogoutService ) {} ngOnInit() { this.ngScService.init(); } }

How to find more components

Unfortunately the Sitecore documentation doesn't currently contain a list of what's available. However if you look in your node_modules folder there is a change log containing information on each component here \node_modules\@speak\ng-bcl\CHANGELOG.md.

Step 3 - Publishing the application

Once you've built the application you need to publish it and copy it into Sitecore.

There are some differences in the way a Speak 3 Angular application needs to work which differ from the normal way an Angular application runs. Among others these include having an index.apsx page rather than an index.html and the application not being located in the root of a site. You can read more about this in Sitecores documentation. The good news though is Sitecore have provided a post build step to sort this out for you.

If you copied the package.json file at the beginning this will already be set up, one thing you do need to do though is update the base location to be where your application is going to live.

Once this is done you can run a build.

1npm run-script build

Note this is using npm to run the build script from the packages.json file rather than doing a regular ng build from Angulars CLI.

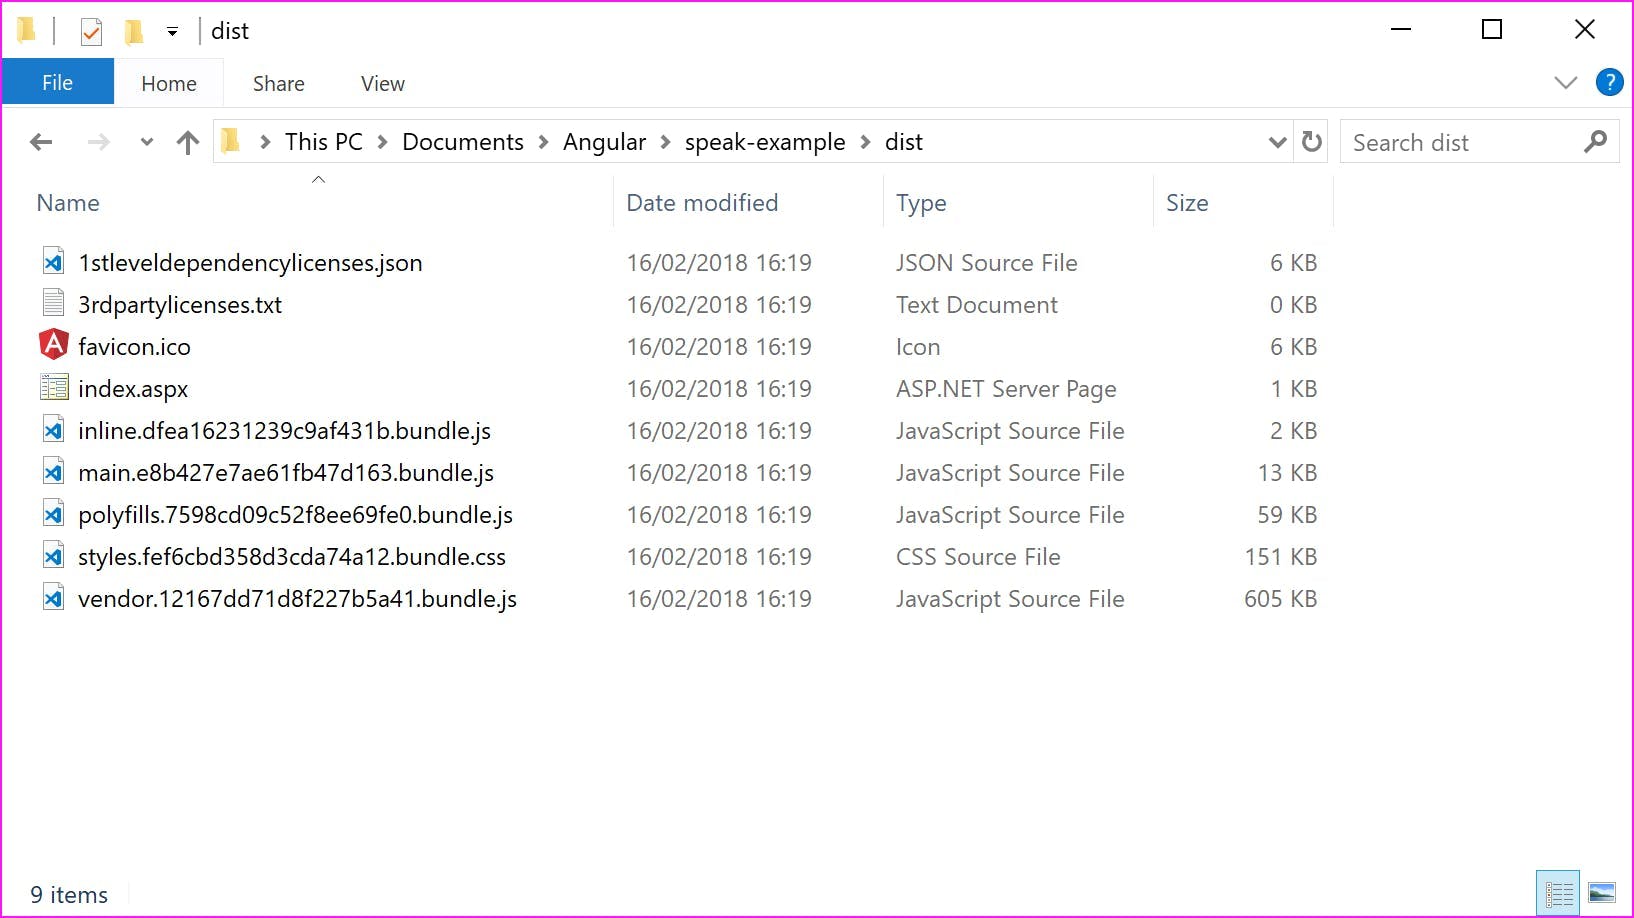
If all succeeds your dist folder will now contain a compiled version of the application.

Copy these files into the destination folder in your Sitecore site. For me this is \sitecore\shell\client\Applications\Speak-Example. You should now be able to log in and view your application.

Notice the logout button now functions and the current user is displayed in the top right. The menu sections are also collapsible, but other than that our application doesn't actually do anything.

Moving on from this there's lot's more to cover on building out the functionality in the application and you may have also noticed in the app.module.ts file a reference for translations which I never created, but this should be enough to get anyone started with building an Angular Speak 3 project and then publishing it into Sitecore.

Related Links

Speak 3 Official documentation
Speak 3 Downloads

Sitecore Alias as Redirect

Sitecore Alias as Redirect

One feature of Sitecore that I have always disliked is Alias's. On each page of a site, content editors have the ability to click an alias button on the presentation tab and add alternative urls for the page.

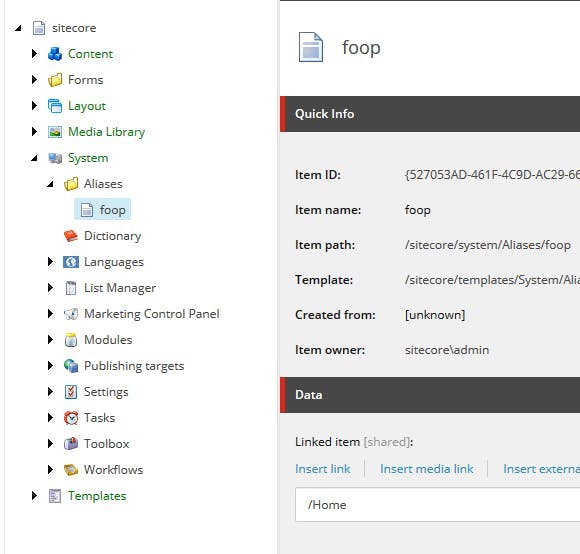
Once added these will appear in the Aliases folder under system.

However all this accomplishes is multiple URLs existing for one page which is a big SEO no no.

Content editors like to do this in order to create simple URLs for things like landing pages. e.g. himynameistim.com/Sitecore but search engines hate it as they see multiple pages with the exact same content. As a result the value of each page gets lowered and appears lower in search engine results. What Content editors really want is to set up a 301 redirect so that they can have the simple URL but redirect users to the actual page on the site.

Aliases as Redirects

One solution is to updated the aliases functionality to cause a redirect to it's linked item rather than resolve the page.

To do this we need to create a pipeline processor that inherits from AliasResolver.

1using Sitecore; using Sitecore.Configuration; using Sitecore.Diagnostics; using Sitecore.Pipelines.HttpRequest; using System.Net; using System.Web; using AliasResolver = Sitecore.Pipelines.HttpRequest.AliasResolver; namespace HiMyNameIsTim.Pipelines { public class AliasAsRedirectResolver : AliasResolver { public override void Process(HttpRequestArgs args) { if (!Settings.AliasesActive) { return; // if aliases aren't active, we really shouldn't confuse whoever turned them off } var database = Context.Database; if (database == null) { return; // similarly, if we don't have a database, we probably shouldn't try to do anything } if (!Context.Database.Aliases.Exists(args.LocalPath)) { return; // alias doesn't exist } var targetID = Context.Database.Aliases.GetTargetID(args.LocalPath); // sanity checks for the item if (targetID.IsNull) { Tracer.Error("An alias for \"" + args.LocalPath + "\" exists, but points to a non-existing item."); return; } var item = args.GetItem(targetID); if (database.Aliases.Exists(args.LocalPath) &amp;&amp; item != null) { if (Context.Item == null) { Context.Item = item; Tracer.Info(string.Concat("Using alias for \"", args.LocalPath, "\" which points to \"", item.ID, "\"")); } HttpContext.Current.Response.RedirectLocation = item.Paths.FullPath.ToLower() .Replace(Context.Site.StartPath.ToLower(), string.Empty); HttpContext.Current.Response.StatusCode = (int)HttpStatusCode.MovedPermanently; HttpContext.Current.Response.StatusDescription = "301 Moved Permanently"; HttpContext.Current.Response.End(); } } } }

And patch in in place of the regular Alias Resolver.

1<configuration xmlns:patch="http://www.sitecore.net/xmlconfig/">
2<sitecore> <pipelines>
3<httpRequestBegin> <processor type="HiMyNameIsTim.Core.Pipelines.AliasAsRedirectResolver, LabSitecore.Core" patch:instead="*[@type='Sitecore.Pipelines.HttpRequest.AliasResolver, Sitecore.Kernel']"/> </httpRequestBegin>
4</pipelines> </sitecore>
5</configuration>

The above code is adapted from a solution given by Jordan Robinson but with a bug fixed to stop every valid URL without an alias writing an error to the log file.

Using compile options for version compatibility

Using compile options for version compatibility

Here's the scenario; Your building a module and it needs to be compatible with different versions of a platform. e.g. Sitecore, and everything's great up until the day you need to call different methods in different versions of the platform. You'd rather not drop support for the old versions, and nor do you want to start maintaining two code bases. So what do you do?

C# Preprocessor Directives

Preprocessor directives provide a way to give the compiler instructions to follow while its compiling a project. By using this we can give the compiler conditions to compile different versions in different ways. Thereby allowing us to maintain one codebase, but produce compilations for different versions of the platform. e.g. One for Sitecore 8.0 and another for Sitecore 9.0.

#if, #else and #endif

When the compiler encounters an #if followed by an #endif, it will only compile the code between the two if the specified symbol had been defined.

1#if DEBUG
2 Console.WriteLine("Debug version");
3#else
4 Console.WriteLine("Non Debug version");
5#endif
6

Defining a preprocessor symbol

For the if statement to work, your going to need to define your symbol which is being evaluate.

This can be included in code as follows

1#define YOURSYMBOL

A more useful was of defining this however is to include it in your call to MSBuild (this is particularly useful when using a build server).

1-define:name[;name2]

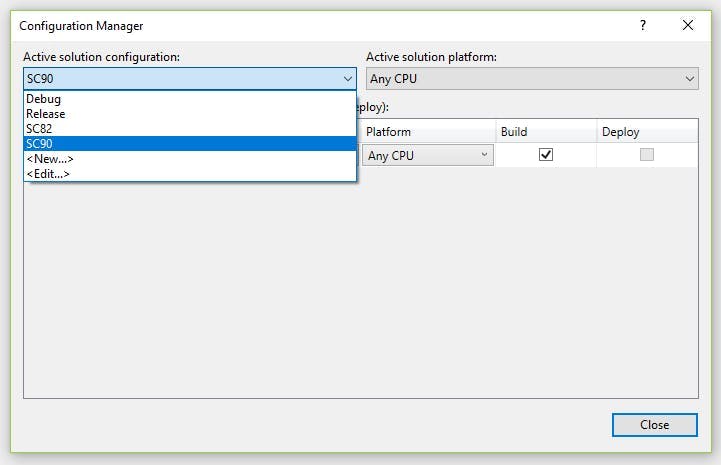
If your compiling from Visual Studio an easier solution is to set up a new build configuration with a conditional compilation symbol.

  • Right click your solution item in Solution Explorer and select Properties
  • Click Configuration Properties on the left and then Configuration Manager on the right
  • In the pop up window click the Active solution configuration drop down and then click New
  • Enter the name of the build config. In my example above I have SC82 for Sitecore 8.2 and SC90 for Sitecore 9.0.
  • Click Ok and close all the windows you just opened
  • Right click the project that your going to build and select Properties
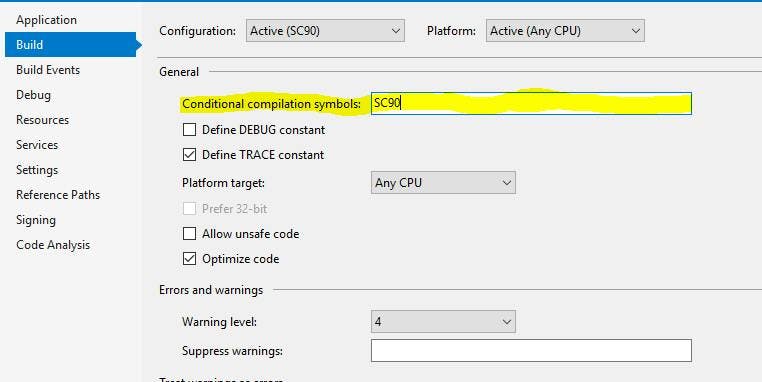
  • Select the Build tab
  • Select your build configuration from the configuration at the top
  • Enter the symbol your using for the #if directives

Reference different versions of an assembly

Adding conditions to our code is good, but for this to fully work we also need to reference different versions of the assemblies that are causing the issue in the first place.

There's no way of doing this through Visual Studio but by editing the .csproj file manually we can update the hint path on a reference to include the configuration name as a variable.

1..\libraries\$(Configuration)\Sitecore.Kernel.dll False

This example shows how different versions of the Sitecore Kernel can be referenced by keeping each version in a subfolder that corresponds with the build configuration name.

As well as different versions of assemblies, it may also be needed to target different versions of the .NET framework. This can be done in the .csproj file by including additional property groups that have a condition on the configuration name.

1bin\SC82\
2TRACE;SC82
3true
4v4.5.2
5
6bin\SC90\
7TRACE;SC90
8true
9v4.6.2

In this example I'm targeting .net 4.5.2 for my Sitecore 8.2 configuration and 4.6.2 for my Sitecore 9 configuration.

Useful Links

C# preprocessor directives
-define (C# Compiler Options)

A first look at Sitecore SPEAK 3

A first look at Sitecore SPEAK 3

SPEAK (Sitecore Process Enablement and Accelerator Kit) is the framework for constructing admin interfaces in Sitecore. It was introduced to the platform prior to Sitecore 8, but really became the way to do things after Sitecore 8's UI refresh which introduced the start page and made accessing full page SPEAK applications logical.

SPEAK 1 and 2

The goals of SPEAK were to:

  • Provide a streamlined approach to application development.
  • Enable reuse of UI elements.
  • Enforce a consistent look and feel.

In order to achieve this SPEAK 1 and 2 provides a component library of controls that can be used to construct pages. This ensures that the UI retains a consistent look and feel, and also minimizes the amount of work on a Sitecore developer. Logic is then added to an application using JavaScript for the front end and C# for server side code.

While this all sounds great many developers find SPEAK hard to use. In order to construct a UI out of the re-usable components, Sitecore lent on it's existing functionality to be able to construct pages out of presentation items, however there is no WYSIWYG editor and the only real way to construct the layout is through Sitecore Rocks. This in itself isn't awful, but when combined with the fact the average Sitecore developer doesn't need to build an admin application that often, it presents a steep learning curve using a tool they may not use to put together components they're not familiar with.

SPEAK 3

SPEAK 3 aims to address complaints in previous versions by introducing a completely new framework based on Angular.

Since SPEAKs initial incarnation, client side application development has moved on a long way, so rather than continuing to construct their own framework, Sitecore has chosen Angular as the the platform to use going forward.

Begin Angular, SPEAK 3 applications can run independently of Sitecore, however the purpose of SPEAK 3 is still to make it simple to integrate Sitecore-branded applications into the content manager.

My First Look

Before being a Sitecore back-end developer I worked on bespoke web based applications using client side frameworks such as Knockout, so the news that Sitecore was going to adopt Angular was great. Digging into Angular again however has given me a first hand experience of how fast the JavaScript world is changing. Gone is the promotion of MVC on the client being replaced with service/controller patterns. Whereas with Knockout and AngularJS (what Angular 1.x is now known as) we could add data binding to just an aspect of a page, Angular is really for running an entire application, routing and all.

Building an SPEAK 3 application really means building an Angular application with some modules provided by Sitecore. These modules will provide integration features such as:

  • Sitecore context
  • Translations for applications
  • Translations for the SPEAK 3 component library
  • Component user access authorization
  • Preventing cross-site request forgery (Anti-CSRF)

In addition to this the SPEAK 3 components will also sort out compatibility issues such as modifying the routing so that the application no longer needs to be in the route of the site and can be in a sub-folder of Sitecore.

Angular for a Sitecore dev

To start it's good to know an outline of what developing Angular involves.

Angular 2+ is built using TypeScript. You don't need to use TypeScript, but as most of the examples are you probably will want to too. TypeScript is a superset of of JavaScript which adds strong typing support as well as other features of ECMAScript 2015 to backport it to older versions of JavaScript.

TypeScript needs to be compiled into JavaScript before it can run in the browser.

The easiest way to get started with Angular and TypeScript is using Node.js to install tools via NPM. Node is not a requirement for Angular and you won't need it in production, but for local dev using Node to host your application can make life a lot easier.

Angular has a CLI which makes things easy to create and run an Angular application.

Visual Studio can be used as an IDE for TypeScript and Angular, but you might find life easier using Visual Studio Code.

It's better than it sounds :)

All this might sound a bit daunting to the average C# developer. Technologies like Node and NPM traditionally are more at home in the open source community.

There is however a lot to be positive about. If your the type of dev that prefers writing c# to JavaScript, then the inclusion of TypeScript is going to please you, as it brings the type checking structure and class organisation that we're used too.

The angular cli (command line interface) is also a reason to be pleased. One large difference between the .net and open source world has been the ability to click a button and get going. Open source typically comes with the setup of many components to get a solution working. At times when you try to learn something it can feel like your spending more effort doing setup that actual dev on the platform. Angular still needs to have all these components put together, but the cli takes care of all this for you, effectively recreating a file new project experience, just through a command line.

Sitecore Logging

Sitecore Logging

One of the advantages of using a platform like Sitecore over completely bespoke development, is the number of features that are built-in that day to day you completely take for granted. An important one of those is logging.

If you're building a bespoke application, adding some sort of support for generating log files can be a bit of a pain. Granted there are solutions that can be added to your project that do most of the lifting for you, but you still need to think about it, decide which to use and understand how to use it. With Sitecore the ability to write to a log file has been built in along with the logic that's going to delete old log files and stop your servers hard disk filling up. Under the hood Sitecore is using Log4Net to generate log files, a side effect of this is that config changes can not be made using patch files.

Logs are written to the logs folder within your data folder. If your on Sitecore 8.2 or below this will be adjacent to your website folder. If your on Sitecore 9 or using Sitecore PaaS this will be in the App_Data folder within your sites folder.

The different log files

Sitecore generates 6 different log files while it's running, these are:

Log - A general log file which you can write to
Crawling - Logs from the Sitecore Search Providers for crawling
Search - Logs from the Sitecore search providers for searches
Publishing - Logs generated during Sitecore publishes
FXM - Logs from federated experience manager
WebDAV - A log for WebDAV activity

Customizing the amount of detail

At different times you will likely want to see a different amount of detail in your log files. For instance on a production server you will want to keep logs to a minimum to maximise performance. However in a different environment where you are trying to debug an issue you would want all the logs you can get.

For this reason when writing a log a priority level is assigned and each log file can be configured to only write logs at a certain level or below to disk.

Priority levels are:

  1. DEBUG
  2. INFO
  3. WARN
  4. ERROR
  5. FATAL

To configure what level of logging should be output, configure the priority value in the log4net section of the web.config file.

1<log4net>
2 <appender name="LogFileAppender"
3 type="log4net.Appender.SitecoreLogFileAppender, Sitecore.Logging">
4 <file value="$(dataFolder)/logs/log.{date}.txt" />
5 <appendToFile value="true" />
6 <layout type="log4net.Layout.PatternLayout">
7 <conversionPattern value="%4t %d{ABSOLUTE} %-5p %m%n" />
8 </layout>
9 </appender>
10 <root>
11 <priority value="INFO" />
12 <appender-ref ref="LogFileAppender" />
13 </root>
14</log4net>

Writing to the log file

Writing to the log file is super easy to do from within your Sitecore application. The Sitecore.Diagnostics.Log class contains static functions to write to the general log file at different priority levels.

1// Writes a log at the error priority level
2Sitecore.Diagnostics.Log.Error("That wasn't meant to happen", this);
Custom Experience Buttons vs Edit Frames in Sitecore

Custom Experience Buttons vs Edit Frames in Sitecore

So your going that extra mile and fully supporting the experience editor in your Sitecore solution, but how do you support a WYSIWYG editor when a field isn't actually visible, or you need to provide the ability to edit a complex field type such as a drop-down or a multi-list?

The solution is to use either Edit Frames or Custom Experience Buttons, both of which will display a dialog containing the fields to edit. The difference between them comes down to where the toolbar containing a button will appear.

Edit Frames require extra code to be added to your view and are designed to surround a section(s) of your view. Custom Experience buttons however appear on the existing tool bar that's shown when you select a component in the experience editor.

Edit Frame

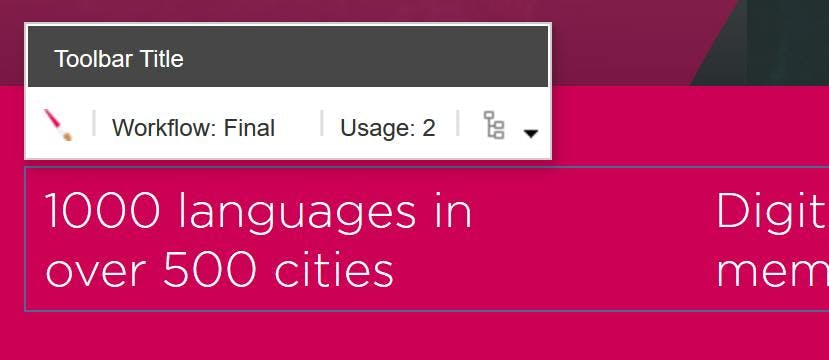
With an edit frame you can surround a section of html within your view with a clickable target, that will display a toolbar with a button to launch the dialogue.

To set up an edit frame:

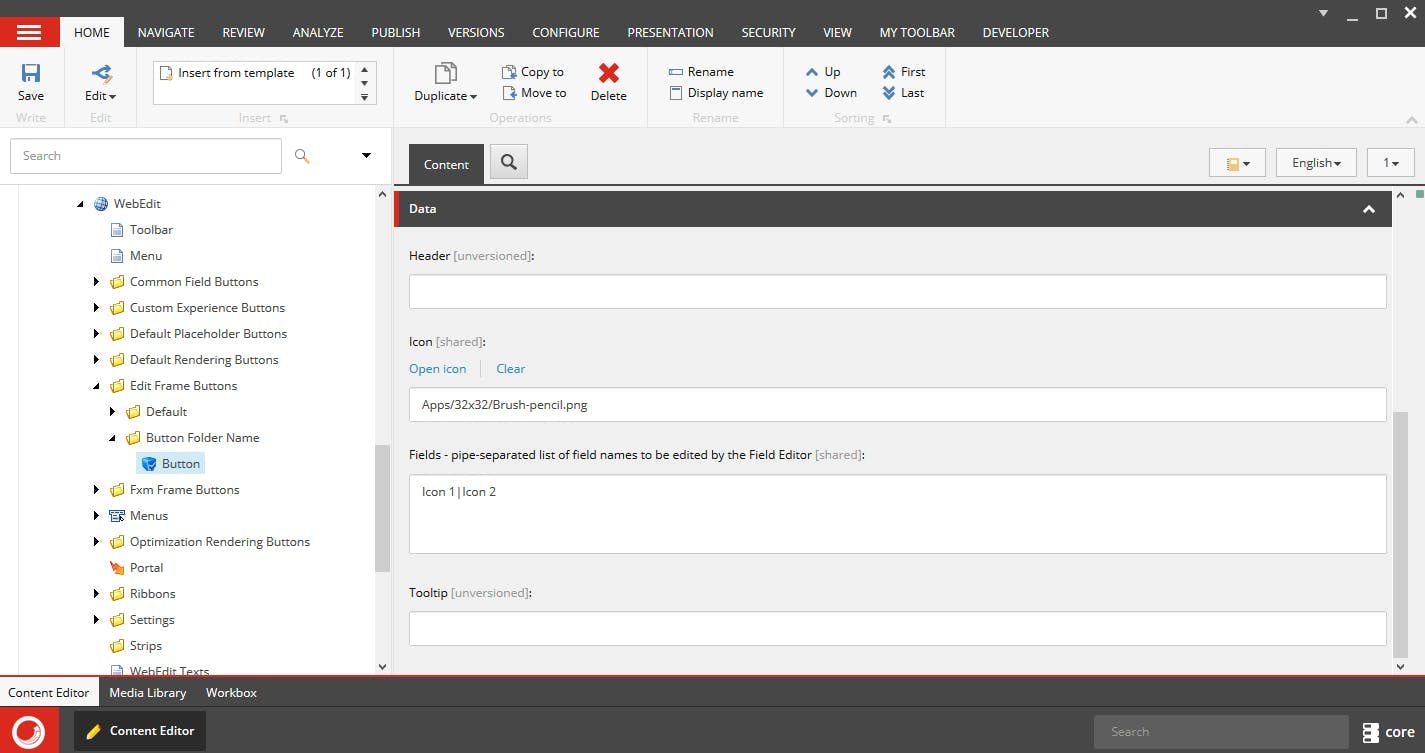
  • In the core database navigate to /sitecore/content/Applications/WebEdit/Edit Frame Buttons and create a new item based on Edit Frame Button Folder. This folder will be referenced in your view for the collection of buttons to be displayed.
  • Under the new folder create a new item based on Field Editor Button and give it the name of your button.
  • On your button item make sure you set an icon and the list of fields the button should allow the content editor to edit. These should be pipe separated.
  • In Visual Studio open the view for your rendering
  • Add a reference to Sitecore.Mvc.Extensions
  • Surround the section to show the button with a using block as follows:
1@using (Html.BeginEditFrame(RenderingContext.Current.ContextItem.Paths.FullPath, "Button Folder Name", "Toolbar Title"))
2{
3 // HTML here
4}
  • You will now see a toolbar appear in the experience editor
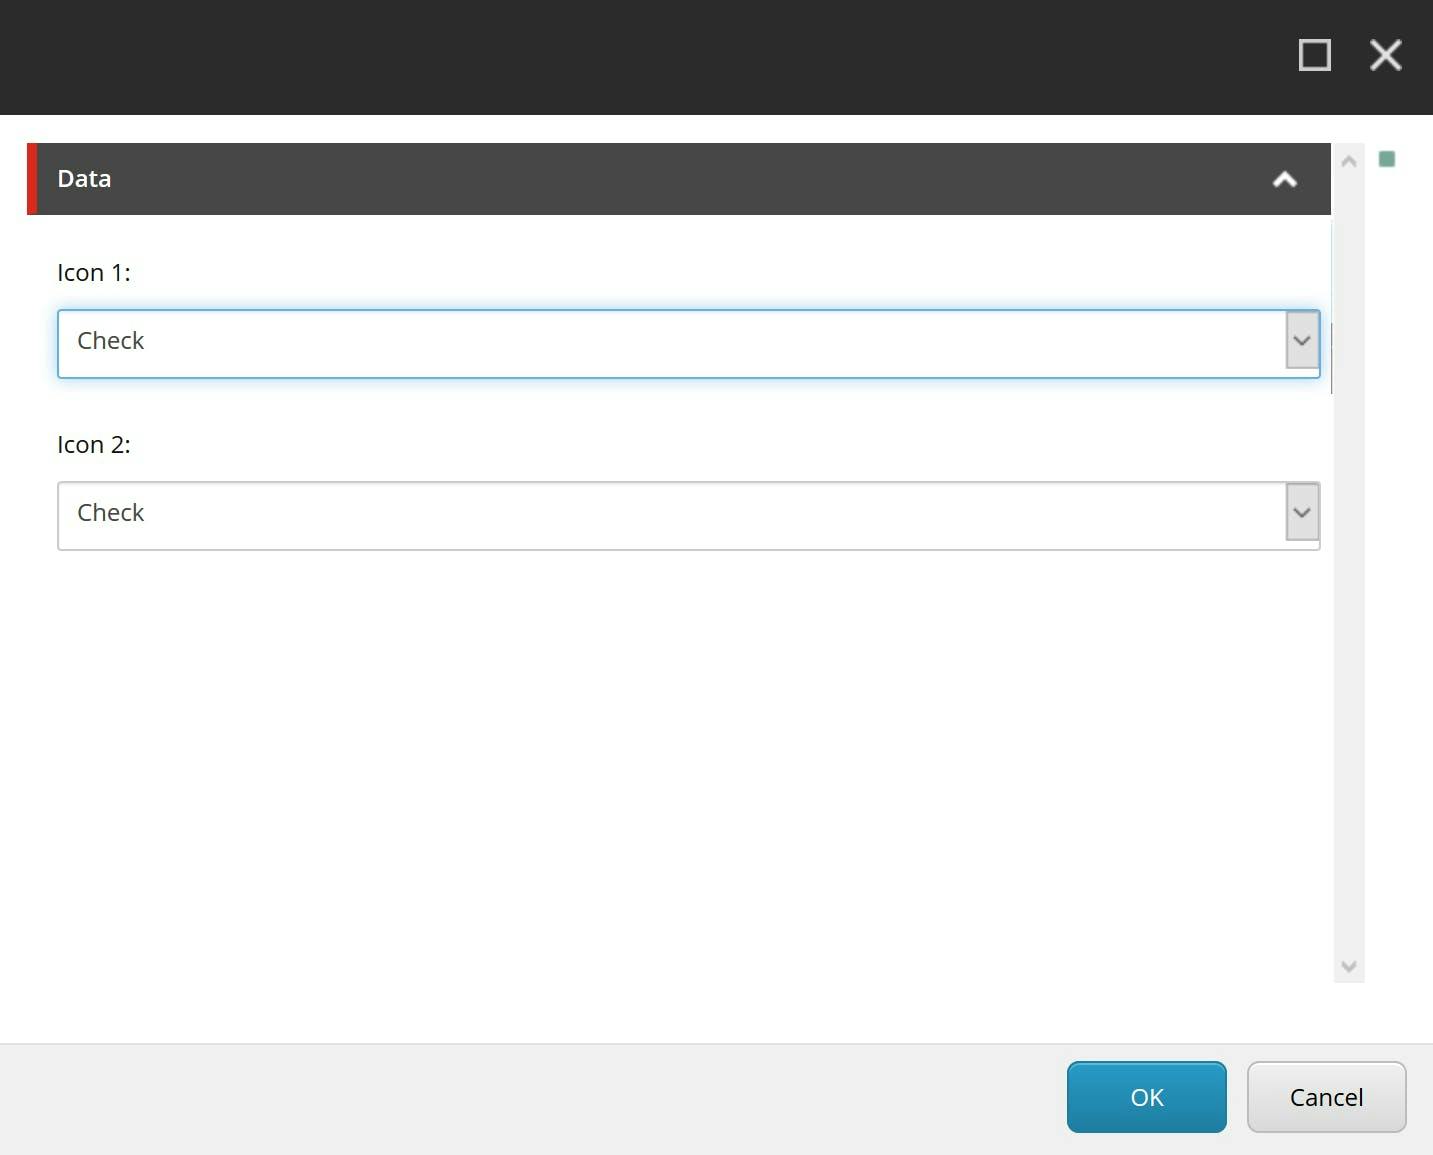
  • Clicking the icon will load a dialogue to edit the listed fields

Custom Experience Buttons

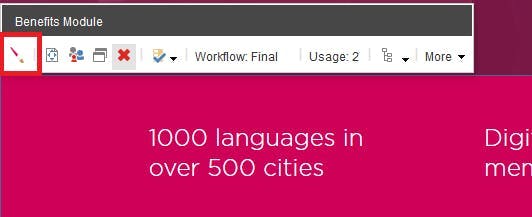
Custom experience buttons differ to edit frames in that you do not need to add any code to your views. Rather than having 1 or more clickable areas in your view the button will appear on the toolbar for the entire component. This makes them beneficial when the field doesn't directly relate to a section in the view. e.g. for editing a background video that may span the entire components background.

To set up a custom experience button:

  • In the core database navigate to /sitecore/content/Applications/WebEdit/Custom Experience Buttons and create a new item based on Field Editor Button.
  • On your button item make sure you set an icon and the list of fields the button should allow the content editor to edit. These should be pipe separated.
  • Switch to the master DB and navigate to the rendering item for your component
  • In the field for Experience Editor Buttons select the new button
  • Selection the component will now show the additional button on the toolbar
  • Clicking the icon will load a dialogue to edit the listed fields
Invert list selection with Sitecore PowerShell

Invert list selection with Sitecore PowerShell

I recently needed to run a script on a block of Sitecore content in invert the selection of a checklist and multilist. As I couldn't find any example of how to do this at the time, I thought I'd share what I wrote.

1#script to update tier
2Get-ChildItem -r -Path "master:\content\Home" -Language * | ForEach-Object {
3 if ($_.PSobject.Properties.name -match "Tier") {
4 [String[]]$tiers = $_.Tier -split "\|"
5
6 $_.Editing.BeginEdit()
7 $newtiers = Get-ChildItem 'master:\content\Lookups\Tiers\' | Where-Object { $tiers -notcontains $_.Id }
8 $_.Tier = $newtiers.Id -join "|"
9 $_.Editing.EndEdit()
10 }
11}

Get-ChildItem -r -Path "master:\content\Home" -Language * | ForEach-Object {

This line is getting the child items from the home node in the master db. The -r specified that it should be recursive and the -Language * specifies to include all languages. The results are then piped to a for each loop.

if ($_.PSobject.Properties.name -match "Tier") {

The field I needed to update was called Tier, as this was included in multiple templates I checked that the object included a field called Tier, rather than checking the template types.

[String[]]$tiers = $_.Tier -split "\|"

List fields in Sitecore get stored as a pipe separated list of the item Id's for the selected items. In order to do a comparison in Powershell I needed to turn the string back into an array using the split command. Notice the backslash that is needed before the pipe.

$_.Editing.BeginEdit()

To edit an item you need to begin an edit

$newtiers = Get-ChildItem 'master:\content\Components\Lookups\Tiers\' | Where-Object { $tiers -notcontains $_.Id }

This is where we get the new list of tiers to set as the selected ones for the item. The Get-ChildItem command is retrieving the original options that could be selected and the where-object statement is then excluding the ones that are in the $tiers array we just made.

$_.Tier = $newtiers.Id -join "|"

To save the new list we need to convert the results of the query into a pipe separated list using a join.

$_.Editing.EndEdit() } }

End the editing to save and close the the if and loop statements.

Top features in Sitecore 9

Top features in Sitecore 9

Sitecore 9 is out and with it comes cool new whizzy stuff. Here's my top features from the new version of the platform.

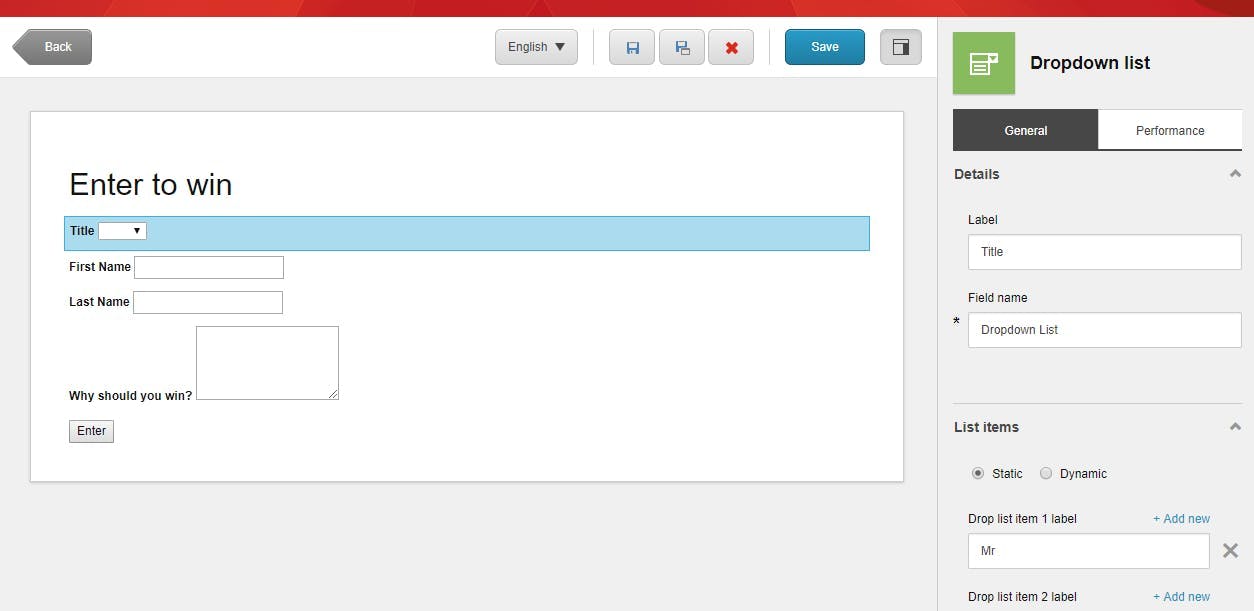
#1 - New Forms module

I think everyone would agree that Web Forms for Marketers was starting to show it's age and the UI was getting a bit dated compared to the rest of Sitecore.

The new Forms module, which is just called forms is completely new from the ground up. It has a new drag and drop UI with long awaited support for multiple page forms.

Like WFFM, the module is extendable through custom save actions and comes with a number of useful default ones out of the box.

There is no upgrade option for moving a WFFM form to the new module but WFFM will continue to work on Sitecore 9 and is being dropped in Sitecore 9.1.

I think more than anything the UX improvements will make a real difference for users by being much simpler to understand and will drive to much more use.

#2 - Marketing Automation

In Sitecore 9 Engagement Plans are being replaced with Marketing Automation. Like the forms module, this is completely new from the group up rather than an UI update to the existing Engagement Plans.

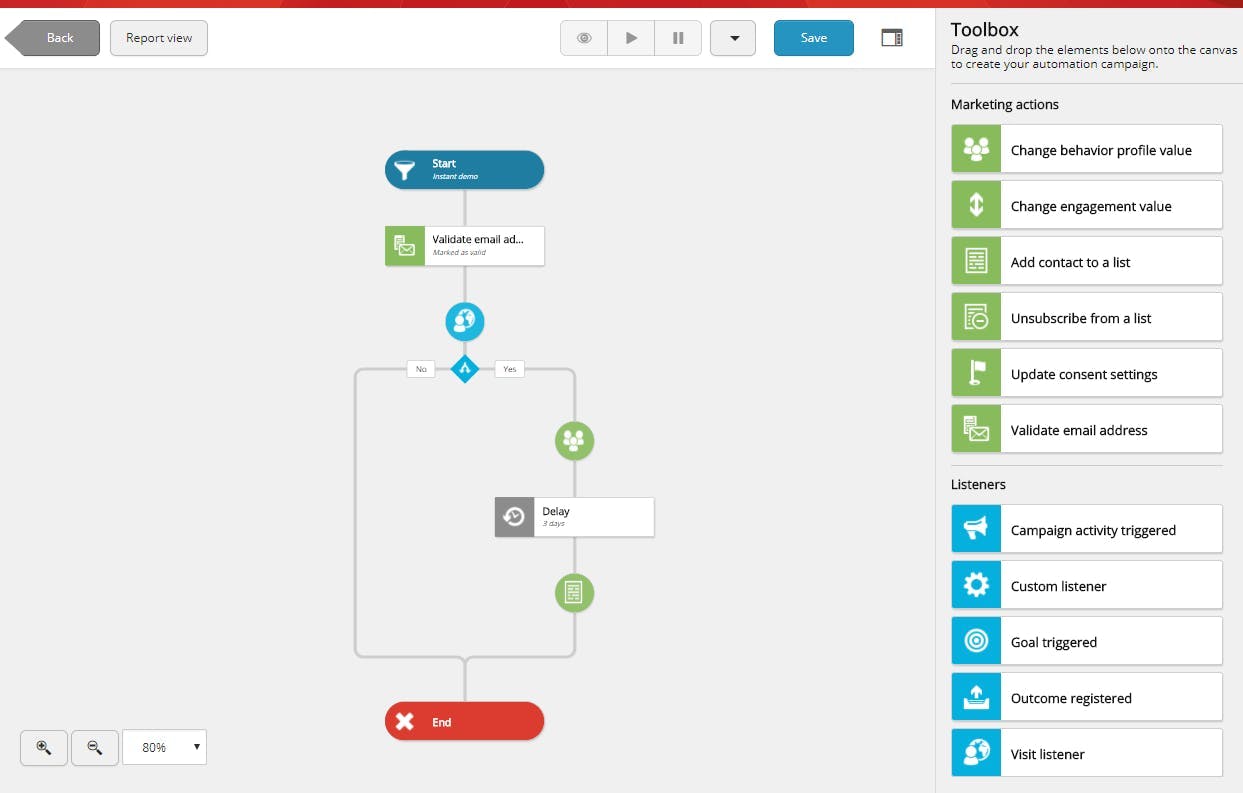
The new Marketing Automation module has a really easy to use drag and drop ui which is a vast improvement over the old Silverlight implementation engagement plans had. It's also directly accessible from the dashboard rather than being hidden in the Marketing Control Centre.

One of the biggest changes (aside from the UI) is there is now no need to enrol users in a plan at a specific state either by code or a wffm save action. I found this one of the most confusing aspects to end users who were expecting creating states with a trigger to automatically add people once they had triggered a goal, so this is great to see fixed.

Plans now have very clear start and end points with a number of options on the start node (goals, events), which can be combined to trigger who should be added to the plan.

Overall for the moment you try creating a plan just to see what it can do, the whole process is so much simpler that I think this will have a significant aspect on users. Engagement Plans were something that needed to be learn 't in order to get anything out of them, and wernt intuitive enough leading to frustration. With Marketing Automation I think a lot of people that were put off before will now benefit from this module.

#3 - xConnect

xConnect is a new service layer that sits between xDB and the client. That could be the CMS, a device or some other custom server side process that needs to read or write xDB data.

With xConnect as the service layer this means that no system has direct access to the collection database or search indexes. Any system wanting to access this data will go through xConnect which also helps with support for things like GDPR.

xConnect is installed separately from Sitecore itself and does not have any dependencies on the Sitecore kernel. When you install Sitecore locally you will see two IIS entries, one for Sitecore and one for xConnect. Communication with xConnect is done via a set of RESTful API's over HTTPS, making integrating with it extremely simple to do.

What xConnect really brings to the table is the ability to scale an combine many more systems rather than just the CMS. e.g. Phone Apps.

#4 - Sitecore Installation Framework (SIF)

Installing Sitecore 9 is very different to previous versions (see my Sitecore 9 installation tips here), gone are the days of copying a web-root and restoring some db's. The entire installation is now done with a new framework based on PowerShell scripts.

While this is going to create a pain point in the amount of time it takes to get started. It will almost certainly vastly improve DevOps tasks as it opens up numerous options to put the installation scripts in deployment pipelines.