Devops
Exporting a Database from SQL Azure

Exporting a Database from SQL Azure

If you need to copy your SQL Azure database locally then exporting it as a Bacpac file is the simplest route to go.

There's many ways you can do this including PowerShell, REST API, and even SQL Server Management Studio. However I am going to show you how to do it through the Azure Portal.

Exporting a Bacpac file

First off find your DB in the Azure Portal.

In the top set of buttons when you view your DB (make sure you're on the actual DB not the server), you will see an export button 3rd from the left.

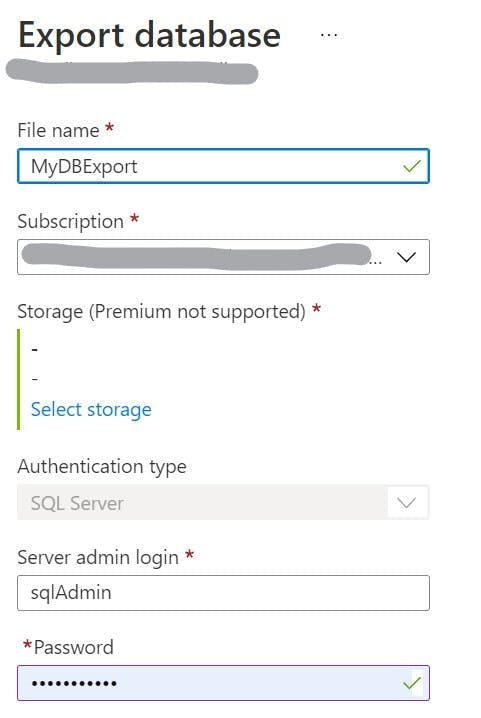
Clicking Export takes you to a page where you need to configures the filename to export as, the storage account to export to and the authentication to log into the DB. The storage account is required as a place for the export to be saved, you will get the choice of configuring the container for it to go into, so I like to create one called backups.

Checking the status of the export

When you start the export you will get a confirmation that it has started, but knowing how to check what the progress is isn't obvious.

To check the progress, navigate to the DB server in the portal.

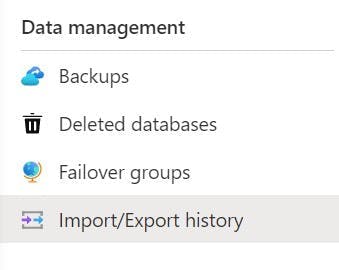
In the left nav, under Data management, select Import/Export history.

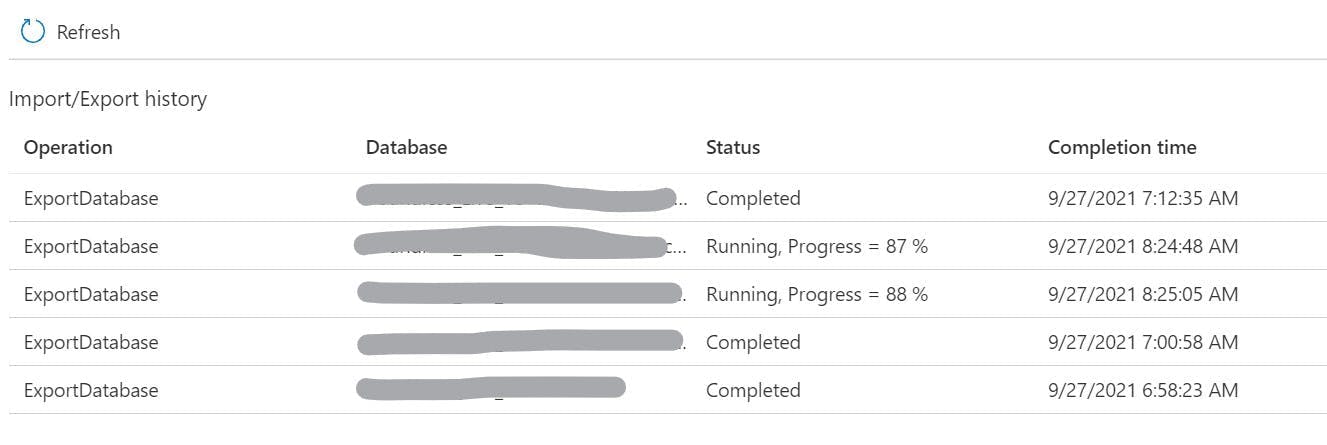
From here you can view the status of each of the exports.

Once they are complete you can download them through blob storage.

Managing SQL Azure Users in the Portal

Managing SQL Azure Users in the Portal

Managing users for a SQL Azure DB is something which I have found is more complex that you would expect. A lot of guides will also tell you it's something which can't be done through the admin portal and needs to be done using scripts in the DB.

This is true to some extent. If you want to set specific role permissions to a DB then you have to do it by assigning roles through SQL scripts. Also if you want to set usernames and passwords at a DB level rather than using Active Directory then this also needs to be done in the DB.

However if you want to give a bunch of active directory users admin access to all the DB's in a server or if you want to give a group of people the same access then this can be done through the azure portal.

Admin Permissions For All

When you create your DB instance an admin user will get created, and for some teams you could just share the password. However sharing passwords isn't that great and there is a better way.

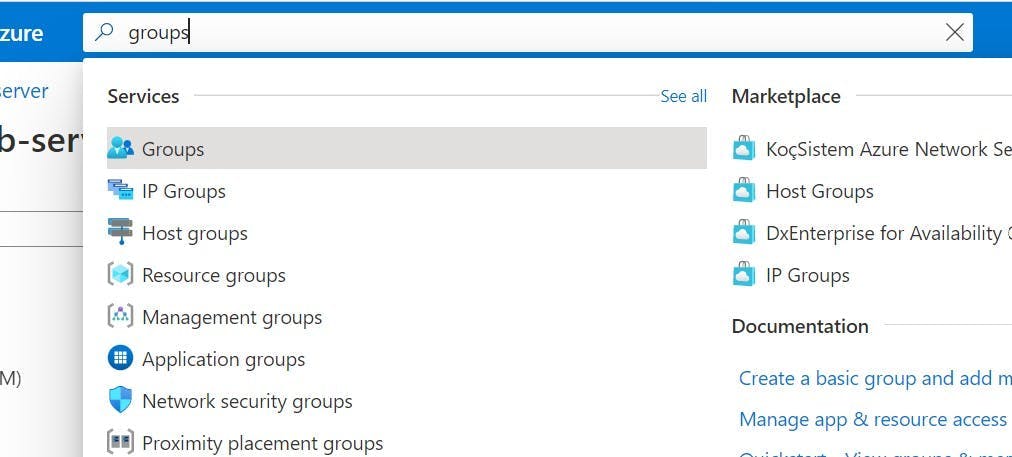
In the Azure Portal search for groups in the big search box at the top.

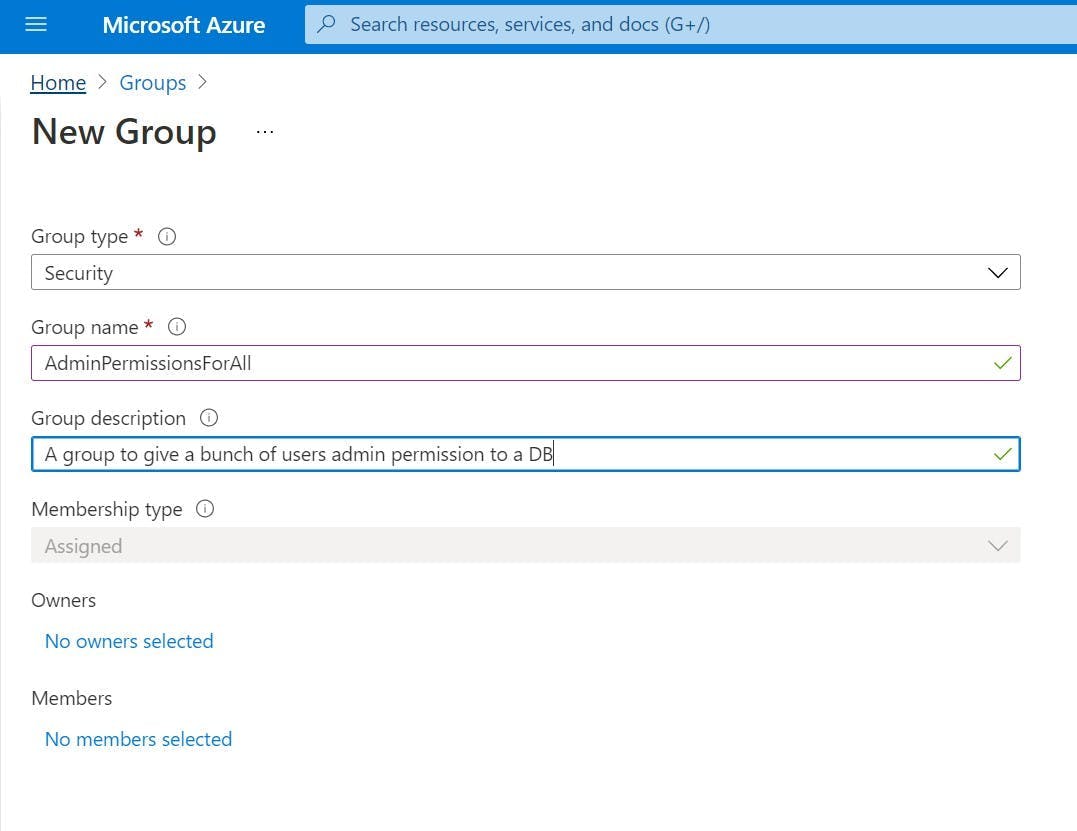
Create a security group with a sensible name, description and add all the members who you want to give admin permission to.

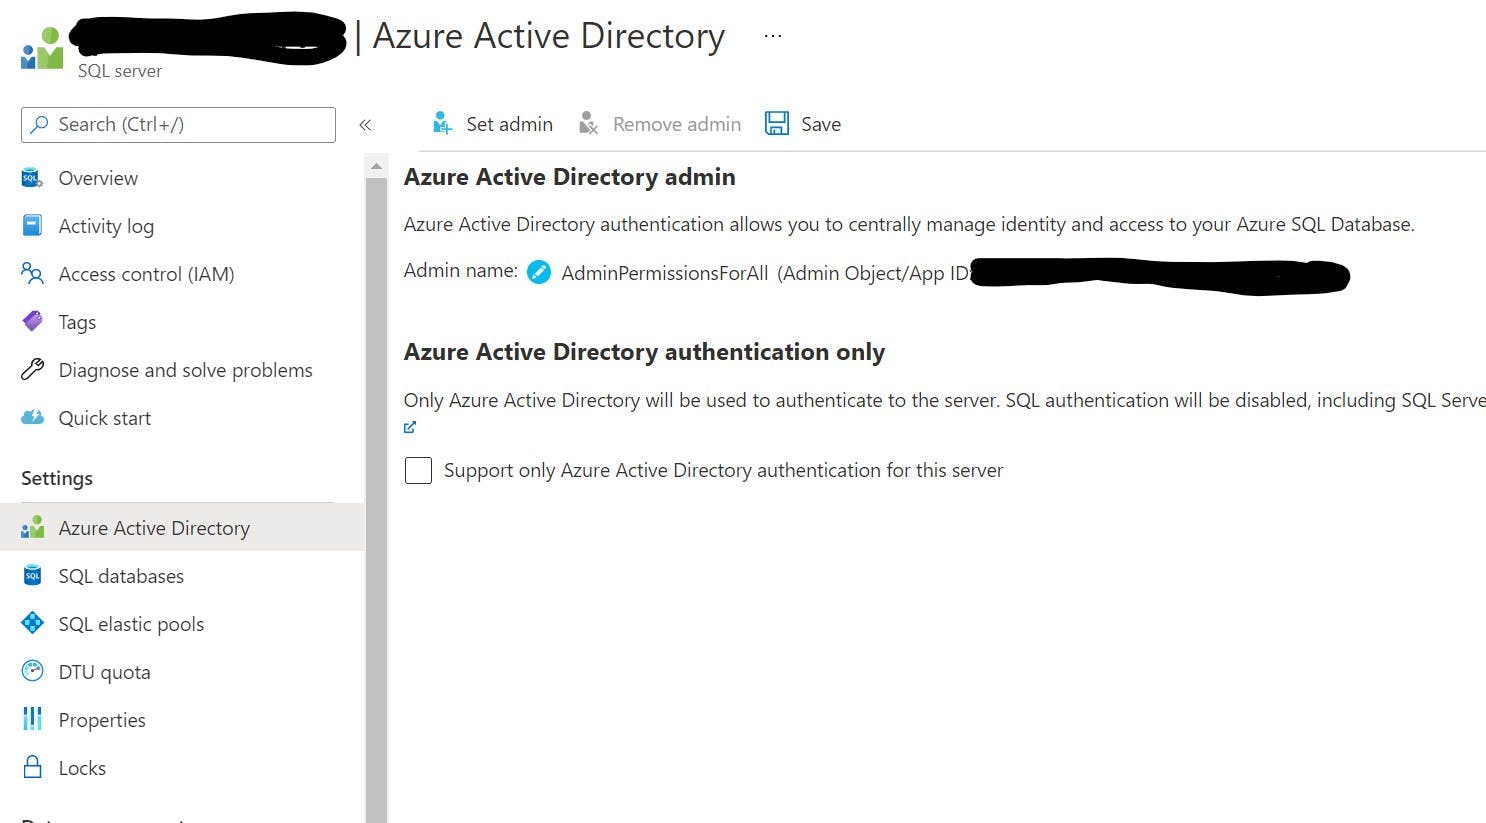
Go to your SQL server resource (this is the parent of the database), and got to the Azure Active Directory setting.

Click the top button to Set Admin, choose your new group and then click save. This will create the user with the correct permissions in the master DB of the server.

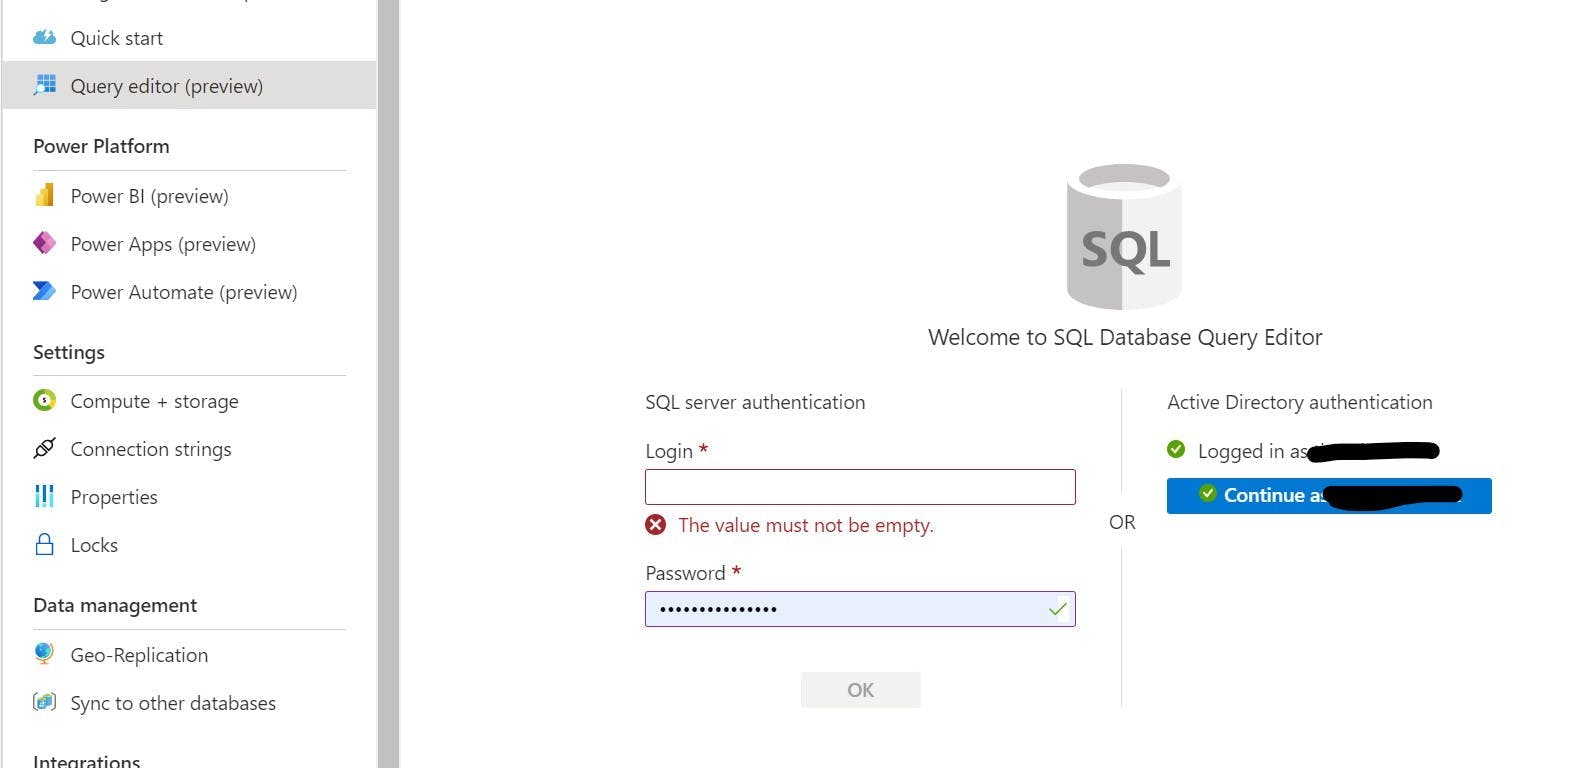
That's it, the members of the group will now be able to access any of the DB's on the server by logging in using Active Directory with Password through SSMS, or through the azure portal using Query Editor.

Query editor will actually give you a nice green tick if you have permission to log in.

To add or remove peoples access to the DB, just add and remove them from the group.

If you can't log in it could be due to a firewall permission for your IP rather than an actual login permission.

Permissions to Specific DBs

Giving everyone admin permission to every DB on the instance might not be what your after. Fine for a dev instance, but probably not something you want for production.

Fortunately the same concept of using groups can make life a lot easier but you will need to do some SQL scripting.

Create your group as above and then make sure your logged in as someone who is an active directory admin for the SQL Server. You can do this with the instructions above or if you want to be the only admin then rather than setting a group to be the admin, just set yourself.

Next log into the DB either using SSMS or Query Editor. Personally I prefer to use Query Editor as I'm doing everything else through the portal.

Our first script is to create an external user in our DB. In our case the external user is the group we want to give permission to rather than a specific user.

1CREATE USER [GROUP NAME]
2FROM EXTERNAL PROVIDER
3WITH DEFAULT_SCHEMA = dbo;

This is called adding a contained user to the DB.

Next we need to give the group some role permissions to do something.

1ALTER ROLE db_datareader ADD MEMBER [GROUP NAME];
2ALTER ROLE db_datawriter ADD MEMBER [GROUP NAME];

Repeat these steps for each DB you want to give the group access too.

The members of your new group should now have permissions to the individual DBs with reader and writer permissions.

If you want to give access to more people, just add them to the group.

Deploying a SQL DB with Azure Pipelines

Deploying a SQL DB with Azure Pipelines

Normally when I work with SQL Azure I handle DB schema changes with Entity Framework migrations. However if you using Azure Functions rather than Web Jobs it seems there's a number of issues with this and I could not find a decent guide which resulted in a working solution.

Migrations isn't the only way to release a DB change though. SQL Server Database projects have existed for a long time and are a perfectly good way of automating a DB change. My preference to use EF Migrations really comes from a place of not wanting to have an EF model and a separate table scheme when they're essentially a duplicate of each other.

Trying to find out how to deploy this through Azure Devops Pipelines however was far harder than I expected (my expectation was about 5 mins). A lot of guides weren't very good and virtually all of them start with Click new pipeline, then select Use the classic editor. WAIT Classic Editor on an article written 3 months ago!?!?! Excuse me while I search for a solution slightly more up to date.

Creating a dacpac file

High level the solution solution is to have a SQL Server Database project, use an Azure Pipeline to compile that to a dacpac file. Then use a release pipeline to deploy that to the SQL Azure DB.

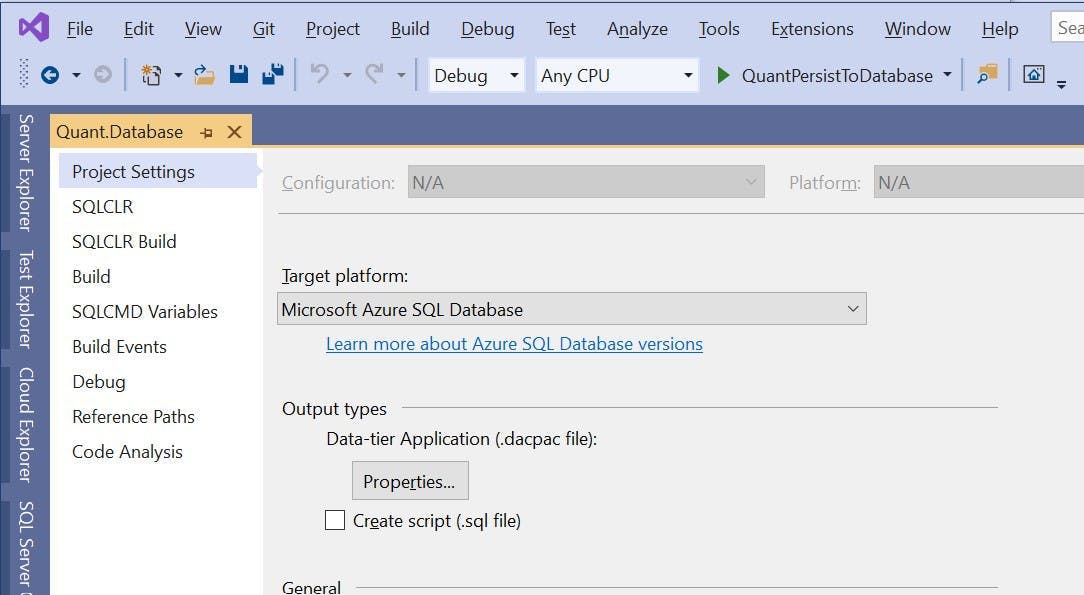
I'm not going to go into any details about how you create a SQL Server Database project, its relatively straightforward, but the one thing to be aware of is the project needs to have a target platform of Microsoft Azure SQL Database otherwise you'll get a compatibility error when you try to deploy.

Building a SQL Server Database project in Azure Devops

To build a dacpac file create a new pipeline in Azure Devops (the yaml kind), select your repo and get yourself a blank configuration file. Also at this point make sure your code is actually in the repo!

The configuration I used looks like this; I've included notes in the code to explain what's going on.

1# The branch you want to trigger a build
2trigger:
3- master
4
5pool:
6 vmImage: "windows-latest"
7
8variables:
9 configuration: release
10 platform: "any cpu"
11 solutionPath: # Add the path to your Visual Studio solution file here
12
13steps:
14 # Doing a Visual Studio build of your solution will trigger the dacpac file to be created
15 # if you have more projects in your solution (which you probably will) you may get an error here
16 # as we haven't restored any nuget packages etc. For just a SQL DB project, this should work
17 - task: VSBuild@1
18 displayName: Build solution
19 inputs:
20 solution: $(solutionPath)
21 platform: $(platform)
22 configuration: $(configuration)
23 clean: true
24
25 # When the dacpac is built it will be in the projects bin/configuation folder
26 # to get into an artifact (probably with some other things you want to publish like an Azure function)
27 # we need to move it somewhere else. This will move it to a folder called drop
28 - task: CopyFiles@2
29 displayName: Copy DACPAC
30 inputs:
31 SourceFolder: "$(Build.SourcesDirectory)/MyProject.Database/bin/$(configuration)"
32 Contents: "*.dacpac"
33 TargetFolder: "$(Build.ArtifactStagingDirectory)/drop"
34
35 # Published the contents of the drop folder into an artifact
36 - task: PublishBuildArtifacts@1
37 displayName: "Publish artifact"
38 inputs:
39 PathtoPublish: "$(Build.ArtifactStagingDirectory)/drop"
40 ArtifactName: # Artifact name goes here
41 publishLocation: container

Releasing to SQL Azure

Once the pipeline has run you should have an artifact coming out of it that contains the dacpac file.

To deploy the dacpac to SQL Azure you need to create a release pipeline. You can do this within the build pipeline, but personally I think builds and releases are different things and should therefore be kept separate. Particularly as releases should be promoted through environments.

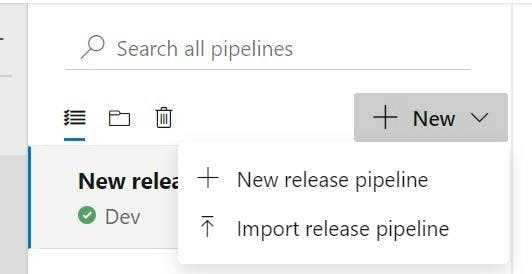
Go to the releases section in Azure Devops and click New and then New release pipeline.

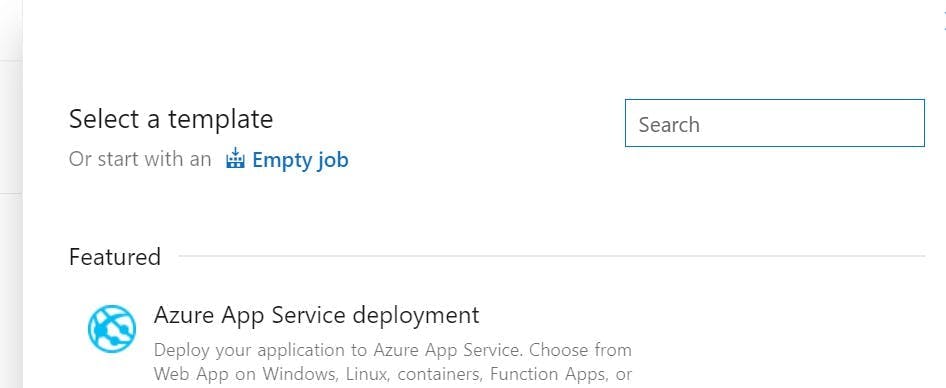
There is no template for this kind of release, so choose Empty job on the next screen that appears.

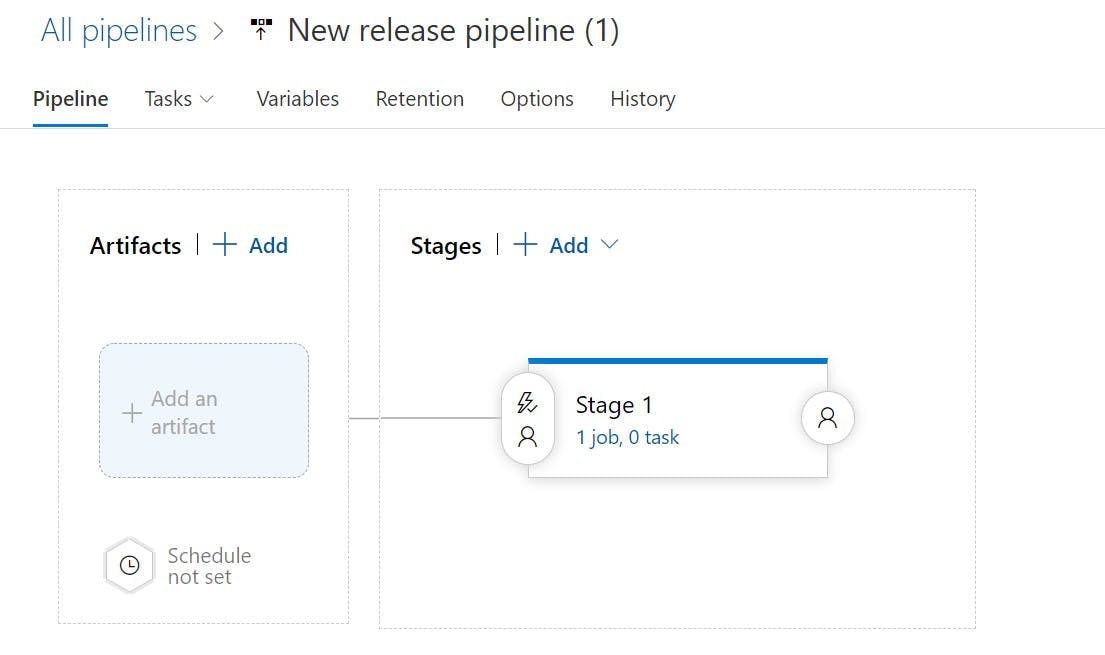
On the left you will be able to select the artifact getting built from your pipeline.

Then from the Tasks drop down select Stage 1. Stages can represent the different environments your build will be deployed to, so you may want to rename this something like Dev or Production.

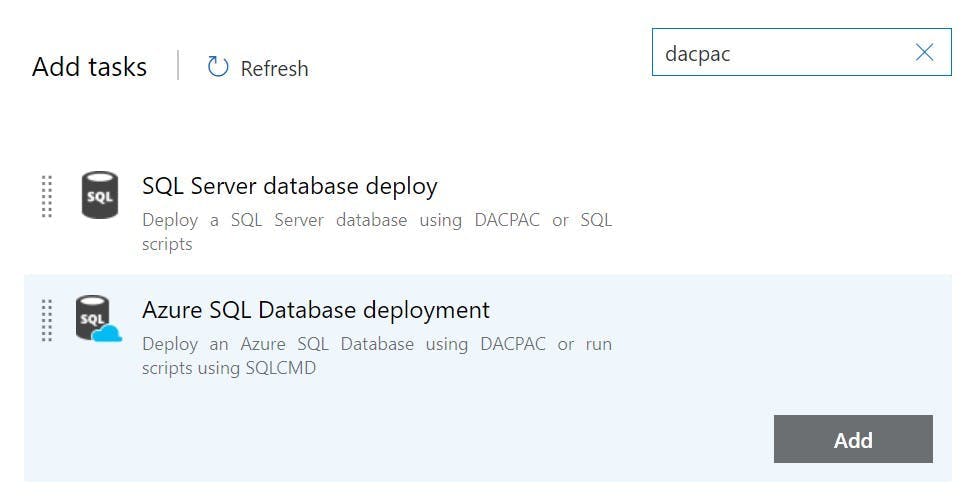
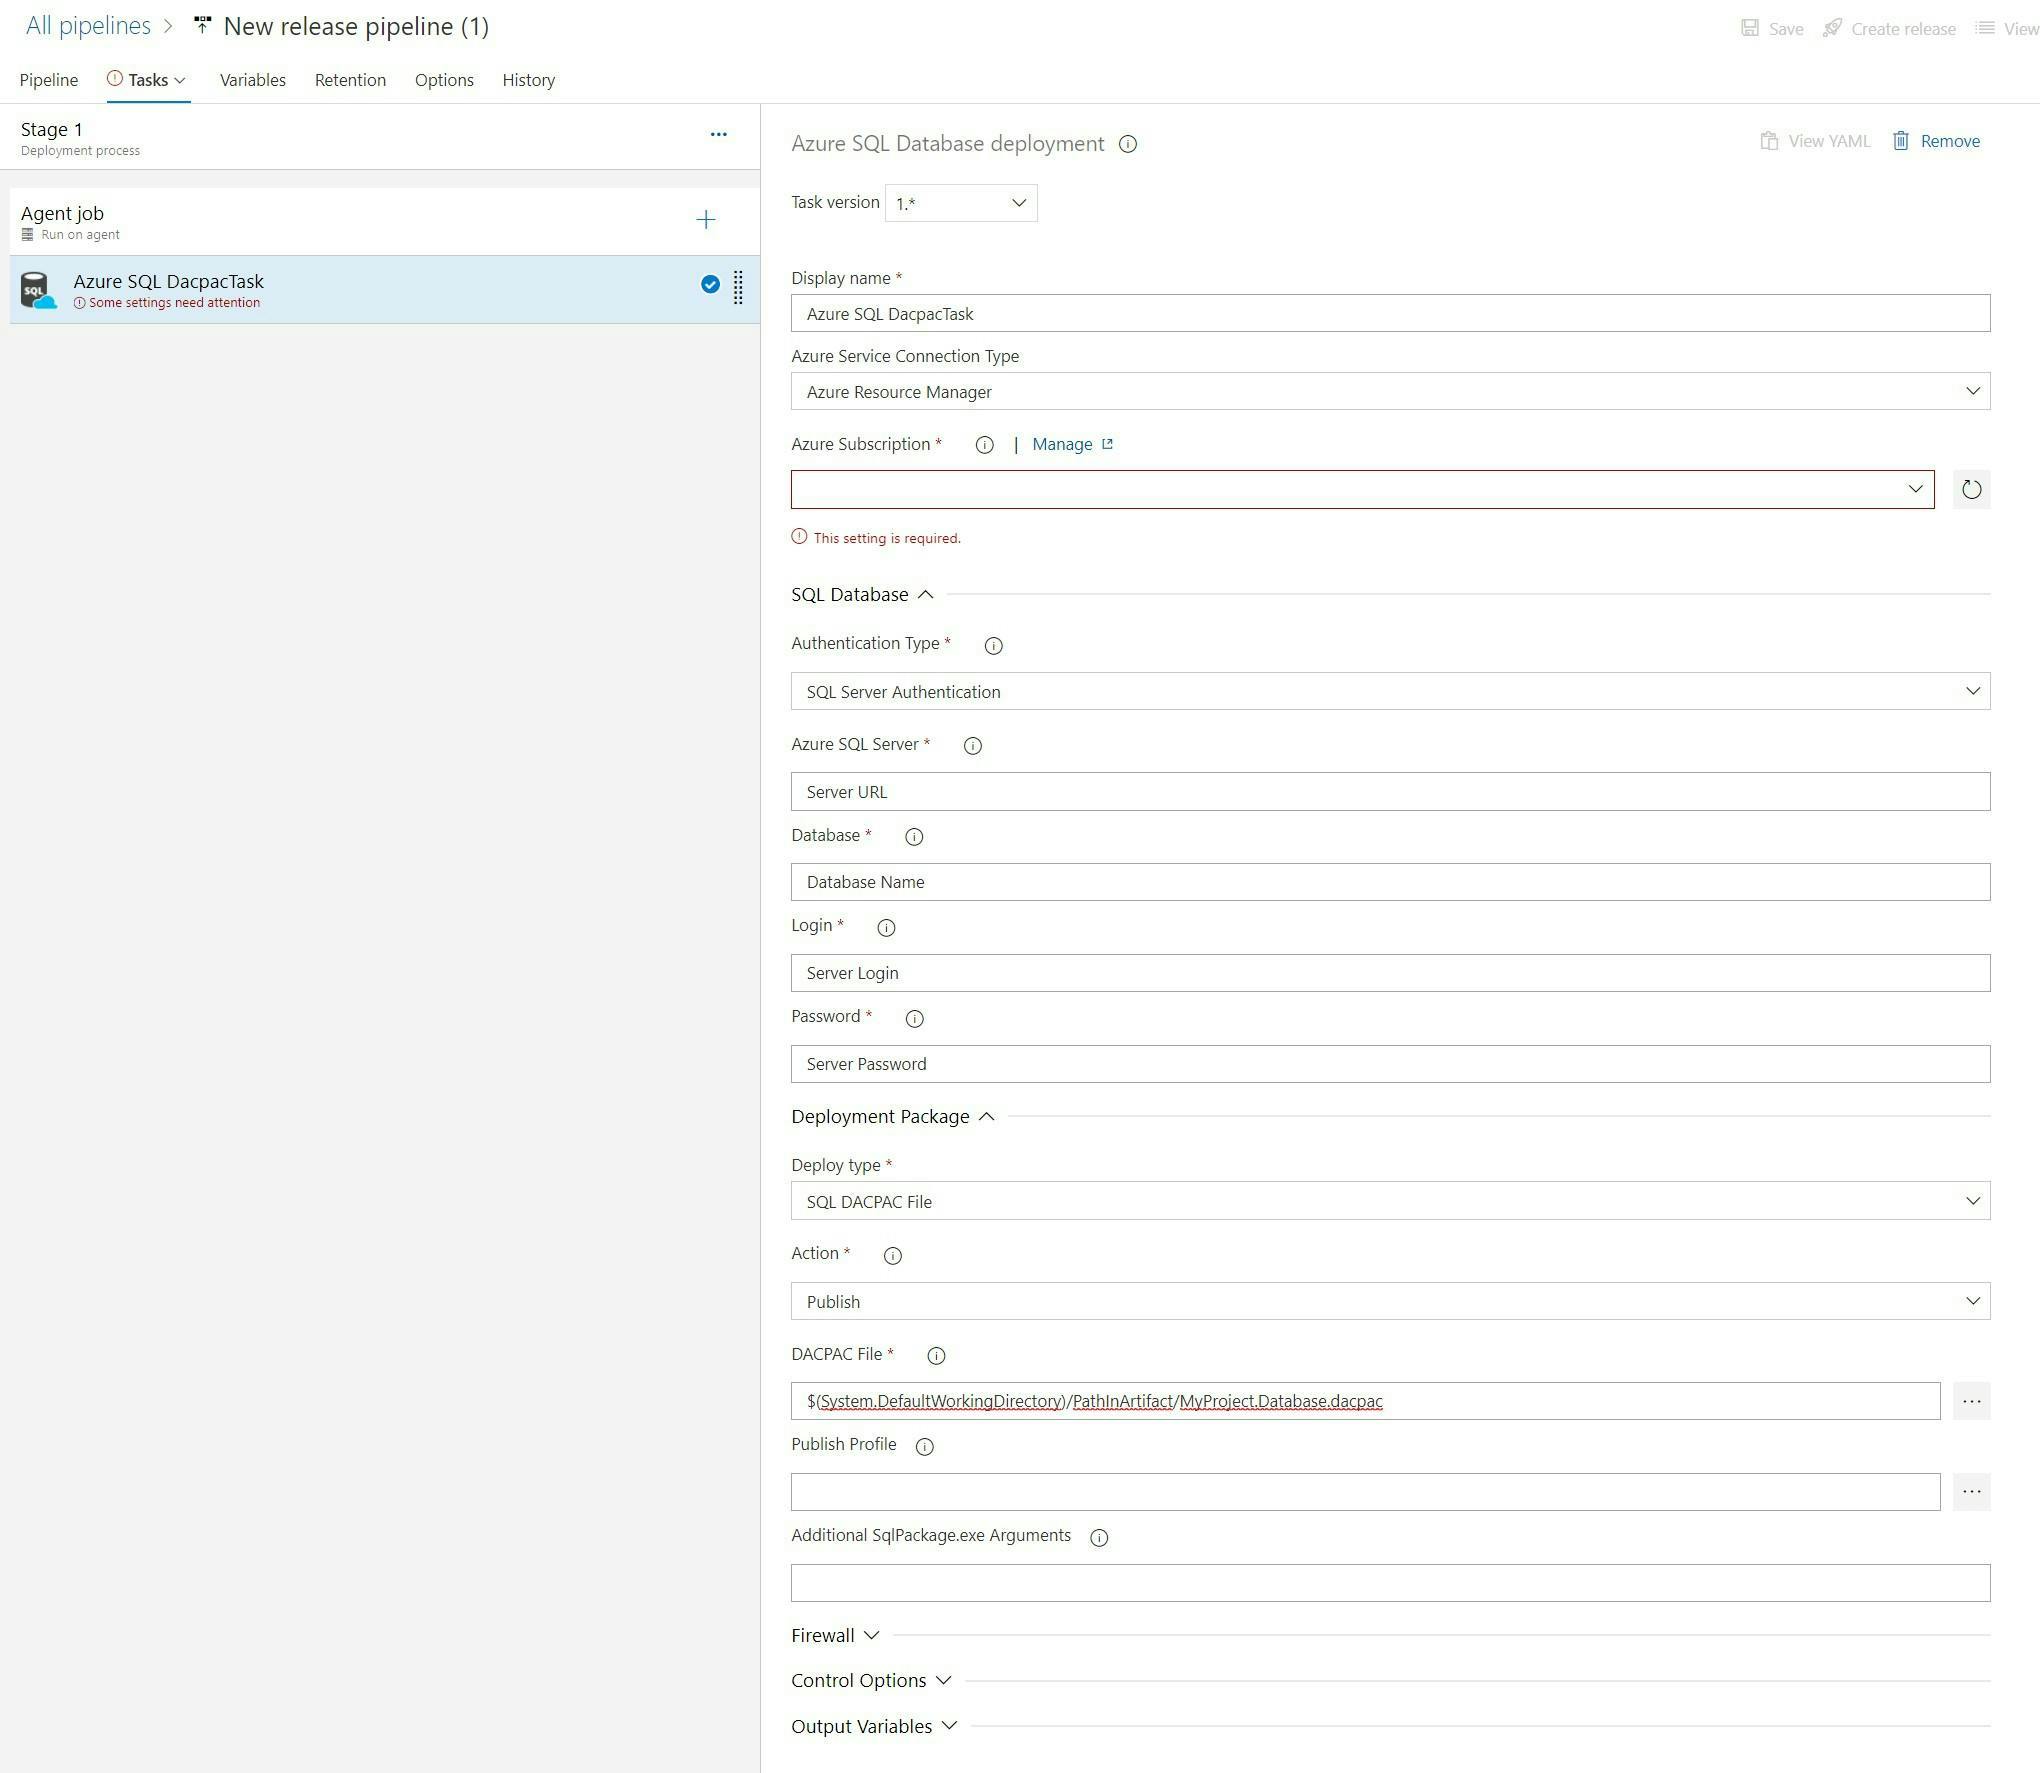
On Agent Job click the plus button to add a task to the agent job. Search for dacpac and click the Add button on Azure SQL Database deployment.

Complete the fields to configure which DB it will be deployed to (as shown in the picture but with your details).

And that's it. You can now run the pipelines and your SQL Project will be deployed to SQL Azure.

Some other tips

On the Azure SQL Database deployment task there is a property called Additional SqlPackage.exe Arguments this can be used to specify things like should loss of data be allows. You can find the list of these at this url https://docs.microsoft.com/en-us/sql/tools/sqlpackage/sqlpackage?view=sql-server-ver15#properties

If you are deploying to multiple environments you will want to use variables for the server details rather than having them on the actual task. This will make it easier to clone the stages and have all connections details configured in one place.

Logging with .net core and Application Insights

Logging with .net core and Application Insights

When you start builing serverless applications like Azure functions or Azure web jobs, one of the first things you will need to contend with is logging.

Traditionally logging was simply achieved by appending rows to a text file that got stored on the same server your application was running on. Tools like log4net made this simpler by bringing some structure to the proces and providing functionality like automatic time stamps, log levels and the ability to configure what logs should actually get written out.

With a serverless application though, writing to the hard disk is a big no no. You have no guarantee how long that server will exist for and when your application moves, that data will be lost. In a world where you might want to scale up and down, having logs split between servers is also hard to retrieve when an error does happen.

.net core

The first bit of good news is that .net core supports a logging API. Here I am configuring it in a web job to output logs to the console and to Application insights. This is part of the host builder config in the program.cs file.

1//3. LOGGING function execution :
2//3 a) for LOCAL - Set up console logging for high-throughput production scenarios.
3hostBuilder.ConfigureLogging((context, b) =>
4{
5 b.AddConsole();
6
7 // If the key exists in appsettings.json, use it to enable Application Insights rather than console logging.
8 //3 b) PROD - When the project runs in Azure, you can't monitor function execution by viewing console output (3 a).
9 // -The recommended monitoring solution is Application Insights. For more information, see Monitor Azure Functions.
10 // -Make sure you have an App Service app and an Application Insights instance to work with.
11 //-Configure the App Service app to use the Application Insights instance and the storage account that you created earlier.
12 //-Set up the project for logging to Application Insights.
13 string instrumentationKey = context.Configuration["APPINSIGHTS_INSTRUMENTATIONKEY"];
14 if (!string.IsNullOrEmpty(instrumentationKey))
15 {
16 b.AddApplicationInsights(o => o.InstrumentationKey = instrumentationKey);
17 }
18});

Microsofts documentation on logging in .NET Core and ASP.NET can be found here.

Creating a log in your code is then as simple as using dependency injection on your classes to inject an instance of ILogger and then using it's functions to create a log.

1public class MyClass
2{
3 private readonly ILogger logger;
4
5 public MyClass(ILogger logger)
6 {
7 this.logger = logger;
8 }
9
10 public void Foo()
11 {
12 try
13 {
14 // Logging information
15 logger.LogInformation("Foo called");
16 }
17 catch (Exception ex)
18 {
19 // Logging an error
20 logger.LogError(ex, "Something went wrong");
21 }
22 }
23}

Application Insights

When your application is running in Azure, Application Insights is where all your logs will live.

What's great about App Insights is it will give you the ability to write queries against all your logs.

So for instance if I wanted to find all the logs for an import function starting, I can write a filter for messages containing "Import function started".

Queries can also be saved or pinned to a dashboard if they are a query you need to run frequently.

For all regular logs your application makes you need to query the traces. What can be confusing with this though is the errors.

With the code above I had a try catch block and in the catch block I called logger.LogError(ex, "Something went wrong"); so in my logs I expect to see the message and as I passed an exception I also expect to see an exception. But if we look at this example from application insights you will see an error in the traces log but no strack trace or anything else from the exception.

This is just the start of the functionality that Application Insights provides, but if your just starting out, hopefully this is a good indication not only of how easy it is to add logging to your application, but also how much added value App Insights can offer over just having text files.