Tag: Continuous Integration
Deploying a SQL DB with Azure Pipelines

Deploying a SQL DB with Azure Pipelines

Normally when I work with SQL Azure I handle DB schema changes with Entity Framework migrations. However if you using Azure Functions rather than Web Jobs it seems there's a number of issues with this and I could not find a decent guide which resulted in a working solution.

Migrations isn't the only way to release a DB change though. SQL Server Database projects have existed for a long time and are a perfectly good way of automating a DB change. My preference to use EF Migrations really comes from a place of not wanting to have an EF model and a separate table scheme when they're essentially a duplicate of each other.

Trying to find out how to deploy this through Azure Devops Pipelines however was far harder than I expected (my expectation was about 5 mins). A lot of guides weren't very good and virtually all of them start with Click new pipeline, then select Use the classic editor. WAIT Classic Editor on an article written 3 months ago!?!?! Excuse me while I search for a solution slightly more up to date.

Creating a dacpac file

High level the solution solution is to have a SQL Server Database project, use an Azure Pipeline to compile that to a dacpac file. Then use a release pipeline to deploy that to the SQL Azure DB.

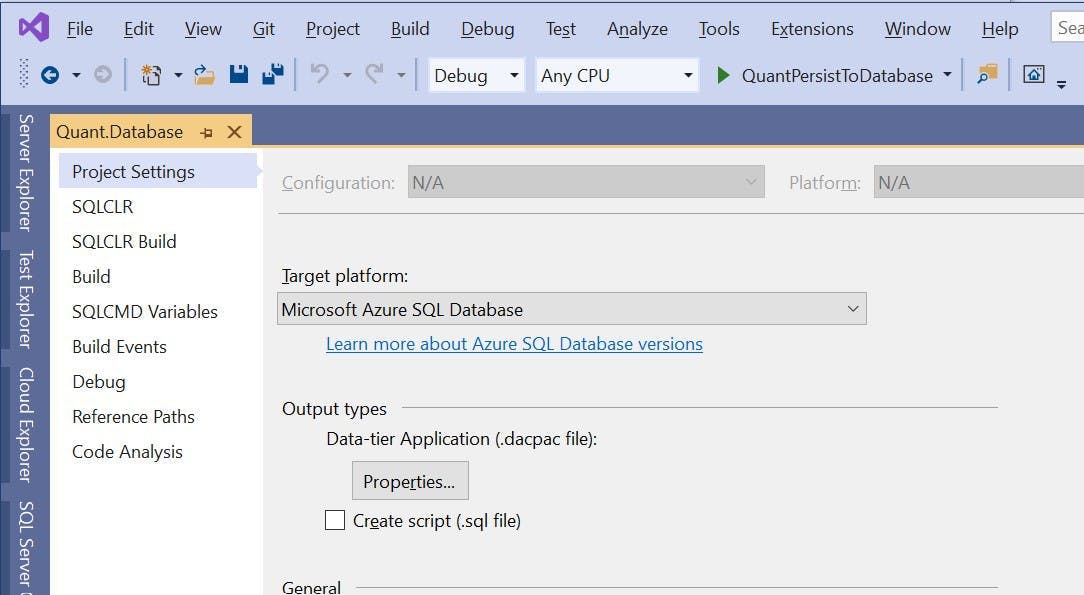
I'm not going to go into any details about how you create a SQL Server Database project, its relatively straightforward, but the one thing to be aware of is the project needs to have a target platform of Microsoft Azure SQL Database otherwise you'll get a compatibility error when you try to deploy.

Building a SQL Server Database project in Azure Devops

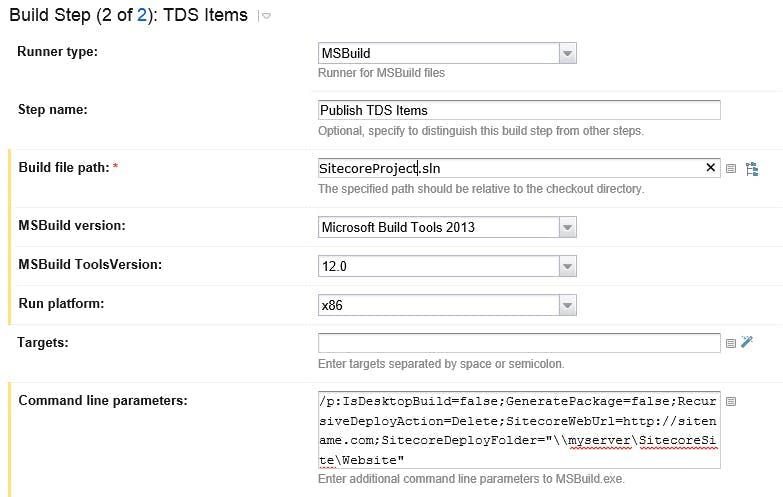
To build a dacpac file create a new pipeline in Azure Devops (the yaml kind), select your repo and get yourself a blank configuration file. Also at this point make sure your code is actually in the repo!

The configuration I used looks like this; I've included notes in the code to explain what's going on.

1# The branch you want to trigger a build
2trigger:
3- master
4
5pool:
6 vmImage: "windows-latest"
7
8variables:
9 configuration: release
10 platform: "any cpu"
11 solutionPath: # Add the path to your Visual Studio solution file here
12
13steps:
14 # Doing a Visual Studio build of your solution will trigger the dacpac file to be created
15 # if you have more projects in your solution (which you probably will) you may get an error here
16 # as we haven't restored any nuget packages etc. For just a SQL DB project, this should work
17 - task: VSBuild@1
18 displayName: Build solution
19 inputs:
20 solution: $(solutionPath)
21 platform: $(platform)
22 configuration: $(configuration)
23 clean: true
24
25 # When the dacpac is built it will be in the projects bin/configuation folder
26 # to get into an artifact (probably with some other things you want to publish like an Azure function)
27 # we need to move it somewhere else. This will move it to a folder called drop
28 - task: CopyFiles@2
29 displayName: Copy DACPAC
30 inputs:
31 SourceFolder: "$(Build.SourcesDirectory)/MyProject.Database/bin/$(configuration)"
32 Contents: "*.dacpac"
33 TargetFolder: "$(Build.ArtifactStagingDirectory)/drop"
34
35 # Published the contents of the drop folder into an artifact
36 - task: PublishBuildArtifacts@1
37 displayName: "Publish artifact"
38 inputs:
39 PathtoPublish: "$(Build.ArtifactStagingDirectory)/drop"
40 ArtifactName: # Artifact name goes here
41 publishLocation: container

Releasing to SQL Azure

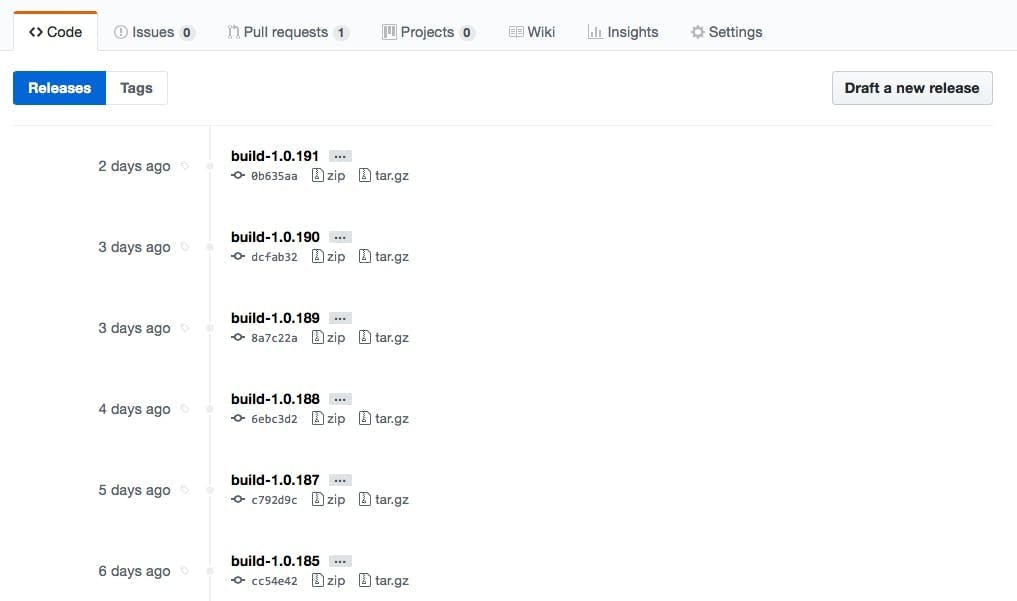
Once the pipeline has run you should have an artifact coming out of it that contains the dacpac file.

To deploy the dacpac to SQL Azure you need to create a release pipeline. You can do this within the build pipeline, but personally I think builds and releases are different things and should therefore be kept separate. Particularly as releases should be promoted through environments.

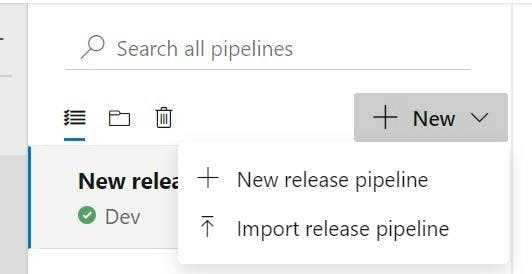
Go to the releases section in Azure Devops and click New and then New release pipeline.

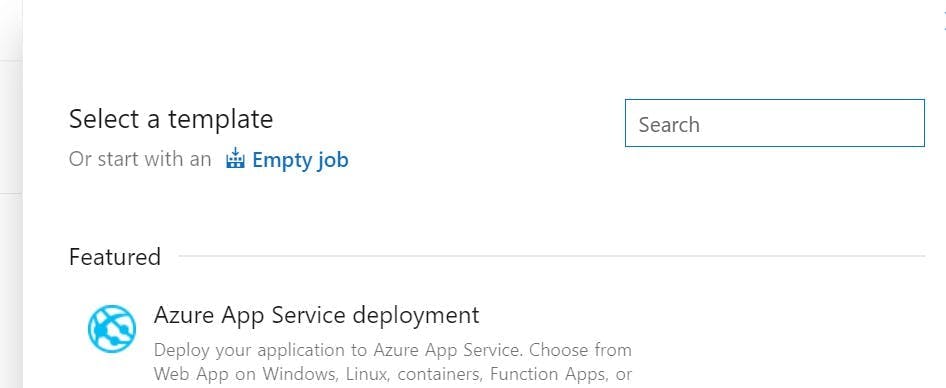
There is no template for this kind of release, so choose Empty job on the next screen that appears.

On the left you will be able to select the artifact getting built from your pipeline.

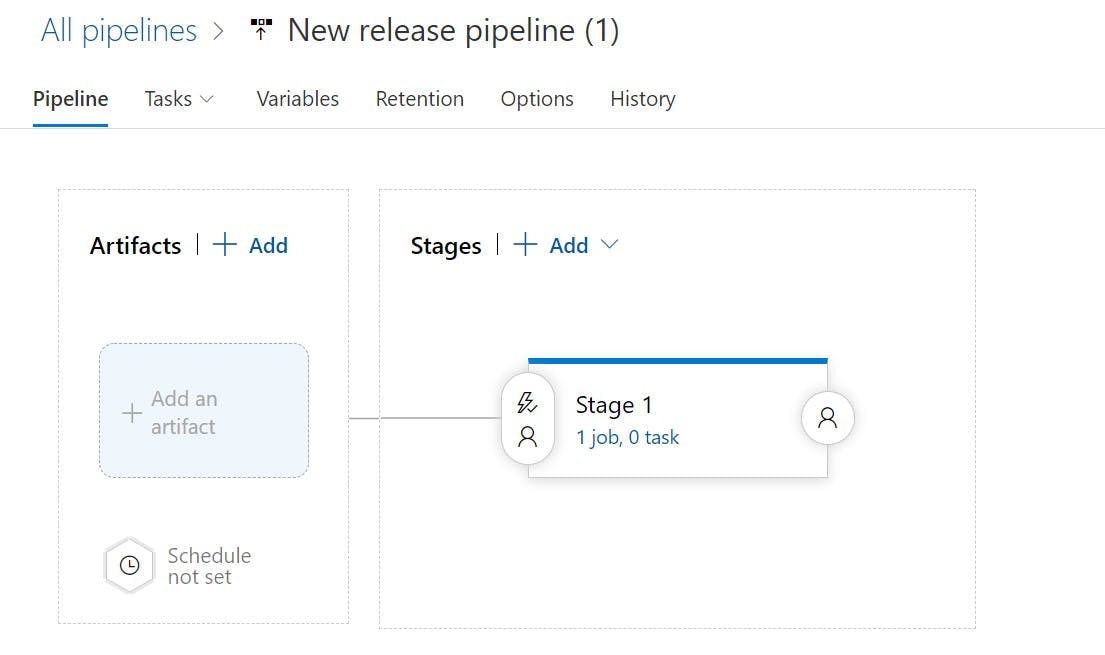
Then from the Tasks drop down select Stage 1. Stages can represent the different environments your build will be deployed to, so you may want to rename this something like Dev or Production.

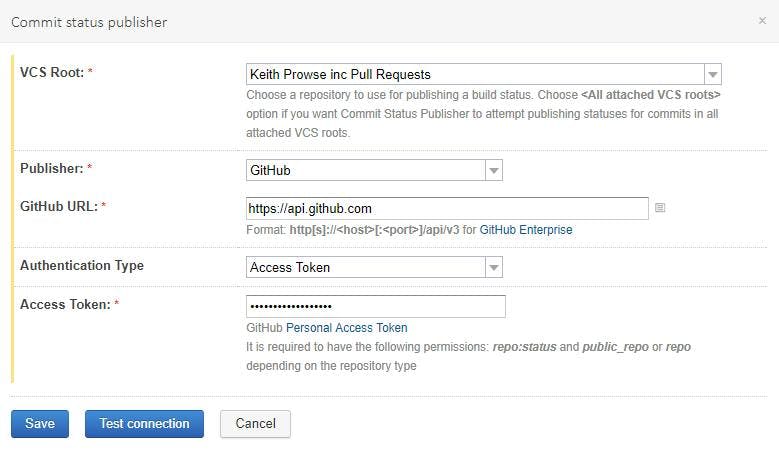
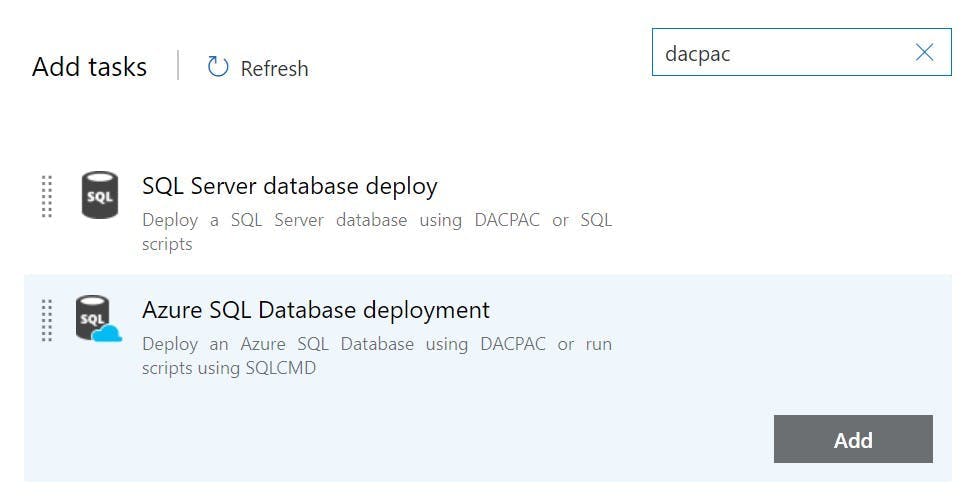
On Agent Job click the plus button to add a task to the agent job. Search for dacpac and click the Add button on Azure SQL Database deployment.

Complete the fields to configure which DB it will be deployed to (as shown in the picture but with your details).

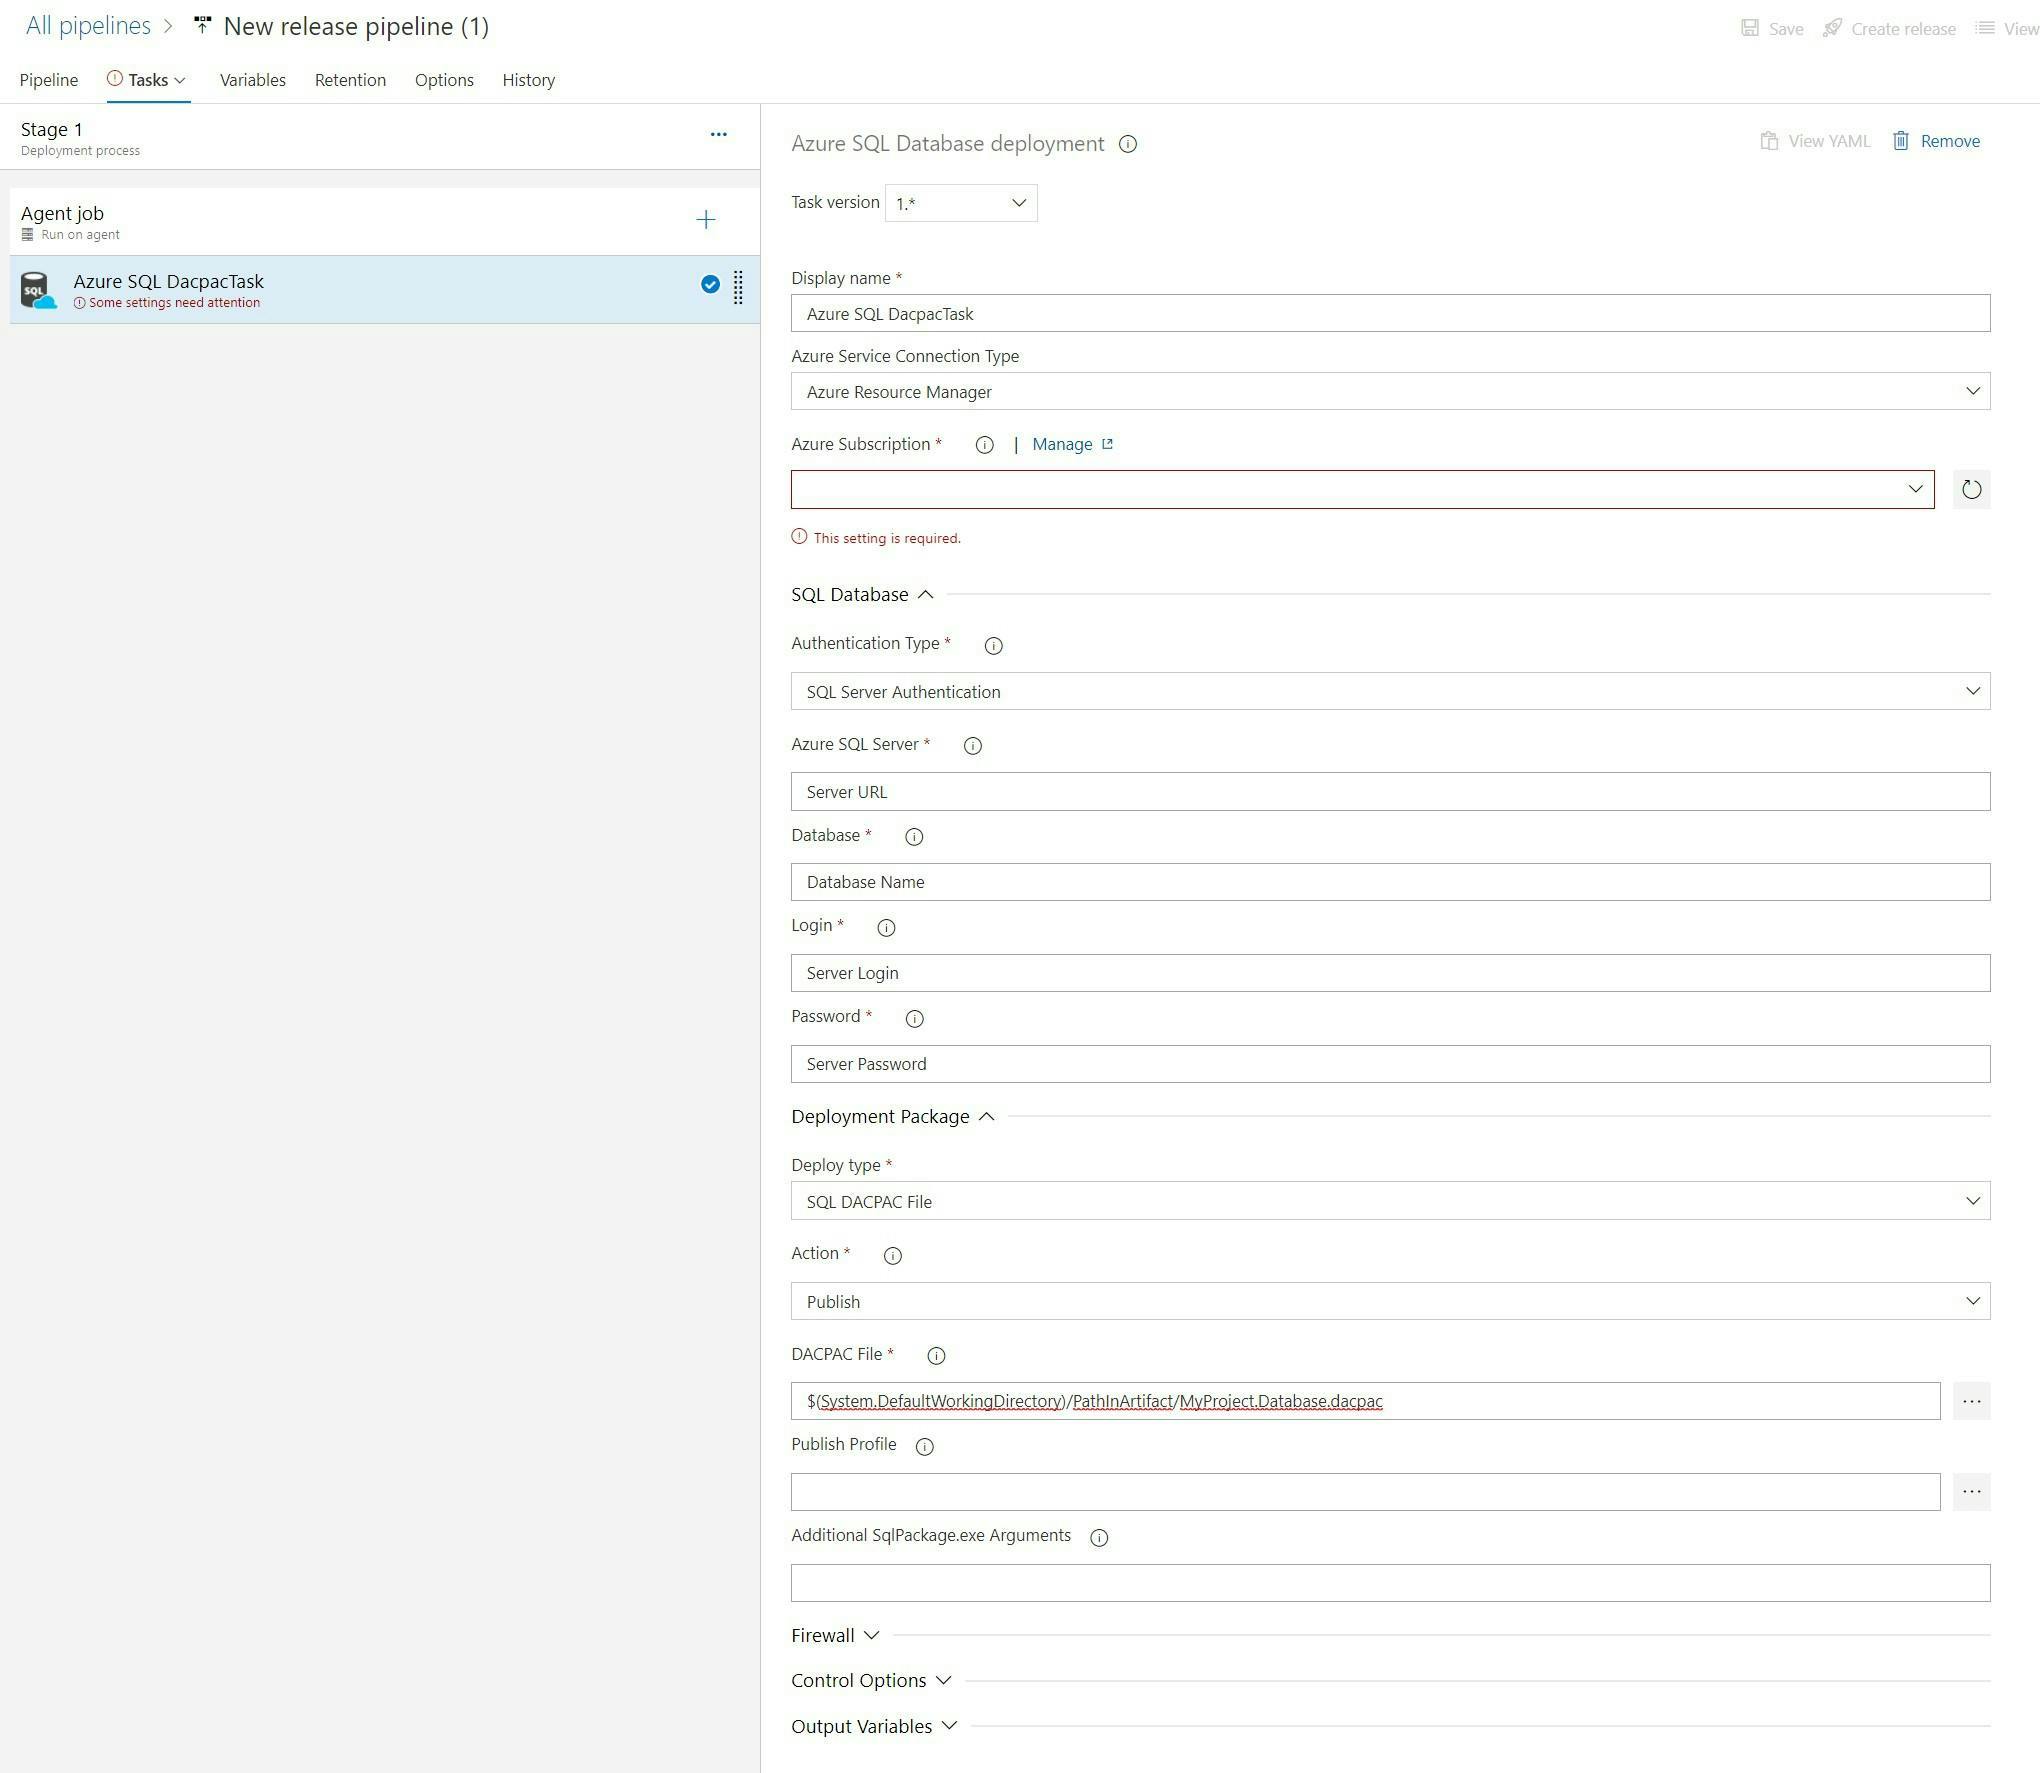
And that's it. You can now run the pipelines and your SQL Project will be deployed to SQL Azure.

Some other tips

On the Azure SQL Database deployment task there is a property called Additional SqlPackage.exe Arguments this can be used to specify things like should loss of data be allows. You can find the list of these at this url https://docs.microsoft.com/en-us/sql/tools/sqlpackage/sqlpackage?view=sql-server-ver15#properties

If you are deploying to multiple environments you will want to use variables for the server details rather than having them on the actual task. This will make it easier to clone the stages and have all connections details configured in one place.

What are automated deployments and why do I need them?

What are automated deployments and why do I need them?

When your working on a new website build as either the marketer responsible for the site or the project manager overseeing it’s build, some of the most frustrating tasks to be using up your budget can originate from the IT team and come under the category of setup.

They can suck days even weeks from a project but offer no visible features or benefit to the end user, worse still they often need to come at the start of a project which for people wanting to see a design turn into a webpage just feels like a delay and lack of progress.

Manual Deployments

So, what are automated deployments and why are they worth it? Well first let’s examine what a deployment is to begin with.

When a change or new feature is ready to be built for a site, it will have been turned into a specification and handed over to a development team to build. The developers will then write some code and test it on their local machines, they may even demo it to someone else. At some point though, that work needs to get from their machine to the server(s) it runs on so that other people like QA can see it without using the devs machine. Typically, there will be 3 server environments set up for a website:

  1. Dev / Test – An environment used by the developers and QA to build, test and refactor new features and fixes.
  2. UAT / Staging – An environment used by the website owners / stakeholders that the features have been deployed to for review and approval before they are deployed into production.
  3. Production – The live website that is accessible over the internet.

In a manual deployment setup, the developer is responsible for copying the website into each of the environments. This will generally involve:

  1. Getting the version of code to be deployed from source control.
  2. Publishing a build of the site locally (some languages need to be compiled into machine code, and most modern websites will run a task on the CSS and JavaScript to obfuscate and reduce the file size).
  3. Login to databases and run any scripts to update the database.
  4. Login to the web servers using something like a remote desktop client.
  5. Copy and Paste the new files onto the server.
  6. Make some sort of record that the deployment has been done and what it included.

As you can probably guess each of these steps is prone to human error; What if the developer gets the wrong version from source control? What if they overwrite the wrong folder? What if they miss the database changes? What if they don’t record the deployment, how can we be sure what version is on an environment?

Not only that but it’s also a lengthy task for someone to do. Some parts are just waiting for a code publish to complete or a file copy to finish. For the odd production deploy with a decent checklist this might not be so bad, but for iterating work into QA this can not only make QA fails for minor things really costly to fix, but also result in bundling more and more changes together to cut down the number of releases which then reduces the flow of work feeding into QA and slows the pace at which features can be developed and released.

A Better Way

Now we understand the issues, we certainly don’t want that as a cost throughout the lifetime of our site, so how do we avoid it?

Well, automated deployments quite simply take all these manual steps, automated them with a few bonuses on top. By doing this we remove all the elements of human error and are left with consistent results each time.

There’s two parts to an automated pipeline, the first is build and the second is release.

The build part relates to the first 2 steps of our manual process. We need to get the code from source control and then publish it. Once we’ve done this, we are left with a build that we can assign a release number to. By automating it we’ve also ensured that the build happens the same way each time rather than any differences between developers’ machines being. At this point we can also start detecting build failures and include some automated testing to pick up on errors before even involving QA.

The release part relates to the remaining steps of the manual process. First of all the process of copying files and running scripts now becomes one large script that won’t miss a step and in addition to that, now we have build numbers we can see which build is on each environment and only promote the one we want to the next environment. Because we’re promoting builds rather than doing the whole build process again, we’re also ensuring that the build going to production is the exact same thing that was tested on QA and then reviewed on UAT. With some clever integrations with things like GitHub and Jira we can also automated release notes to say what was included in each of the releases.

Degrees of Automation

It worth noting at this point that there are different degrees of automation and this will greatly affect the cost of setup.

As well as automating the deploy of code, we could also automate the entire server setup through the use or ARM templates in Azure. Different levels of automated testing can be implemented from very low code coverage to very high; a test could even be what the level of code coverage is.

Automation could also extend to include load balancers for green / blue deployments where zero downtime of the site is achieved by using multiple production servers and switching between them while files are being copied.

Is this the CI and CD thing I’ve heard about?

Two terms I deliberately haven’t used in this article is Continuous Integration (CI) and Continuous Delivery (CD) and that’s because although automated deployments forms part of achieving them they are not the same thing and it’s worth knowing how they differ.

Continuous Integration related to the build part of the automated setup and aims to deal with issues arising from multiple developers working on a project. When more than one developer works on a copy of a website locally, both sets are changing in different way to what is contained within source control. The longer this goes on for the bigger the differences get and the harder it will become to merge again. Continuous Integration advocates shortening the gaps between merges to as shorter time as possible, potentially multiple time per day. By having automated tools in place to run a build whenever this happens, issues can be identified as early as possible.

Continuous Delivery relates more to the release aspect of the automated setup and is an aim to be constantly delivering / deploying updates to a solution as fast as possible. By doing this, deployments become trivial and smaller updates are delivered at a much faster pace rather that being queued for one big release. Automation helps make this a reality by removing many of the manual time consuming tasks that are repetitive.

Equivalent of the Octopus Package Library for Azure Devops

Equivalent of the Octopus Package Library for Azure Devops

I’ve been using Team City and Octopus deploy in our CI setups for several years, but over the last 6 months have slowly been moving over to use Azure Devops. This is mostly to move away from needing to keep an application like Team City updated by switching to a SAAS service. Octopus is available as a SAAS service, but as Azure Devops is also capable of doing releases I opted to start with that rather than using Octopus again.

One of my first challenges was how you replace Octopus’s package library. The solutions I’m working on (which are generally Sitecore based), consist of the application we write and store in Source Control, and all the other pre-built parts of Sitecore which we don’t store in source control.

With Octopus deploy we would add these static parts to the Octopus package library and then release a combination of them and our application to a server, wiping what is there before we do. That then gives us the exact same deploy on every target.

With Azure Devops however, things are a bit different.

Azure Artifacts

The closest equivalent of the package library is Azure Artifacts. Rather than a primary purpose being to upload packages to be included in a deploy. The goal of Artifacts is more inline with the output of a pipeline being saved to an Artifact which can then be a package feed for things like NuGet or npm.

Unfortunately, there is also no UI to directly upload a NuGet package to an Artifact feed like there is with Octopus’s package library. However, it is possible to upload a pre-built NuGet package another way using NuGet.exe itself.

Manually uploading a NuGet package to Azure Artifacts

To start you need to create a feed for your package to uploaded to.

Login to Azure DevOps and got to Artifacts. Click Create feed and give it a name.

Click connect to feed and select NuGet.exe. You will see under the heading project setup a nuget.config file to add to your solution.

Create an empty solution in Visual Studio and add a nuget.config file to the root folder using the source from the website. It will look something like this;

1<?xml version="1.0" encoding="utf-8"?>
2<configuration>
3 <packageSources>
4 <clear />
5 <add key="MyFeed" value="https://pkgs.dev.azure.com/.../_packaging/MyFeed/nuget/v3/index.json" />
6 </packageSources>
7</configuration>

Copy the NuGet package you would like you publish into the root folder as well. I’m using a package we have created for a tool called Feydra. My folder now looks like this.

Before we can publish into our NuGet feed we need to setup a personal access token. This is done from within Azure Devops.

In the top right corner click the person icon and then select profile. On the profile screen you will see a section called Personal access tokens under Security.

From here click New Token and give it the Read, write & manage permission for Packaging.

You will be given a token which you should save a copy of.

Now we are ready to publish are NuGet package to the Artifact feed.

Open a command prompt at the folder containing your solution file and run the following commands

1nuget push -Source <SourceName> -ApiKey az <PackagePath>

For me this is as follows:

1nuget push -Source MyFeed -ApiKey az .\Feydra.Custom.1.0.0.30.nupkg

You will then be prompted for a username and password which you should use the personal access token for both.

Refresh the feed on the website and you should see you package added to it, ready to be included in a release pipeline.

Using Sitecore TDS with Azure Pipelines

Using Sitecore TDS with Azure Pipelines

Sitecore TDS allows developers to serialize Sitecore items into a file format which enables them to be stored in source control. These items can then be turned into a Sitecore update package to be deployed into a Sitecore solution.

With tools like Team City it was possible to install the TDS application on the server, and MSBuild would pick it up in the same way that Visual Studio would when you create a build locally. However, with build tools like Azure Piplelines that are a SAAS service you do not have any access to install components on a server.

If your solution contains a TDS project and you run an Azure Pipeline, you will probably see this error saying that the target 'Build' does not exist in the project.

Fortunately, TDS can be added to a project as a NuGet package. The documentation I found on Hedgehogs site for TDS says the package is unlisted on NuGet.org but can be installed in the normal way if you know what it's called. When I tried this is didn't work, but the NuGet package is also available in the TDS download so we can do it a different way.

Firstly download TDS from Hedgehogs website. https://www.teamdevelopmentforsitecore.com/Download/TDS-Classic

Next create a folder in the root of your drive called LocalNuGet and copy the nuget package from the download into this folder.

Within Visual Studio go to Tools > NuGet Package Manager > Package Manager Settings, and in the window that opens select Package Sources on the left.

Add a new package source and set it to your LocalNuGet folder.

From the package manager screen select your local nuget server as the package source and then add the TDS package to the relevant projects.

When you commit to source control make sure you add the hedgehog package in your projects packages folder. Normally this will be excluded as your build will try and restore the NuGet packages from a NuGet feed rather than containing them in the repo.

If you run your Azure Pipleine now you should get the following error:

This is a great first step as we can now see TDS is being used and we're getting an error from it.

If you're not getting this, then open the csproj file for your solution and check that there are no references to c:\program files (x86)\Hedgehog Development\ you should have something like this:

1<Target Name="EnsureNuGetPackageBuildImports" BeforeTargets="PrepareForBuild">
2 <PropertyGroup>
3 <ErrorText>This project references NuGet package(s) that are missing on this computer. Use NuGet Package Restore to download them. For more information, see http://go.microsoft.com/fwlink/?LinkID=322105. The missing file is {0}.</ErrorText>
4 </PropertyGroup>
5 <Error Condition="!Exists('..\packages\HedgehogDevelopment.TDS.6.0.0.10\build\HedgehogDevelopment.TDS.targets')" Text="$([System.String]::Format('$(ErrorText)', '..\packages\HedgehogDevelopment.TDS.6.0.0.10\build\HedgehogDevelopment.TDS.targets'))" />
6 </Target>
7 <Import Project="..\packages\HedgehogDevelopment.TDS.6.0.0.10\build\HedgehogDevelopment.TDS.targets" Condition="Exists('..\packages\HedgehogDevelopment.TDS.6.0.0.10\build\HedgehogDevelopment.TDS.targets')" />

To fix the product key error we need to add our license details.

Edit your pipeline and then click on the variables button in the top right. Add two new variables:

  • TDS_Key - Which should be set to your license key
  • TDS_Owner - Which should be set to the company name the key is linked to

Now run your pipleline again and the build should succeed

Moving the Media Cache folder in Sitecore

Moving the Media Cache folder in Sitecore

One of the cache’s that Sitecore has is the Media Cache. Whenever you use an image from Sitecore’s media library, Sitecore will retrieve the image from the database, scale it to the size you requested and then store it to disk in the media cache folder. On any subsequent request the image will now be retrieved from the media cache rather than the database.

By default each content management and content delivery server will locate the media cache in /App_Data/MediaCache

This is a relatively logical place to store a cache for images that wont cause you many issues. However, if you have automated deployments setup then you are likely wiping the whole of your website folder each time you do a deploy to ensure that your deploy remains the same on all environments. As the App_Data folder is in the website, your Media Cache will be deleted too.

Depending on your site then deleting the media cache potentially isn’t much of an issue. After all it’s a cache so all that will happen is the images will get cached the next time they are requested. But depending how many images get retrieved at the same time this could slow down performance, particularly if your content editors decided to put every image they ever uploaded into the same folder. Opening the that folder in the admin will create a nice amount of load on your server, particularly if you also have some extra image optimization logic installed.

Like most things in Sitecore though, you can change the location through a config setting.

In Sitecore.config you will find a property called Media.CacheFolder. Change this to somewhere outside of your website folder and Sitecore will now start storing the Media Cache in this location and it will be safe your all your deploys.

1<!-- MEDIA - CACHE FOLDER
2 The folder under which media files are cached by the system.
3 Default value: /App_Data/MediaCache
4 -->
5 <setting name="Media.CacheFolder" value="/App_Data/MediaCache"/>
Adding Build Statuses to Pull Requests with TeamCity and GitHub

Adding Build Statuses to Pull Requests with TeamCity and GitHub

I'm always looking for ways to improve our build server setup and improve our overall efficiency. So a recent change I've made is to get Team City to start building pull requests and pushing the resulting status back to GitHub.

This improves our dev flow by eliminating the need to do any testing on a pull request if we can already see it will fail a build. Previously someone doing a code review would only find out once they've checked out the change and built it locally, or even worse after approving the request and then breaking the build.

What's particularly good with this setup, is it's testing the resulting merge rather than just the branch being merged in.

Team City Setup

As this is covering a different scenario to our normal build processes which are focused on preparing a build version to be deployed, I set this up as a second build configuration on our projects.

Version Control Settings Root (VCS Root)

The VCS Root needs to be configured to fetch each pull request that is creating in GitHub. To do this, you will need to add a Branch specification which will tell Team City to monitor additional branches rather than just the default branch specified.

I'm using the branch specification +:refs/pull/(*/merge) .

This syntax is telling Team City to monitor references to pull for pull request, the * refers to any pull request, and the merge indicates that we only want to resulting merge of the pull request.

When you create a pull request in GitHub, this merge reference is automatically created for what the resulting merge would look like.

In the projects list, builds will now get labels indicating what they were for:

Build Steps

I created my build configurations by duplicating the existing ones we have that take care of creating builds to be passed onto Octopus Deploy for release. If you do this, it's important to remember to disable all the steps you no longer need.

The less steps you have the quicker your build will run and the quicker the pull request will be updated with a status. Ideally you want the process to finish before someone starts doing a code review! Steps like running Inspections may prove counter productive if the builds are never finished on time.

Triggers

Having a build running automatically for your releases can be a drain on server resources, particularly if you never have any intention of actually doing a deploy for most of them. For this reason our builds are set to manual.

However for statuses to be of any use, they're going to need to be running automatically so that the status is ready for the code reviewer, so we need to add a VCS Trigger.

Build Features

To get Team City to start posting status updates back to GitHub we need to add a build feature. If your on a version of TeamCity prior between 7.1 and 10 then there is a plugin you can grab here https://github.com/jonnyzzz/TeamCity.GitHub. If your on a newer version of TeamCity. i.e. 10+ then the build feature is now built in and is called Commit status publisher. The built in version also has support for Bitbucket, Gerrit, GitLab, JetBrains Upsource and Visual Studio Team Services.

Add the build feature and fill in the config settings.

And that's it. Your pull requests will now automatically build and have the status sent back to GitHub.

Not only will you be able to see this status in GitHub, you'll also be able to click a details link to see the build. Useful in the event that it's failed and you want to see why.

The importance of build numbers

The importance of build numbers

If I were to make a prediction, I would say that build numbers are something that are rarely treated as being important in the agency world of web development. That's not to say milestone releases aren't given names like "Phase 2", "August Release" or a major feature name, but every build / release of a project in between, I'd sense largely have build numbers either ignored or never created.

It's also easy to see why, after all it's not like we're producing software that's going out to the masses to be installed. The solution is essentially just ending up having 1 install on a set of servers. When a new version is built, that replaces everything that came before it and if a bug is found we generally roll forward and fix the bug rather than ever reverting back.

Why use build numbers?

So when we're constantly coding and improving applications in an agile world why should we care about and use build numbers?

To put it quite simply its just an easy way to identify a snapshot of code that could have actually have been built and then released to a server. This becomes hugely useful in scenarios such as:

  • A bug being reported by an end user
  • An issue being identified by some performance monitoring
  • An issue being picked up in some functionality further on from the site. e.g. in an integration

Without build numbers the only way to react to these scenarios is to look at commit dates in source control or manual release notes that may have been created to try and work out where an issue may have been created and what changed at that time. If the issue had subsequently been fixed you also can't really give a version description when it was fixed other than a rough date.

Other advantages of build numbers can include:

  • Being able to reference a specific version that has been pen tested
  • Referencing a version that's been tested with integrations
  • Having approval to release a specific version rather than just the latest on master
  • Anywhere you want to have a conversation referencing releases

Build numbers for deploys

The first step to use build numbers and with the rise in CI, possibly the one thing most people are doing is to start creating build numbers via a build server. By using any type of build server you will end up with build numbers. This instantly gives you a way to know when a build was created and what commits were new within the build.

Start involving an automated deployment setup either using your build server or with other tools like Octopus Deploy and you will now start to get a record of when each build was deployed to each server.

Now you have an easy way to not only reference what build was on each environment and when through the deploy history, but also a way to see what went into a build through the build servers change log.

Tag builds in source control

Being able to see the changes that went into each build on your build server is all very good, but it's still not an ideal situation for finding the exact code version a build relates to.

Thankfully if your using Team City it's really easy to set it up to create a tag in your source control with each build number. Simply go to the build features section of your projects configuration and add a feature called "VCS Labeling". This is a step that happens post build in the background and will create a tag in source control including the build number. It has lots of other configuration options, so if you need different tag formats for different branches its got you covered.

If your using GitHub once this is turned on you will be able to see a list of all the tags in the releases section.

Update Assembly info

Being able to identify a build in source control and view a history of what should have been on a server at a particular time is all very good, but its also a good idea to be able to easily identify a build for a published version of code. That way just by looking at the code on a server you can tell which build version it is, and not rely on your deployment tool to be correct.

If your using Team City this also also made super simple through a build feature called "Assembly info patcher". When using this the build number will automatically get patched in without having to edit AssemblyInfo.cs.

Conclusion

By following these tips you will now be able to identify a version by looking at the published code, see a history of when each version was not only built but also released to each environment and also have an easy way to find the exact source for that build.

The build number can then be used in any conversations around when a bug was introduced and also be referenced in release notes so everyone can keep track of what versions included what fix's in a simple to understand format.

Sitecore Continuous Integration with Team City and TDS

There are a lot of articles around on how to do automated deployments / continuous integration with Sitecore, which if you're new to the tools will likely leave you slightly baffled. This article will hopefully show you exactly what you need to do and explain why.

Solution Overview

  1. TDS is used by developers to serialize their Sitecore item changes and push them into source control
  2. Team City is used to detect the changes and run a build script
  3. Team City uses Web Deploy to push the code changes to the web server
  4. Team City calls MSBuild which will trigger TDS which is installed on the server to deploy Sitecore items to the destination server

Prerequisites

  • You have a build server with Team City installed and know how to set it up to do a web deploy
  • You are already using TDS and have your Sitecore items serialized in source control
  • Essentially you know how to do the first 3 steps and just need help with Step 4

Step by Step

UNC Share

On your web server you need to set up a UNC Share on your website's folder. When TDS does a deploy it will install a web service on your website through this share, do the item deployment and then remove the web service again.

The share needs to give permission to the user that your Team City Build Agent runs as. To find out which user your Build Agent is using:

  1. open the list of services and find TeamCity Build Agent in the list
  2. right click and select "Properties"
  3. in the "Log On" tab you will be able to see which Windows User is being used

Team City Config

In your Team City's build configuration settings for your project, add a new build step with the following config:

Runner Type: MSBuild
Step Name: Publish TDS Items (or some other identifier)
Build file path: Path to your projects .sln file
Command line parameters:

  • SitecoreDeployFolder: TDS will use this file path to install a web-service on your site to publish the items through.
  • SitecoreWebUrl: This is the url of the site you are going to update. TDS will use this when it tries to call the web service it installed.
  • IsDesktopBuild: false
  • GeneratePackage: false
  • RecursiveDeployAction: Delete
1/p:IsDesktopBuild=false;GeneratePackage=false;RecursiveDeployAction=Delete;SitecoreWebUrl=URL OF SITE;SitecoreDeployFolder=&amp;quot;UNC PATH TO YOUR SITECORE SITE&amp;quot;

Setting the command line parameters here will take precedence over any that have been included in your TDS projects solution file (which are liable to be overwritten by a developer).

That's it!

It's that easy. If you run your build script now your items should all be published to Sitecore.

Alternatives

This certainly isn't the only way to setup automated deployments and nor is it without issues. The fact a share needs to be set up between the Web Server and the Build Server, could cause an issue with security and may just not be possible if you're using a cloud server.

Rather than using TDS to deploy the Sitecore items you could use TDS to create a .update package. These would normally be installed through an admin webpage (not great for CI) but there is an open source project called Sitecore Ship that will expose a REST endpoint for the package to be posted to. Brad Curtis has written an excellent guide to this setup here (http://www.bradcurtis.com/sitecore-automated-deployments-with-tds-web-deploy-and-sitecore-ship/), however at the time of writing Sitecore Ship isn't compatible with Sitecore 7.5 or 8.

Another alternative to installing the update package is to use the TDS Package Installer. This is a tool Hedgehog provide alongside TDS for installing the update package. In this scenario you would need the tool installed on your web server and some way to call it. Jason Bert has written a setup guide for this example (http://www.jasonbert.com/2013/11/03/continuous-integration-deployment-with-sitecore/) however as well as Team City, you will also need Octopus Deploy to call the package installer. Octopus Deploy works by having what it calls Tentacles on each server you deploy to, making it easy to set up scripts to call programs on that server.

Sticking with the example using just TDS, you could also use TDS to deploy the solutions files as well as Sitecore items rather than using Web Deploy. However the downside here is that TDS is unable to modify your Web.Config file, which is one reason to stick with Web Deploy.